605+ Cannabis Strains over 20 Breeders worldwide.

Toll Free: +1 (800) 805-7835

How to Make Hash with Stems

Most cannabis growers share the same concern after they give their plants the regular trim and prune: what can you do with your growing pile of stems? Cannabis stems are often discarded right away and just add up to our waste. However, stems can still be put to good use. It’s important how to make hash with stems for pure enjoyment. Though they do not have as much THC and terpenes, you can easily process the stems yourself to maximize the potency that can be harnessed even from a small bundle. 

The easiest product you can craft from stems is making your hash, dark and tacky clay that you can smoke and craft with just a few tools. Using stems to produce hash is an effective and convenient way to get the most out of your cannabis plants and have an emergency supply to smoke when flowers are not in season. This guide provides you with how to prepare your stems and different ways to craft a traditional and healthy hash.

Using Stems as an Alternative to Smoking

Dealers and medical experts advise that smoking stems should be avoided if you have asthma, shortness of breath, or lung disease among other related conditions. If stems are not properly treated, smoking or ingesting them may cause abdominal pain, vomiting, severe migraines, and can damage cognitive functions. 

If you do use stems, always remember to decarboxylate them first if needed and carefully follow procedures to prepare them for use. For your health and safety, it is recommended that you only take small doses at a time. Craft your pot responsibly and always smoke in moderation.

How to Decarboxylate your Weed Stems

Decarboxylation refers to a heating process for cannabis to extract the THC and other valuable elements from it such as terpenes and cannabinoids and separate it from the plant cellulose. Some hash processes require it, and others may not so do check the procedure of each hash method. 

To decarboxylate, take the following steps:

1. Break your stems into small sticks and lay them flat on a tray.

2. For a regular oven, set the temperature to 100 degrees Celsius, and for a fan-assisted oven, adjust to only 100 degrees Celsius. Let the stems bake for one hour.

3. Remove the stems from the heat and let them cool.

How to Make Hash with Stems

Over the years, different methods of making hash have emerged as this craft has been known to root back to our small indigenous communities. Here we have selected the best ways to create a hash that does not require many tools. As a heads up: your hands will be doing most of the work to make it. You will also need a few bowls

and a cheesecloth or silkscreen throughout some of the procedures of these methods.

The Original Charas

Charas is the traditional way Hash is made. It is messy and will need your bare hands to make, but uses the fewest of tools. Charas is made with fresh flowers or stems preferably picked or pruned on the same day. For stems, proceed to do the following:

1. Gather a small bundle of stems between your palms and start rubbing them tightly. After some time you can see a dark green resin build up on your palms. This is the hash packed with trichomes separating from the stems. Keep rubbing until no more resin comes off from your bundle.

2. Discard the first bundle and rub or scrape off the hash into a bowl until your hands are clean. Repeat the first step with another bundle and scrape of the hash. Repeat until you have gathered enough charas in the bowl.

3. Take a small clump of charas in your hand and roll into a log that you can smoke like a blunt. Roll the charas in a blunt wrap or shape them into balls to toss into your pipe. Smoke and enjoy.

Silkscreen Hash

As the name implies, silkscreen hash uses a silkscreen or cheesecloth to collect the hash from the stems. This method will also need a fresh pile of stems to make.

1. Start by preparing the stems. Break them into smaller pieces and pack them in a resealable bag. Put them in a freezer to extract the THC and trichomes. Let them cool for a few hours until they feel cold and moist.

2. Take out the bag from the freezer and grab a small bundle of stems. Put your silkscreen or cheesecloth over a bowl and start rubbing the bundle against the fabric until the stems no longer excrete any juice.

3. Check the bowl and see if any sediments settle at the bottom, separated from the liquid. The sediment is the hash. Repeat the second step with all the other stems until you fill-up the bowl.

4. Remove the silkscreen or cheesecloth and slowly pour out the juice, making sure that the hash stays inside the bowl.

5. Scoop some of the hash in your palm and roll into balls or logs for your pipe or blunt to smoke.  

Blender Hash

Blender hash is easiest to make if you are looking for a method that will keep your hands clean and have any stems that have been piling up in a corner for too long. The blender method requires decarboxylated stems so bake them first before you proceed with the process below.

1. In a blender, combine your decarboxylated stems with one part water and one part ice. Blend for one minute.

2. Pour the mixture into a bowl covered with a silkscreen or cheesecloth. Watch the water separate from the hash. You will see the hash settle at the bottom of the bowl. 

3. Once all the hash settles, pour two-thirds of the water in a separate glass or bowl. Then, fill the remainder of the hash mixture with cold water. Watch for more hash to settle and repeat this step until all the plant slush is separated from the hash

4. Pour out the water and plant sediments slowly, leaving the hash inside. Strain the hash with your cheesecloth or a coffee filter to squeeze out the water. Shape into logs or balls depending on how you prefer to smoke it.

Conclusion

Learning how to make hash with stems is a great way of enjoying your cannabis. Smoking stem hash is similar to flowers except they have lower THC and barely any flavor. The adverse effects of smoking hash can be worse if your stems are not properly prepared. Be sure to decarboxylate the weed stems if needed and use fresh ones as much as possible. Making hash helps maximize how you use your plants and help reduce your waste production. Be guided by the methods provided and have fun crafting hash that you can smoke while waiting for your plants to bloom once again.

Cannabis Leaves Curling Up: Diagnoses and Fixes

Growing your own cannabis is not as easy as most would think, even if there are strains out there recommended for beginners. Cannabis plants need the utmost attention and care for them to thrive, just like us human beings. All strains will share similarities on how you can raise them, but can also have some distinct needs that set them apart from other types of weed. Cannabis may experience cannabis leaves curling up that should be diagnosed and fixed early.

To ensure the overall health of your plant, growers are always advised to keep an eye out on one part that can alert you right away: the leaves. Leaves will often reflect how certain conditions affect it through physical changes. A common problem encountered with cannabis plants is curly leaves. 

While this is not a good look, it is also a sign that there could be one or several factors that may be affecting the plant’s health, thus further hindering it from growing if not treated the right way. But there is still hope! You can still save your plant and get it back on track towards a potent yield by learning about the causes of curled up leaves and how you can fix them.

Reasons for Cannabis Leaves Curling Up

Temperature: Too Hot or Too Cold

Some cannabis plants favor warm climates, while other strains will prefer cooler climates. Though if cannabis is left in extremely warm or cold conditions, they start to darken and curl or claw in from the edges. These extreme temperatures will halt them from photosynthesis; hence it will disrupt their growth. 

Curling from high heat or cool settings are not only experienced outdoors but in indoor gardens as well if you do not set the right temperature. While cooler temperatures are needed to encourage flowering, if you set the temp too low, it can actually kill off the leaves and worse, dull, lifeless buds.

How to Fix it:

To fix cannabis leaves curling up, follow these tips: For plants exposed to warmer temperatures, if kept indoors, check your heater settings and adjust it to about 26 to 28 degrees Celsius (or lower than the previous temperature it was exposed to). You may also set a fan next to it to promote air circulation and help it cool off from the warmth. Plants grown outdoors should be moved to a shaded area or have a screen installed overhead.

If your plant has been growing under cooler temperatures, the best solution is to install lamps. A lamp should give it enough warmth without taking away the amount of light it needs. You may also adjust your heater to the recommended 28 degrees Celsius to warm up your plant again.

Drowning: Over Watering a Cannabis Plant

Cannabis will not be able to call you out when they start feeling thirsty, and signs that it’s time to water them may not be that obvious. We often tend to overwater our plants in fear that they dry up fast and need it almost daily. Too much water will drown the roots and cause them to rot, molds, and mildew will start showing up, and those curled leaves will soon get your attention. This is the common plant killer since we tend to think water sustains them the most, but too much of it is actually unhealthy.

How to Fix it:

Make sure your plant is getting the right amount of light and warmth, which helps it absorb water faster. Let the water dry up completely before watering again, or the pit can make the rotting worse, which is the most difficult to spot. You can know when your plant is dry and ready for another refreshment by lifting the pot: a lightweight pot means it is time to water, and a heavy pot means you should save the water for later. If you grow your cannabis outdoors, feel the soil. Tap the top surface, then poke a finger or a stick into the soil about a few inches deep, then pull it out. If you come out clean, your plant is ready for watering, but if a lot of soil sticks to you, refrain from watering for the meantime until you get a clean poke.

Too Fed Up with Fertilizer

Just like watering, we also tend to use too much fertilizer on our plants with the idea that they will grow faster and appear healthier. Each strain may react to different kinds of fertilizer differently and cause discolored curly leaves. Fertilizers will usually combine nutrients and other chemicals as a supplement. In high doses, this can be harmful to the plant that can prevent it from growing further. 

How to Fix it:

Stop using the current fertilizer you have and check if it has the recommended amount of Nitrogen, Phosphorus, and Potassium – each of these nutrients should go from highest to lowest, respectively (Nitrogen with the most, and Potassium with the least content). Read the label about its pH level, which should be measured at 6.0. If your current fertilizer does not meet these standards, switch it to a different one that contains all the right amounts. Follow the grow chart to be guided by how much fertilizer you should apply, and when is the best time.

Nutrient Deficiencies

The natural soil you plant grows in plus water might not be enough to sustain it. While this should be an organic approach, experts always advise techniques and supplements for your plant to grow with optimum results. Using fertilizers can go a long way with your cannabis for those big potent buds as long as they have the proper application and dose.

How to Fix it:

Choose a fertilizer with the standard amount of Nitrogen, Phosphorus, and Potassium, plus the average pH level for soil fertilizer. Apply this as directed on its grow chart and start with smaller amounts, slowly adding up as your plant adjusts to it and shows results. Stick to the prescribed amount of fertilizer and do not go overboard with it. A little can do so much more and save you from a lot of stress and worry. An overdose of fertilizer is not as easy to fix compared to a plant that lacks enough fertilizer.

Conclusion 

Plant problems like cannabis leave curling up can be hard to avoid, whether you have zero experience or have been raising cannabis long enough. Curled cannabis leaves are a common concern that makes most growers think their plant is a lost cause. Extreme heat or cold temperatures, overwatering, using too much fertilizer, and existing nutrient deficiencies in the plant can be reasons for your cannabis to not be in its best shape. However, this can all be fixed with easy solutions. By being informed about why curling can happen, you can prevent making mistakes and take the right steps for your cannabis to grow back into its happy and healthy self so that you can be a proud plant parent and satisfied user as well.

How Long Does THC Stay in Saliva: Passing a Drug Test

The discovery of THC or Tetrahydrocannabinol originated in the year 1940. THC acts mostly like cannabinoid chemicals. It was in the year 1964, THC was described and isolated for its synthesis and structure. Its compound found in the resin secreted by glands of the cannabis plant. THC is very low water solubility, as with many aromatic terpenoids, but good organic solvent solubility, particularly alcohols and lipids. But, how long does THC stay in saliva?

How Is THC Detected

THC is usually detected and quantified in blood since it metabolites for its 11-OH-THC and THC-COOH. Its Pharmacokinetic data shows its bioavailability through inhalation has a range between 10-35%, and oral is 6-20%. 

Its elimination half-life, orally administered dronabinol is 25-36 h. Study shows that it could be present in your feces 65-80% and urine 20-35% as acid metabolites. THC route of administration can be through oral, local/topical, transdermal, sublingual, or inhaled. 

Effects of THC

THC can cause phantasm and cause illusions that make you high. It was studied that THC helps those people with anxiety, glaucoma, insomnia, muscle spasticity, pain, and low appetite. People experienced the effects of THC lasted two hours, and they will feel the kick in 10 to 30 minutes even though the perceived high stopped. Still, your body will feel slowing down on thought and physical movements (Psychomotor impairment).

Risk Factors When Taking Cannabis

There are risk factors that should also be considered when taking cannabis with high THC. It even makes cannabis a popular drug and considered as a commonly used illicit drug in the world. The side effects of your body system are impaired motor skills and decreased IQ, memory, and cognition. Especially in younger people, THC may give them a long term problem with regards to health issues. 

How Long Does THC Stay in Saliva?

As per studies shown, people using cannabis has its limited high and effects in the body. The THC doesn’t last too long in the saliva of the person smoking, and it still depends on your smoking habits. If you are a persistent smoker, it can be stretch up to 1 month for the THC to fade away. For an irregular smoker, it only takes 3 to 5 days to fade away. 

THC, compared in urine and saliva tests, studies show that the period in the saliva is quite shorter. But we need to consider the body type, and how often he smokes cannabis, the component of THC-COOH can be found in urine samples over 30 days after consumption.

In passing a drug test, you also need to consider your oral hygiene. If the tests will be on swabbing tests, rinsing and brushing your teeth three times a day will reduce or remove the THC on your saliva within a couple of weeks. You can also avoid high-fat foods, fat cells store, and absorb THC. You could also use lemon extracts or vinegar in rinsing your mouth, to dilute saliva and reduce THC levels. The strength of THC depends on what variety of cannabis you are smoking. High potency strain means the more THC will stay in your saliva. 

How Is THC Tested In the Saliva?

You need only to smoke a mid-potency strain, which results in a low THC level if you’re planning to apply for a job in the upcoming weeks. A random test might immediately require you that you need to take preparation. 

Other applicants already past the edge of tests, even the supporters of the testing believe in its accuracy. There are several employers requiring drug tests despite that weed or cannabis are known to its medicinal effects. There have new methods in terms of testing, specifically saliva testing, which has been introduced to masses and is more become acceptable. 

These tests are somehow new and different from the typical standard of urine drug tests. Many people believe that saliva tests are more accurate, and some find it a lot easier to pass. Many companies started this procedure since swab tests are cheaper, quick, and easy testing method. To minimize the chances of failing, you should know the process and how saliva tests work. 

Differences between Urine Test and Saliva Drug Test

There are some remarkable differences between saliva drug tests and standard urine tests since both have different compounds. A saliva test screens for THC itself or tetrahydrocannabinol while urine test the main metabolite is an ester of glucuronic acid and THC-COOH.

Cannabis Strains That Are High in THC

THC in cannabis strain differs from its variety and quality of genetics. Since it is the main source of potency in cannabis, we still need to understand the part of terpenes may play a big role in increasing and make the strain’s high. A cannabis strain that is abundant in both THC and terpenes most likely delivers a remarkable experience to smokers. 

The list of cannabis strains below is a selection from different powerhouses.

  1. GSC – average THC is 19%, expect a feeling of intense excitement that covers both body and mind with relaxation for hours.
  2. Kosher Kush – average THC, is 20%, expect the feeling of numbness and weightless entity with somehow foggy consciousness.
  3. Ghost OG – average THC is 20%, expect the feeling of powerful, euphoric, and perfect relaxing effect.
  4. Bruce Banner – average THC is 23%, expect the feeling of the dizzying punch of euphoria that locks your body in great relaxation.
  5. Ghost Train Haze – average THC is 18 %, expect the feeling of intense energy that goes through the head, provides focus and creativity.
  6. Chemdog – average THC is 19%, expect the feeling of the intense flavor of acrid fuel, but provides vigorous stress relief.

Final Thoughts

So, how long does THC stay in saliva? It can stay in the saliva for up to 30 days if you’re a regular smoker. Saliva tests are now one of the new generations of drug tests, and you should consider that they are easier to pass rather than taking a urine drug test. Some drug tests are not reliable and possible to pass through saliva screening just a few hours after you smoke. If it happens that you failed on the tests, you can demand another test since this procedure not strictly regulated.

How to Grind Weed Even Without a Grinder

Have you ever caught up in a weed party without a grinder to grind your stash? Surely, it’s quite a frustrating situation, most especially if you want to unwind because of a stressful day. So it’s crucial to learn how to grind weed without a grinder. In this post, you’ll learn about alternative ways to grind stash using other tools. 

Ways on How to Grind Weed Without a Grinder 

Use a Coffee Grinder 

Like what you do with coffee beans, you can also use a coffee grinder for your buds. Of course, you have to make sure that your buds won’t smell like coffee, so you have to clean the coffee grinder first. Also, you have to clean it after using so you’ll have fresh coffee the following day. 

Here are some important things to remember when using a coffee grinder as a weed grinder:

  • Pack the buds loosely for proper grinding. Don’t overwhelm the grinder.
  • Never use too small or too big buds.
  • Adjust the time and settings of the grinder to make sure that your stash doesn’t end up fine powder.

Use a Pestle and Mortar 

Without a coffee grinder, using a pestle and mortar is another alternative to grind your weed down. Make sure to clean the pestle and mortar before and after use.

Here are some important things to remember when using a pestle and mortar to grind weed:

  • Allow your buds to dry out for an hour or two outside the container, so it’s easier for them to break down.
  • Clean the pestle and mortar to avoid the scent of regular herbs in your next meal.
  • Using a smooth and rounded mortar and pestle may take some time for your weed to get ground.
  • Never grind the nugs down too hard.

Use Knife and Chopping Board

Using a knife and chopping board is an equally effective option to grind your favorite cannabis buds like the veggies that you eat. Throw the stash on the cutting board, dicing it until it’s grounded, but not powdery. You can use any knife, preferably one with a non-serrated blade or a chef’s knife. 

Here are some important things to remember when using a knife and chopping board to grind your weed:

  • Let the buds dry out first for an easier chopping task later on.
  • Watch your fingers because the nugs are quite small. Consider how light and uncompressed buds can be because they’ll pass through the knife easily.
  • Chop the nugs in moderation.
  • Clean your board and knife after using it.

Use a Cheese Grater 

A cheese grater is a cool way to grind your nugs. While it may take some time to grind everything, it’s a convenient way to use it. 

Here are some important things to remember when using a cheese grater to grind your weed:

  • Watch your fingers because you might end up grating your skin because of the sharp points.
  • Use a cheese grater with smaller openings for ideal consistency.
  • Get buds out of the crevices by poking around, digging through them, and getting all of the buds.
  • Wash the cheese grater thoroughly to get rid of the skunk scent and residue.

Use a DIY Shaker

If you’re on the go, use a small, rigid plastic container such as a pill bottle or a dispensary container. Throw several coins into the bottle or container with the buds. The amount should just be right without too many buds inside. Close the container and shake away, checking the progress every 20 to 30 seconds to ensure you get the right consistency.

Here are some important things to remember when using a DIY shaker:

  • The best coins you can use if you’re in the United States are nickels and quarters. If you’re in Europe, one or two Euro coins are recommended. One of the two-pound coins can be used by people residing in the United Kingdom. 
  • Avoid over-shaking because it will leave your cannabis buds unsmokable. 
  • Make sure to clean the bottle or container afterward if you’re using a container or pill. 

Use Your Hands 

You can use your hands to grind your nugs using your fingernails and fingers. 

Here are some important things to remember when using your hands:

  • Wash your hands before doing this procedure. 
  • Weed can be sticky, so take it slow and steady. A heavy-handed maneuver could compress the nugs, which makes smoking more difficult.
  • Be careful with dry weed. Use a flat, crevice-free, and even surface to pick the weed a lot easier.

Use Shot Glass and Scissors

You can use a pair of scissors that lie around and a shot glass to grind buds. You can throw the buds in the shot glass and cut them together using scissors. Cut them in half and use the scissors’ tips to make them smaller.

Here are some important things to remember when using shot glass and scissors:

  • Wash the shot glass and scissors before using them. 
  • Avoid spilling the glass. Use a clean, flat, and smooth surface to avoid spills.
  • Keep the leftover ground stash using the same shot glass. 

Use a Blender

You can grind buds with a blender. Clean the blender first and throw the buds inside. Close the lid then hit the blender button (pulse settings). Be careful and make sure to use the appropriate pulse setting for full control.

Here are some important things to remember when using a blender:

  • Clean the seeds and stems before you blend to avoid blender’s blade issues.
  • Because the blender is a bit powerful, limit blending up to 10 seconds.

Conclusion 

Whether you’re on the go, at home, or in a party, there’s always an alternative to weed grinder. Learning how to grind weed without a grinder will make your cannabis experience more flexible and exciting. You can try the different tips shared above, like using scissors, pestle and mortar, coffee grinder, and a cheese grater, knife and chopping board, and make your life a lot easier even without a grinder available.

How to Dry Weed the Right Way

Your weed is ready for harvesting, and so you also need to prepare for drying and curing. In this post, you’ll learn how to dry weed the right way. Get the most out of your crops by drying your cannabis buds the best way possible.

How to Dry Weed

1. Harvesting and Trimming

Once your marijuana plants are ready to harvest, drying and curing would start. A lot of people prefer cutting off a branch, trimming of chunks of flowers, and trimming the leaves from the marijuana buds. This procedure hastens the drying time. 

A drying rack can be used to directly trim the buds, neatly trimming off the bud leaves after drying. Save time trimming the leaves by investing in a trimming machine.

Check out these tips when harvesting and trimming buds:

  • Once the buds are trimmed, the next step is transferring them to a dark room. 
  • Make sure that there’s no sunlight coming in. 
  • The temperature of the darkroom should range from 60°F to 70°F and 45 to 55 percent humidity levels.
  • You can use a dehumidifier to maintain the humidity levels. Using an air conditioner is important to maintain the temperature.
  • Improve ventilation using a small fan.

2. Dry Your Weed in the Sun

It is called the Sun Dry Method, which is one of the best ways to dry weed the right way. While this method is not the fastest, it is used for quick drying cannabis. Place the cannabis buds inside a brown paper bag before placing them under the sun to remove humidity. It will help dry your weed completely.

When it’s hot outdoors, drying your cannabis under the sun is highly recommended. It provides a quick fix wherein the weed is ready and dry after two days when the air isn’t humid. The drawback of this method includes the destruction of the terpenes by the sun, giving your weed its unique scent, dissolving the cannabinoids when a user gets high. 

3. Hanging Your Cannabis to Dry

You can hang your cannabis upside down to dry them quickly. Hang them in a dark heated room, setting the temperature to about 92°F. Check on your weed regularly, making the necessary adjustments as needed. You can increase the airflow of the room if it is too humid by setting a constant temperature. Also, make sure that all parts of your cannabis are heated evenly.

4. Dry Your Weed Using Gas-Powered or Electric Heater

It’s suitable for drying cannabis in large amounts using either a gas-powered or electric heater. Make sure that you’ll use a well ventilated and dry room. Inspect the buds and make sure that they’re not too close together because it may cause mold growth. 

When they’re too close together, the mold will spread very fast. It will spoil the weed, which makes your buds almost unmarketable. Using a heater is a great way to dry cannabis fast. But make sure that your buds won’t dry too fast because you could end up having a harsh tasting weed. 

5. Using Brown Bags

For those who are running low on cannabis and are not patient enough to slowly dry their weed, using brown bags helps shorten the drying process. By using this drying method, drying weed would only take a few days rather than weeks. For small or popcorn-sized buds, using brown paper bags can be effective in drying your cannabis. 

Put two to three newly harvested buds inside the bag, leaving it in a cool place for about three to six days. Remove the weed from the bag after the 6th day, and your weed is ready for consumption. Also, your laptop emits heat and can be used to dry weed. Place your cannabis-filled brown bag on top of your laptop vent wherein the heat is dispensed. Turn your bag after 10 minutes and repeat the steps several times. 

When your weed is almost ready, you’ll feel the dryness upon touching. Dry your weed using this method close to an hour. Remember that this method may cause cannabis to taste slightly harsh. Also, it’s a quick and easy way to dry your weed.

6. Dry Your Weed by Baking the Buds

Decarboxylation or baking your buds is one of the quickest ways to dry cannabis. You need an oven tray or a cookie sheet works and your desired buds. Place the cannabis on the tray and place them in the oven for about 10 minutes. The temperature should be set at a range of 125° to 140°F. After five minutes, flip the buds, place them again to the oven, and then repeat this procedure once. 

Drying your weed using this method is a good idea, which won’t impact the potency of cannabis. Also, it helps remove the water in your cannabis. However, you should not compare the taste of the weed dried using this method to slowly dried buds. Also, be careful as you might burn the buds instead of drying them, so never set the oven temperature more than 150°F. 

How to Check If Your Weed is Dry

To make sure that your cannabis is dry, leave them for about 5 to 15 days. It’s important to check signs of mold every day. Also, avoid over-drying your buds. Rotate the nugs every day to ensure they’re surely drying evenly and hold them in the stem to prevent breakage.

For seasoned growers, one can tell that the buds are dry by looking at it. Also, you can touch them too and tell them if they are dry. If the branches snap and the flowers are crisp, you have dried buds and are ready for curing.

Conclusion 

There are other ways to dry weed the right way. The method you use will depend on your needs, such as how soon you need a dry bud and the desired scent, dryness, and effects. You can dry weed under the sun or the sundry method, using a brown paper bag, a heater, hanging them, trimming them, and other means discussed above.

How to Roll a Blunt Perfectly

There are several popular methods today on how you can enjoy your cannabis for the best smoke. Stores and sites now sell different instruments. You can try for a unique smoking experience. This would cost you a bit more, but these methods all have something to offer. Yet the classic way to enjoy your weed remains superior, by smoking it from a blunt. That’s why it’s important to know how to roll a blunt perfectly. 

Blunts are an affordable way to smoke some Mary Jane without compromising the potency and quality of your buds. They are similar to cigars, but with a surprise inside, containing fresh and flavorful buds to replace tobacco. Plus, smoking blunts can be customized by making them yourself. Rolling up a blunt is even easier than it seems, and all you will need are your hands, your supply of weed, and a few tools that you already have in the comfort of your home. In this guide, you can learn how to roll a perfect blunt in a few quick and easy steps.

Gathering Your Materials for a DIY Blunt

Making your blunt is an easy and affordable mini crafting project. You should be able to have these supplies around the house, but you can also check out most stores around you that carry them.

  • Fresh cannabis flowers. One to two grams should be enough for one roll, depending on its size. At most, you can use up to 3 grams of weed in your blunt if you would rather have a plump cigar. The more fresh your cannabis is, you will get a richer aroma and flavor from your blunt.
  • Blunt wraps. This can be rolling tobacco papers, or you can repurpose a new tobacco cigar by removing its contents. You can also add more flavor to your smoke by using flavored blunt wraps.
  • A Blade. This may be optional, depending on if you will be using a rolling paper or a ready-made cigar to cut open.
  • Grinder. Using this will help finely grind your weed for it to burn evenly as you smoke. If you prefer your blunt to last longer, you can break the buds into small pieces with your own hands.
  • Water. Set aside a small amount of water in a cup or bowl. This will give a blunt that perfectly shaped role.
  • Lighter. You will need this, in the end, to seal the deal for and is the key to cooking up the perfect blunt.

Steps on How to Roll a Blunt Perfectly

It’s crucial to follow the right steps on how to roll a blunt properly. Check out these steps:

Grind and Break Your Weed

Using a Grinder:

Fill up your grinder with the buds and cap it off. Twist your grinder until you get nice crushed bits. Do not grind your buds into a fine powder. It would help if you still have some tiny chunks to avoid killing off the trichomes and cannabinoids.

The Traditional Method:

To crush your cannabis by hand, break it into small chunks. They should be small enough to roll up easily but not fine in texture. Break the flower gently so that you can still retain some of the trichomes and cannabinoids.

Set aside the grounds and proceed to prepare the blunt wrap or rolling paper.

Prepare Your Wrap

If you are using packed cigars, cut your blade along the cigar wrap lengthwise to split it open and remove all contents until clean. You can set aside the tobacco and roll up again to smoke or combine it with weed to create a spliff. Lay the cigar wrap flat in preparation to roll your blunt. If you have rolling papers, you can skip this and proceed to the third step.

Dampen the Wrap

Dip your fingertips onto the water and lightly rub them on the rolling paper. Avoid making the wrap soaking wet, or it cannot be rolled. You may also use a brush if you want to keep your setup neat. A bit of moisture makes rolling and shaping the blunt easier.

Fill Up the Wrap

Scoop or take a pinch of weed and fill the wrapper. Add as much as you want, but make sure it is enough to fit once you roll it. Your wrap should still have enough space to keep it sealed.

Roll and Seal Your Blunt

Carefully take the open blunt in your hands and roll it. You should have one end of the wrap tucked inside and the other end exposed. Lightly dampen the exposed edge and press it gently onto the tucked end to seal. Smooth out any creases or wrinkles with your fingers.

Bake The Blunt

Using the lighter, drag it along the seal to glue it shut. Turn your blunt around to give it a full and even bake to give it extra flavor and prepare the cannabis for smoking. Make sure to keep a fair distance from the flame to avoid burning the blunt. 

Though you might be tempted to try popular smoking methods, the price and ensuring you get a quality smoke often poses a problem. By preparing your blunts, you can customize them to your liking without compromising the quality of its flavor and the smoking experience. Once you have everything you need, you can start by grinding or breaking up your buds, making sure that they are still coarse and small enough for a smooth roll later on. 

Next, lightly dampen your choice of rolling paper then fill it with the crushed flower. Add as much as you like but leave some space so that you can roll in the blunt. Once your blunt is rolled up, seal the exposed end of the wrap by moistening it with water, then press it against the tucked side. 

Finish off the lighter by baking it all around with a lighter. You can also add a twist to your blunt by mixing cannabis and tobacco or using flavored rolling paper to compliment your every puff. By rolling blunts yourself or crafting them with your friends, the possibilities are endless for a delightful and cheap fun smoke.

Conclusion

Now you’re more knowledgeable on how to roll a blunt perfectly. Make sure to gather the right tools and supplies and follow the steps shared mentioned above.

Best Indoor Strain for Yield and Potency

If you are an aspiring Marijuana grower, chances are that you would want your very first marijuana strains to have qualities such as, easy to grow, massive yields, high-level potency, and can be grown indoors. Lucky for you, we’ve listed down some of the best Indoor strain for yield and potency.

Many aspiring growers choose to cultivate in an indoor growing set up to reach their full potential. Some of the best indoor strain for yield and potency is very forgiving to growers and doesn’t require much knowledge when growing. Also, growing indoors can reduce the flowering time needed for them to be harvested.

Before we start listing down some of the best Indoor strain for yield and potency, here are some of the things to look out for when trying to find the best strain to grow indoors.

Why Should We Grow Marijuana Indoors?

There are many advantages when growing marijuana indoors, these are especially good when you’ve chosen your Indoor marijuana strain.

For beginners, growing marijuana indoors will give you more control over how you cultivate these plants. You can easily monitor them in your grow room, from temperature, light conditions, ventilation, humidity. Other factors such as time of the year or seasons like very cold or hot won’t affect your entire crops.

Another good thing about cultivating indoors is you can supervise the entirety of your grow room too, from its cleanliness, and the discretion they need when other people are around. Also, you can provide an air purification system that will make your grow room free of pathogens and other germs that may cause diseases such as mildews, and molds.

Growing Indoors will also help you in keeping your growth as private as possible. You don’t want your neighbors lunging in your plants and destroy them entirely, right?

What to Keep In Mind When Choosing the Best Marijuana for Indoor Cultivation

There are a few factors to keep in mind when choosing the best strain for you. Remember that some of the best strains that can be grown indoors may not be the ideal choice for you.

For beginners, you will want to start with your budget. Remember that popular strains are quite expensive, but if you have the money then go for it. however, for people who are tight on budget, you should consider strains that are cheap and can be grown indoors.

Also, you may want to consider what type of strain you want to grow, either Indica, Sativa, Hybrid, or an Autoflowering one. Also remember that varying effects that the two have, and prioritize which factors are important to you.

You may also want to consider the grow room you have. From how much space do you have, or have can you provide proper airflow and ventilation when growing indoors. It is important to note that proper ventilation and airflow is essential to avoid mildew infestation and other diseases. These diseases are airborne, so, basically, proper ventilation and airflow should not be taken lightly.

When growing indoors, you should also consider lighting, and watering types do you have, or can you even set it up? All these things should be considered to achieve a favorable outcome. Remember that when you consider all these things, the success you will have in your Marijuana journey is inevitable.

Can all Cannabis strains be grown Indoors?

Almost all types of Marijuana can be grown indoors. However, this doesn’t mean that all indoor strains out there are the best strain for you. Remember that you have your unique traits to find when trying to pick a strain.

Not all high-yielding outdoor strains can yield the same amount when grown indoors. Technically, almost all cannabis strains can be grown indoors, but this comes with a cost. Other strains require so much attention that you might have a harder time cultivating them. As long as you have a controlled environment in your grow groom such as 12/12 lighting cycle, air purifying system, and regulating humidity levels, you can cultivate strains indoors.

However, not all Marijuana plants and strains are similarly practical for indoor cultivation, and vice-versa. Some Marijuana plants are more sensitive than others. This particularly true when you live in a cold climate, you might have a harder time cultivating the same marijuana plants outdoors as you did indoors.

Best Indoor Strain for Yield and Potency

Now, we can go to the most important part. Here’s the list of the Best Indoor strain for Yield and Potency. The list includes:

Northern Lights Cannabis Strain

A legendary strain that caters the expertise of all growers, the Northern Lights strain is an Indica dominant strain that is pretty easy to grow and can be recommended for beginners as well. The Northern Lights strain has a very short flowering period not exceeding 50 days, the strain grows very short and is an ideal choice for indoor growing.

Also, the northern lights aren’t quite as aromatic as other plants, so you will have nothing to worry about. Overall, a great plant for beginners with legendary traits.

Chocolope Cannabis Strain

The Chocolope strain is a very popular strain due to its overwhelming potency and out of this world effects. However, its growth profile stands out the most. Chocolope strain is Sativa dominant strain the yields around 600g per square meter. When grown indoors, the plant should be well-ventilated and with proper airflow. Its meticulousness to grow will reward you with massive yields in the process.

Critical Mass Cannabis Strain

True to its name, the Critical Mass strain can yield massively without getting much attention. It can be forgiving to beginners and has a short flowering period. They are especially good for people who don’t have the patience in waiting for plants to bloom. The plant has a very nice structure to it which makes it an ideal choice for indoor growing. With 6 to 8 weeks flowering time, you will be delighted when harvest season nears,

Amnesia Haze Cannabis Strain

Amnesia Haze remains to be popular up to this day. The strain is popular due to its potency and effects. What makes amnesia the best indoor strain for yield and potency is it will deliver you with a whopping 22% of THC content, this is combined with massive yields that will keep coming for days. Growing this strain will exude strong flavors of lemon and fruits that will fill the room.

Power Plant Cannabis Strain

A classic marijuana strain that can still bring you the Yields and potency you are looking for. When grown indoors, the plant has great resistance to most common diseases such as mildews, and molds. It can yield up to 600 grams/m2 without taking a very long time to bloom. The Power plant strain is very stable and you won’t have a hard time cultivating.

Conclusion

Starting your very own Marijuana growing journey is quite easy and simple, as long as you follow the directions and guidelines. Choosing the best indoor strain for yield and potency shouldn’t be hard for you as we’ve listed down some of the best! Remember that choosing the right works wonders than choosing the best one! Good luck with your Marijuana growing journey!

How to Get Rid of Powdery Mildew During Flowering of Your Weed Plants

During weed cultivation, the view of powdery mildew in Marijuana plants is a terrible sight to see especially for growers. Powdery mildews are a serious concern for growers especially when harvest time nears. How to get rid of powdery mildew during the flowering of your weed plants should be the key to having a favorable outcome.

As a marijuana grower, it is important to deal with these kinds of issues. It is also essential for growers to know how to deal with these types of diseases as they come along in your Marijuana in the journey.

For this article, we’ll discuss different ways on how to get rid of powdery mildew during the flowering of your weed plants. But first, we’ll discuss what is Powdery Mildew.

What is Powdery Mildew?

Powdery Mildew is the worst thing that could happen to your cannabis plants, they are the nastiest fungal disease a marijuana plant could get. On most occasions, Powdery Mildew is white or grayish, they tend to destroy the entire crop completely. That’s why it is essential to avoid or prevent this type of fungal disease from affecting your plants.

Powdery first manifests in the leaves of Marijuana like baby powders, the powder-like structure is the by-product of fungal spores. They can also appear in any parts of the plants, from leaves, buds, nugs, and colas.

Also, Powdery Mildews spread through the air. It is the reason why they are hard to deal with. Airborne diseases are pretty difficult to address, however – there are some little transmissions through animals, humans, and the tools used for cultivating marijuana plants. It is the reason why 

Air purification equipment is essential for growing marijuana, especially for indoor cultivation.

Powdery Mildew loves crowded environments because they spread easily. There are also factors wherein they can form easily, through high humidity grow rooms, and from moderate to cool temperature. They usually form on newer leaves of a mature cannabis plant or when they are still young.

In other manifestations, they produce foul-smelling odor like rotten vegetation, this is most likely that this the final stage of the disease. It destroys the plant entirely. If your grow room is exhibiting unusual odor, try investigating within your plants, it is more likely caused by the Powdery Mildew.

How to Get Rid of Powdery Mildew During Flowering of your Weed Plants?

Owners must fight pathogens before they even form, because once they form, it may be hard to fight them all alone. As you may already know, Powdery mildew is an airborne disease, having a grow well-ventilated room and with proper airflow is the key to battling the disease. Not only do you need to provide a well-ventilated and proper airflow area, but one key component is having an air-purifying system.

It is also important to have a proper air purifying system is because once your crops are infested, it can destroy all your crops in a few days. This is especially bad when your harvest time nears.

Setting Up an Air Purifying System

Setting up an air-purifying system minimizes the possibility of infecting your crops with Powdery mildew. As the name suggests, it purifies the air with all the impurities accompanied by it. It keeps pathogens away and maintains the purity of the air around your grow room.

Keeping the entire grow room spore-free and other blights will solve your problems regarding powdery mildews and other pathogens. This is by far, the best method on how to get rid of powdery mildew during the flowering of your weed plants

Treating Infected Plants

If worst comes to worst and your plants are infected, there are possible treatments on how to deal with powdery mildews.

Transplanting your Plants

By transplanting, we mean by transferring them to a secure location to avoid massive infestation. These are essentially great if only a few plants were infested, some of the plants can still be harvested and transferred to a secure location. Airborne diseases are hard to address, but if you can transfer them to a location wherein the air is good and has plenty of ventilation, it may be a good start.

Keep them Separately

This may fall on the preventive measure or it can work as a treatment too, when plants are far apart, the chances of these airborne diseases flying to other plants are minimal. If they are planted together an in bunches, chances are the diseases quickly spread throughout destroying your crops entirely.

Alternatives

There are other alternatives when trying to get rid of Powdery mildews, this often includes spraying neem oil, sesame oil, or fish oil. These types of spray works wonder when treating fungal diseases. Also, a milk spray can be an ideal option too. By mixing 40% milk and 60% water.

Milk spray works by spraying the entire infected area with milk spray. The combination of the two forms as an antiseptic when the protein in the milk reacts with the sun. when that antiseptic is formed, this is the killer of mildews. This is a cheap and easy method to treat or prevent your plants from getting infected. Spray your plants if they are to expect a heavy dose of light for 10 days.

Plastics Bags

When a plant is entirely infested, it is the best option to just simply cut them off of your grow room. In doing so, carefully enclose the infested plant onto a plastic bag. In this way, you prevent the spores from spreading through the air. A cost-effective way to get rid of the infested plant.

Conclusion

Airborne diseases are in your cannabis plants is a tough fight to win. But with our preventive guide, you are sure to have a smoother growing journey. The best way on how to get rid of powdery mildew during the flowering of your weed plants is through prevention. As the saying goes, prevention is better than cure.

In case your plants are infested, we’ve listed some tips that might help you win the battle. Growing cannabis strain isn’t as simple as you may think, but with proper knowledge and preparation, the journey will be a smooth ride after all. Happy growing!

Growing Weed with LED Lights

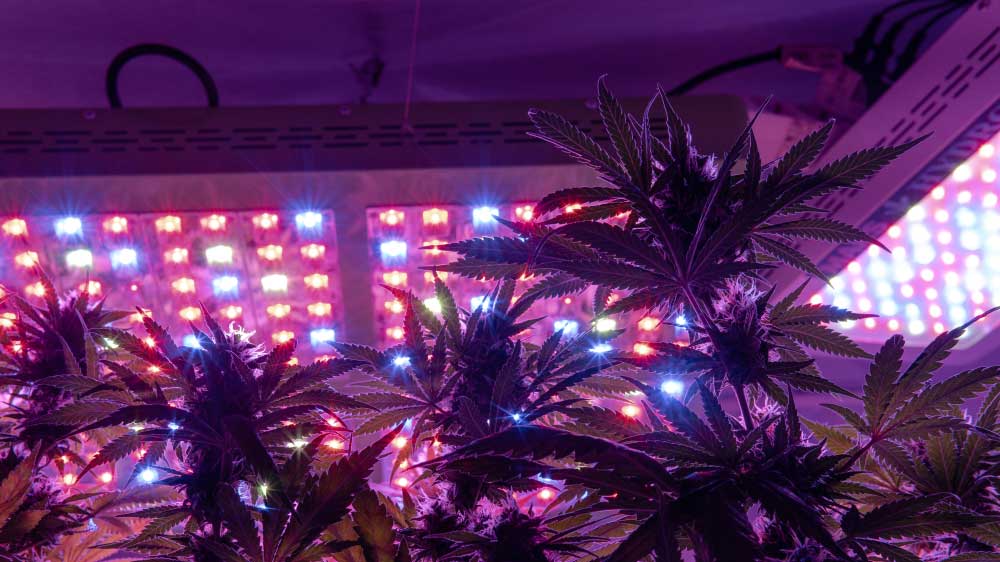
One of the main components of growing cannabis is light. You must give your cannabis plants as much light as you can so these can grow healthier and become more productive. We will focus on indoor growing lights, specifically growing weed with LED. This type of lighting is one of the best choices for cultivating cannabis. 

Many growers swear that they were able to produce higher yields without sacrificing the temperature of their growing area. By using high quality LED lighting on cannabis plants with good growing qualities, you can get as much as 0.5 to 1 gram per watt of power.

Take note that we considered the type of strain or cannabis in the equation. There are more factors to consider like the growing skill of the grower and the light quality of the LED lamp. For instance, 200 watts of LED would give you around 100 to 200 grams or about 3.5 to 7 ounces of yield. 

More Reasons to Use LED Lamps

Aside from shining brightly, LED growing lamps to have a lot of impressive qualities you may not be aware of. Here are some of the following:

  • LEDs last longer
  • LEDs shine the brightest but won’t make your room too hot
  • LEDs won’t cost too much energy to use
  • LEDs are perfect for growing all kinds of plants
  • LEDs are available in different colors

LED Growing Lamp Models Nowadays

The grow lamps you’ll find in online stores and growing stores have better performance compared to those that are available in the past. Modern LED growing lamps are now available in full-spectrum models or wideband spectrum models. These LED lamps come with more colors and not just blue and red diodes. Growers say that these colors result in healthier plants with better growth. Red color, infra-red, and far-red is needed for the flowering stage.

There are also lamps with improved lenses that can focus directly on plants and enhance light penetration. This type of lamp can improve yields while using the same light as other LED lamp models. 

Three Kinds of LED lamps

Although there are many styles and forms of LED growing lamps, there are three main types used in cannabis growing. Take note that each has its pros and cons therefore, there is no such thing as the best one. 

Spread Style LED Lamps

In a spread-style LED lamp, small LED bulbs are spread across a wide area. This design allows brighter and maximum coverage for a larger growing area or for growing more plants. Some perfect examples of spread-style LED lamps are Rack, Quantum Boards and those spider-type LED growing lights. 

  • Quantum board – this type of grow light was created by the Horticulture Lighting Group. The term is now openly used to refer to LED lamps with the same style. Quantum boards are available in low wattages with bulbs spread on a large board. The popularity of this type of board has dramatically increased because of the best growing results of this lamp.  
  • Spider LED lamps – this type of spread-type LED looks and works like Quantum boards. The diodes are spread in different directions but are set on small panels or arms like a spider instead of just being set on aboard. 

An example of Spider LED lamps is the SPYDRx LED lights. These may be more expensive but are known to produce the best results. 

Traditional LED Lighting 

Standard LEDs are available in different wattages and are very compact. Modern LED lamps are available in panel style. Think of Panel LEDs as a hybrid of a Quantum board lamp and COB style lighting. Panel LEDs come with a mixture of the qualities and characteristics of the two lamps. 

There are also updated hybrid LED growing lamps that come with a combination of big and small bulbs. These have unique form factors that combine the good qualities of the different lamp styles. 

Chip On Board LED Lighting 

A type of LED lamp is the COD or Chip On Board LED. This type of lamp is very bright and very intense since these come with numerous LED chips installed in a small area. This type of lamp can produce very intense light compared to other LEDs. Each of the COB section uses a particular amount of power. And when it comes to the COB, Cree is the best brand. 

Rather than using a dozen of very small diodes, COB lamps with LEDs will only have a small number but large COBs. Every COB has strong lenses that focus very intense light to each plant. This type of COB is very popular because this helps light penetrate better.

Variations of the COB Lamp

An AutoCOB is a type of COB with only a single COB for every lamp. With this design, it’s easy to spread the light over your growing area a single lamp at a time.  You will also find LED grow lights with a single LED COB while multiple units may be spread if you need to light up a larger area or several plants. 

 Every COB has a spectrum therefore you can make your color spectrum that will help your plants bloom by simply combining different AutoCOBs. This is easy to configure especially if you have an irregularly-shaped grow space. You can also use COB LED lights into regular light bulb receptacles. 

Consider LED Growing Lights for the Following:

  • If you want to use the best cannabis grow lights with a customizable light spectrum then an LED lamp is for you.
  • If you want to find out if LED grows lights are ideal for your growing area.
  • If you don’t have a tight budget to spend on your cannabis growing setup. LEDs are known to be the most expensive type of grow lights.
  • If you don’t want to install additional exhaust systems or air ducts then LEDs are for you. With LED lamps, simply hang the LED lamps on top of your plants and let these cool on their own.
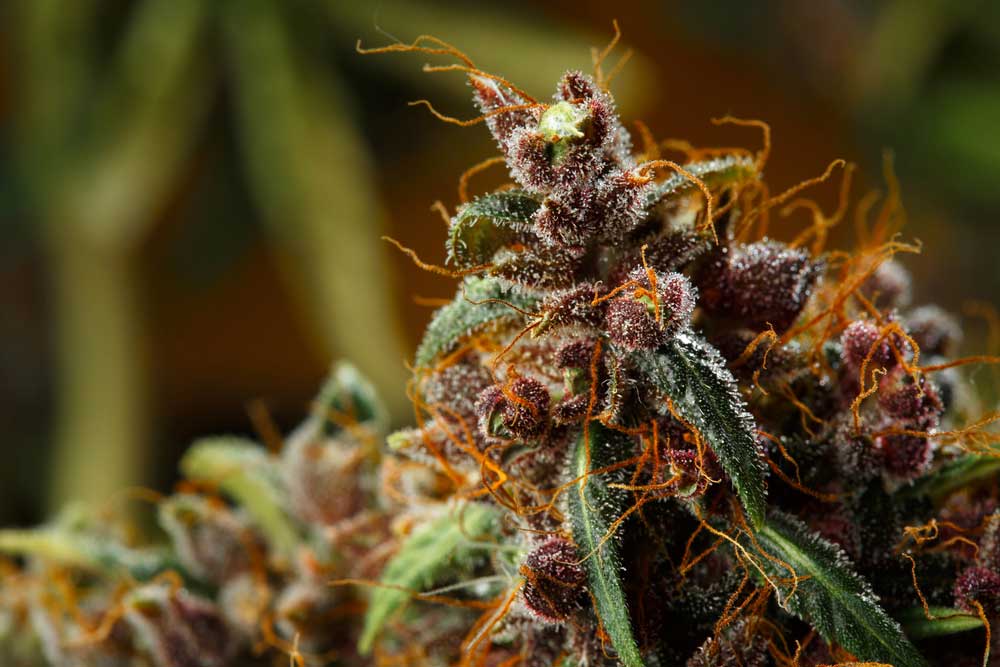
  • If growing quality (bud size, trichome development, smell/aroma, and potency are very important to you as a grower.

Five Top LED Grow Lights to Check Out

If you’re growing weed with LED lights and you’re looking for the ideal LED lamp for your setup, consider these five top models. 

ViparSpectra

ViparSpectra is a popular LED lamp brand with different models. Many growers swear that ViparSpectra lamps can enhance the quality and number of yields. There are different models and the most commendable is the ViparSpectra 450W, the 450W Pro Series, 600W, 700W Pro Series, and the 1200W ideal for advanced growers. 

All ViparSpectra lamps come with heat management parts like a heat sink and a built-in fan. You don’t need to install additional fans and cooling equipment to deal with rising temperatures brought about by your grow lights. 

Electric Sky from The Green Sunshine Company

The Green Sunshine Company makes Quantum Boards or the popular Spread Style LED lighting. With their Electric Sky LED grow lights you can get higher yields at very low power consumption. The lamps come in a solid panel but when you check it out, the very bright LEDs are spread to cover more plants and for a larger growing area. All models also come with fans to reduce the temperature caused by the intense LEDs. 

Kind LED Grow Lights

Another type of LED light that is starting to become more popular is the Kind LED. Those who have used Kind in growing cannabis were able to produce massive yields but take note, these LEDs are among the priciest. The price ranges from $500 to $750 but many say that it’s worth every penny.

Just like ViparSpectra, there are different models of Kind LED lights. These vary from the recommended grow space size, power consumption, the average yields you can get, and other factors. But you can be sure that all Kind LED systems are equipped with a fan and heat sinks to reduce heat from its colorful LED bulbs. 

HLG (Horticulture Lighting Group)

HLG was the first company to coin the “Quantum Board’ on LED lamps which come with diodes that spread over a frame. These grow lights instantly went popular the minute these arrived in the market. Growers who were able to try these grow lights have reported great results from the amount of yield for the electricity that the lamps used. 

HLG LED lights are available in affordable to expensive models. These are available in different sizes to match the size of a small or large growing area. The LEDs are dimmable; the large LED light panels consume more power compared to smaller ones. 

Advanced Grow Lights  

If you’re looking Platinum for a cheaper alternative then check out Advanced Platinum LED lights. It’s a new name in LED grow lights but their lamps have wider light spectrums compared to other LEDs. This makes this grow light more efficient as a wider spectrum of boosts plant growth and reduces nutrient deficiencies and leaf problems. 

Many growers are recommending Advanced Platinum Grow Lights because of its great results. And aside from the affordable price, you will get a good 5-year warranty on your purchase. All LED light models come with fans, heat sinks, and a control panel to switch the lamp to veg (good for the growing phase) and bloom (ideal for the flowering phase).

Tips for Using LED Growing Lights

1. Consider a Heater in Cooler Climates

LED lights are good for growers who live in warm climates as these lamps don’t give off too much heat. But the heat from growing lights is also important to plants as this can dry the soil and increase humidity needed by very young plants. So if you are located in a place where the climate is cooler, consider adding a heater inside your growing area. Monitor the temperature of your growing area regularly. 

2. Move Your Plants Closer to the Glowing Lights

Because LED lights don’t emit too much heat, you can move your plants closer to the lamp or vice versa. When plants receive more light, it grows healthier and can produce the best yields. A good rule for seedlings and vegging plants would be around 2 to 4 inches. Place your hand under the lamp and check if it’s too hot. Place the lamp farther away if you think that it’s too warm for your plants. 

3. Water Your Plants Considerably

LED lights won’t make your growing area too warm and this reduces water evaporation in the soil. Water stays longer in the soil to benefit your plants and thus, you don’t need to water your plants often. Check the soil in the pots before you start watering. If the soil is dry then you may water your plants. Never water when it’s moist or if the soil is still wet. 

4. Apply Nutrients Less Often

As you water less often, you use nutrients less often as well. You can reduce the nutrient build up in the roots when you apply nutrients less than often. You will save money from buying expensive nutrients and use the money you save on other growing supplies. 

5. LED Lights During the Seedling Phase

As your seedlings are starting to take strength and make more leaves, these will need good lighting to grow. But compared to older plants, seedlings are more sensitive to light. This is why you must be careful in using very intense LED lamps.

If you have LED lamps with a dimmer then use this to reduce light intensity. If your lights don’t have this, move your lights away from your young plants. But don’t move these farther away because this may result in stretching or taller and lankier stems. 

If you’re using LEDs with a veg and bloom switch, use the veg option for a cooler light. This color is the best kind for this sensitive phase. Follow an 18 hours light, 6 hours darkness growing schedule. And as your seedlings grow to stronger and more mature plants, you can gradually improve light intensity to encourage more growth.   

6. LED Lighting During the Vegetative Stage

During the vegetative stage, your plants need more light as these are actively growing. If you’re using LED lamps with a dimmer then moderately intense to intense lighting is encouraged at 20 to 24 hours a day. This will help maximize your plants’ vegetative growth. If your LED lamps come with a veg and bloom switch, continue applying the veg feature with cool bluish light. 

Take note of your plant’s response to light. If it’s growing bushier and taller day by day then you’re on the road to growing healthier and stronger plants. If these are growing lankier with spindly trunks and stems then these are not getting enough light.  Adjust your lamp’s intensity and height as necessary.

So when do you flip the switch to flower your plants? This will depend on the amount of space you have to grow your plants.  You can let your growing plants remain under 18 to 24 hours of light for as long as you want but these will grow very big and tall after quite some time.  Remember, the maximum height of cannabis plants will depend on the type and strain. 

7. LED Lamps During the Flowering Stage

To initiate the flowering stage in photoperiod plants, place them in a strict 12-hour light and 12-hour dark lighting schedule. Do not interrupt this schedule, otherwise, your plants can revert to the vegging stage and this can stress your plants. Cannabis plants that miss their flowering phase may become hermaphrodites and hermies can accidentally pollinate female plants and destroy all your hard work.

LED lighting during light hours should be intense. If you have a lamp with a veg and bloom color light switches, power on the bloom switch. You must also move your LED lights closer to your flowering plants. Take note when using LED lights, change light colors, and intensities gradually. Quick changes may only stress your plants and cause poor growth and reduced yields. 

8. LEDs and Autoflowering Plants

Growers often prefer autoflowering plants rather than photoperiod ones because, with autos, they don’t need to bother with triggering the flowering phase with a special light schedule. Autoflowering cannabis plants should remain under an 18 to 24 lighting schedule per day until they reach harvest time. 

If you’re using LEDs with a veg and bloom switch, use these during the appropriate growth stages. This feature can help improve plant health and will also enhance your yield.

9. LEDs vs HID Lamps

HID lamps or high-intensity discharge lamps are widely used and often with good results but the main problem is that these lamps can give off too much heat. Also, most ready-to-use grow tents and cabinets come with HID lamps. But if you can manage heat using fans then why not try HID but if you are concerned about heat buildup and you want to use different light spectrums to grow your plants then stick to LED grow lights.

Growing weed with LED lights makes it easier and more efficient to cultivate all kinds of cannabis strains. But make sure to follow instructions very carefully and to buy only safe and efficient LED grow lights. Don’t rely on cheap or budget LED light versions that will never give you the best results. 

Spider Mites on Weed: Preventing and Removal Guide

Spider mites on weed can be very daunting. Imagine, all your hard work after many weeks only to find out that small mite-like creatures are slowly eating your plants! What do you do? How do you remove them? Can you still smoke your weed even with mites on them? 

Sadly, this happens even to the most prudent growers. Spider mites and other pests can attack even if you protect your plants indoors. But of course, there are fewer chances for plants to catch pests when these are grown indoors compared to outdoor growing.

What are Spider Mites?

Spider mites are members of the mite species. These are called spider mites because these are related to spiders. These are also very common cannabis and plant pests and are usually very hard to get rid of. Spider mites have very sharp teeth that can bite and suck out the juices of cannabis plants. They most especially attack the leaves underside because these are the most succulent parts. 

The problem with spider mites is that these are so small, it’s hard to detect their presence. You may be very diligent, checking and rechecking your plants daily for spider mites only to find out the next day that they have completely devoured your plants! 

Spider mites are so small that these can instantly hide and create a huge infestation before you can even notice! Sometimes, growers mistake spider mite infestation for a nutrient deficiency because the way these pests destroy your leaves. 

Spider Mite Size

Spider mites are very small creatures and this is why they go unnoticed. It’s only when they have managed to multiply and cause massive havoc that they are noticed by growers. An adult spider mite is as small as a dot. Male mites are around 1/50th of an inch or .5mm long while females are smaller at just 1/64th or .4mm long. The only way to see a spider mite up close is under a microscope. This pest has four pairs of legs, an oval body, and has no antennae. Spider mites attack in small numbers to large groups although an only mite may also eat to its fill. Usually, leaves that have been attacked by a group of spider mites die early.

Why Do Spider Mites Love Cannabis Plants?

Spider mites are pests to different kinds of plants but are most especially fond of cannabis. Why is this so? The reason could be lying underneath each leaf. Spider mites love the soft yet crunchy undersides of cannabis leaves possibly because of the rich cannabinoids and terpenes. If you don’t find mites on top of the leaves, you’ll be able to spot them on the underside of the leaves munching contentedly.

What are Plant Parts that Spider Mites Love to Eat?

The leaf underside is the most favorite part for spider mites however, this pest has a voracious appetite that these can also devour new stems and even the buds. 

You may not be able to visibly check for spider mites but you know they’re around because of the presence of fine webbing that covers your plants. The web was produced by hundreds upon hundreds of mites and will cover the leaves, stems, branches, and buds. It’s hard to get rid of the web and sadly, plants that are covered with the web will not be fit for consumption anymore.

How to Spot Spider Mites?

There’s no way to tell if you have spider mites on your plants early on. Usually, the infestation is worse by the time you see some signs. Here are some common spider mite signs.

  • The presence of minuscule, flat mites along the underside of the leaf. Use a magnifying glass; you can tell that these are not spots but are spider mites because they are moving!
  • The presence of spider mite eggs. These are small, round objects near the adult mites. It is common to see spider mites in varying stages of life on a plant.
  • The presence of small bite marks on the underside of the leaves. If the bites are worse, the marks can also be seen on the surface of the leaves.

The bites can be larger and usually the marks turn to yellow spots. This means that the spider mite has already sucked the nutrients in that area of the leaf! Don’t confuse these yellow spots because these are all over your plants. Most nutrient deficiencies can be seen in young leaves only or only on adult leaves.

  • The presence of webbing. If you spot webbing all over your plants and buds, this means that the spider mite infestation has turned for the worse. There is no hope for your plants now!
  • The presence of wilted leaves and stems. Spider mites have a voracious appetite and usually, the only thing that will make them go away is when the leaf has wilted and died. But they won’t give up just yet because they will soon move to another leaf and eat to their heart’s content.

How did Spider Mites Enter Your Indoor Growing Area?

You found spider mites on weed but you were extra careful! You even checked all your plants daily but how come this happened in your indoor growing area?

Spider mites are very small creatures and these can easily hitch a ride on anything to reach your plants. 

  • From pets or animals – spider mites can easily latch on to the fur of animals or pets and this gives them a ride to any plant that they can eat. This is why you must never allow pets or other animals to enter your growing area. Not only will pets like dogs and cats bring in mites but these creatures can also have cannabis pollen in their bodies and these can accidentally fertilize your female plants!
  • From other plants other than cannabis – if your cannabis plants share a growing space with other plants then it may have acquired spider mites from these plants. This is why it’s best to grow cannabis plants in a separate grow room or growing area, away from other types of plants. 

If you think that the spider mites came from these sources, you might be able to exterminate the mites using common measures. You may be dealing with regular mites that are not yet exposed to cannabis pest pesticide products! You still have a chance!

  • From a cannabis clone – if you recently brought in a clone from another garden inside your growing area then this clone plant may have spider mites. It’s wise to quarantine all plants even clones and seedlings for a few days to weeks before these are introduced to the main growing area. 
  • From another cannabis plant – if you recently added a new plant inside the growing area then it’s also possible that the mites may have been from this plant. Again, it’s best to quarantine new plants or plants that you wish to add to your growing area to check for pests.     

Compared to the previous two, spider mites coming from a new clone or new plant can be harder to get rid of. This is because it’s more likely that these pests have already received treatment and have developed resistance to the pesticide. Because of this, you need to rotate your spider mite pest control technique to fully eradicate these pests. 

How to Remove Spider Mites on Cannabis Plants?

Before using pesticides and other organic treatments, prepare your plants first by removing most of the pests. 

1. Add a Strong Fan on Top of Your Plants

A strong breeze will remove the mites from the leaves instantly. It will also stop them from mating and laying eggs since they can’t do these in a windy environment. The mites and their eggs will be sprayed elsewhere. 

2. Spray with Plain Water

Use a spray bottle with water and spray the mites away. Make sure that the stream of water is strong enough to dislodge the pests from the leaves. Hold the leaves and spray at the bottom where most of the mites are staying. Don’t forget to spray on the stems and branches but do so minimally on the buds. 

3. Take Your Plants Outside 

If you can, take your plants outdoors and spray them with water. This way, you are spraying the mites out of your room and not just spraying them on the walls and floors. 

Now that you have removed most of the pests, it’s time to hit the remaining ones with some hard-hitting treatments

4. Use Water and Soap Spray

Before you use any of the next treatments, use simple water and soapy spray. This technique will soften the hard shells of spider mites so it would be easier to apply the next treatments. The spray will also create a slippery film on the leaves that the mites will find it hard to hold on to. Also, water and soap are not dangerous to plants and are non-toxic to humans and pets. Spray this in the morning and then spray pure water after a few hours. You may now proceed with the next treatments. Repeat the water and soap spray morning treatment daily.

5. Use Spinosad 

All Spinosad products are safe on plants, humans, and pets but are hard to pests like spider mites, thrips, caterpillars and crickets. Make sure to read labels before you use them. Also, prepare just the amount you need because you can only use the prepared amount for 24 hours.

6. Use Organic Essentria IC3

Essentria IC3 is another effective spider mites solution and is also toxic to other cannabis pests. This treatment is safe for humans and plants but will only work for a few hours. This has to be used together with other treatments to completely eradicate spider mites.  

7. No Pest Strips 

Pest strips are sticky strips that spider mites and other pests are attracted to. They move to the strip and once they are there, they won’t be able to move or escape. These strips may have a weird smell but are very effective and won’t hurt your plants at all. Just place strips near your plants.

8. Bleach and Water Solution

Bleach and water can instantly kill spider mites now that they are vulnerable. Place a small amount of bleach in a spray with water. Shake the mixture and spray it all over your plants. The spider mites will be killed after being soaked with bleach solution. However, this treatment will not work with spider mite eggs.

9. Alcohol and Water Solution 

Alcohol and water may also be sprayed on plants as alcohol can also instantly kill mites. Let this solution remain on leaves. 

10. Floramite 

This is effective in killing spider mites but is very expensive. Make this the final solution if all your efforts are still in vain. Floramite is also safe for humans, plants, and pets.  

11. Diatomaceous Earth

This is fine fossil dust that can cut the bodies of spider mites and other insects and kill them. Sprinkle this all over your plants and also on the growing area surfaces. This treatment is very safe to humans, pets, and your plants but is very deadly on pests like spider mites, thrips, aphids, and more.

12. Neem Oil 

Neem oil is the natural oil from the neem tree which has effective pesticide effects. Follow directions on how to use neem oil and use a sprayer to spray the oil to your plants. Cover every part especially the underside of plants. Spray it all over but not on the buds because this can change the smell and flavor of your buds.

13. Use natural insect predators 

Use the common enemy of spider mites: ladybugs. These insects also have a voracious appetite and will devour spider mites easily. You can buy live ladybugs from garden centers. All you need to do is to place some of these on different parts of your plants. These won’t hurt or eat your plants because they most especially love spider mites and other pests.

How to Prevent Spider Mites on Cannabis Plants?

The only way to prevent spider mites is by careful monitoring of your plants. Also, avoid placing new plants directly inside your growing area. Have these quarantined first. 

Conclusion

Spider mites on weed are indeed devastating. But a combination of these treatments can help stop spider mite infestation and help you save your plants. And if the infestation is so severe, you may have no choice but to harvest early or abandon your growth.