605+ Cannabis Strains over 20 Breeders worldwide.

Toll Free: +1 (800) 805-7835

How to Grow Cannabis with Organic Super Soil – A Super Soil Recipe

Super soil is the filet mignon medium for nearly any kind of cannabis plants. Unlike regular soil, super soil provides the most type of weed plants an optimal environment to thrive.

What makes an organic super soil a great medium for cannabis? Let us show you the different characteristics of super soil and the ingredients in creating this medium at home.

Characteristics of an Organic Super Soil

Before going through what a super soil is, we need to know what cannabis plants need out of a medium for healthy growth development. This includes water retention, soil pH value, and more:

1. Water Retention and Drainage

The soil needs to hold enough water to keep the medium from drying and still be able to get rid of excess moisture to avoid drowning the plants. A good drainage rate also provides air circulation to the roots. Your cannabis plants need oxygen in its roots to turn sugar or carbohydrates into energy.

2. Soil pH

The acidic/alkaline value of the soil can affect the cannabis plant’s nutrient intake. Soils that have a low pH value can make phosphoric acid, magnesium, and calcium unavailable for the plant. On the other hand, alkaline soil can make iron, zinc, copper, and manganese unavailable within the medium. You want a soil that has a pH value of around 5.5 to 6.5 for the plant to thrive.

3. Micro and Macronutrient Content

Cannabis plants require a wild array of nutrients for different purposes. This includes nitrogen for growth development and phosphorus for bud production. While fertilizer can give your plants a specific amount of nutrient at key periods of their growth cycle, these can dangerously increase the nutrients within the soil to toxic levels. On the other hand, compost within super soils releases the nutrients through the decomposition of organic materials. This makes the nutrient available at regular intervals without overwhelming the plant.

Steps in Creating Organic Super Soil

You will need a large container placed in your yard or garage where you can mix big amounts of soil and other medium components. Tools you will need is a rake to mix the medium as well as a tarp or stainless steel cans to hold the super soil during the cooking process if the container does not have a cover. For the best type of organic super soil, you will need the following ingredients:

  • 450L of organic potting soil
  • 1L of earthworm castings
  • 2.5 lbs of bone meal
  • 5 lbs of blood meal
  • 5 lbs of bat guano
  • 2.5 lbs of fish bone meal
  • ½ cup of azomite
  • 1 cup of agriculture lime
  • ¾ cup of Epsom salt
  • 8 quarts of perlite

In a large container, pour in about ¾ or 75 percent of the organic potting soil.  Pour in the fish bone meal and bone meal in. With a rake, mix the three ingredients together until you get an even color on the surface. Pour the azomite, agriculture lime, earthworm castings, and half of the leftover potting soil to the mix. Rake the ingredients once more to mix them properly. We add and mix in the rest of the potting soil as well as perlite. Finally, add the bat guano, blood meal, and Epsom salt to the soil. Mix all ingredients until the top has an even color.

For one week, use a shovel to turn over the soil to one side until the top shows the same color. Add some water to the soil and mix it. Water it until the soil is moist, but not too damp that it is dripping wet. The water will kick-start the microbial process within the soil.

The next step is to cook the organic super soil. This involves placing the container with the medium in an area that is under constant exposure to sunlight. This will continue the microbial process that will enrich the soil. You will also know the process is going when the soil becomes hot to the touch. It is important to keep the soil from drying out as this can stop the process. Allow your super soil to cook for one to two months while keeping it damp.

It is a good idea to add some earthworms to the soil. Worms will create a network of tunnels that aerates the medium and enrich the soil with nutrients. These small creatures will also not harm your cannabis plants.

Picking the Container for the Super Soil

With a large batch of super soil in hand, select an appropriate container where your cannabis plants will grow. You have several options to pick for your cannabis plants, which are categorized into three containers.

1. Regular

Regular containers consist of traditional ceramic pots that you often see in gardening stores. Other variants are made of durable plastic. Almost every regular containers will have a drainage hole at the bottom and a saucer to catch the runoff. This type of contains has a high water retention rate that can decrease the chances of your plants from drying out. However, the lack of drainage can lead to overwatering the soil, which can drown and damage the roots.

2. Air

Air containers have a series of openings on its side as well as the bottom. This container is the opposite of regular ones in terms of high drainage and ventilation rate due to the numerous holes around the pot. Another benefit of the holes is the allowance for the roots to grow outside of the container. This prevents the plant from getting constricted and choking within a pot. The main problem with air containers is its low water retention rate. You will need to provide the plants with more water to keep the soil from drying out.

3. Smart

Smart containers are fabric pots that provide a balance of both the regular and air pots. The fabric material allows excess water to seep out of the pot while keeping a significant amount within the medium. This material even allows oxygen to reach the soil via the side of the container. Much like air containers, smart pots do not have the same water retention rate as regular pots. This means that you will need to use more water on your plants to keep the soil from drying.

Overall, smart and air containers are a good choice if you want to avoid overwatering the plants. Using either of the two will mean using more water throughout the growth period of the plants.

Germinate the Cannabis Seeds

Before your cannabis seeds can get the most out of your super soil, you will need to germinate them first. This process is when they sprout their taproot out from the shell and grow their first set of leaves called cotyledons.

Like the containers, you have many options to germinate your seeds. The key criteria to germinating seeds are moisture and warm temperatures. Both of which will encourage the seeds to grow their taproot.

One method is to use starter cubes or germinating cubes, which are available in various online seed banks. To use, soak the cubes in water for an hour before placing it in a grow tray. Grow trays are mini pots that will hold the seedlings along with the cubes. You can find these trays in online shops or use an egg carton to create a makeshift tray.

Place the seeds into the opening at the top of the starter cubes and slightly pinch it to secure the seed in place. You do not need to push the seed farther down the cube for better results. Apply water to the grow tray and place it in a warm humid area. You can boost the progress of the seed’s germination stage by placing a heating pad below the grow tray. Check on the seeds daily to make sure there is still water in the tray.

After several days, you will see roots sprouting out from the walls of the cube with a set of leaves growing at the top. This is a good sign that the seeds are ready to enter the next phase of their growth cycle. If you are using the starter cube, you can transplant the seed along with the cube to the super soil medium. The roots and the plant will grow out of the cube medium to form a much larger root system in the main medium.  

Using the Organic Super Soil

Even after one or two months, the super soil should still be hot to the touch. This indicates that the microbial process is still happening. While this is great for growing plants, the super soil might be too much for younger ones. Young plants that are entering the vegetative phase might burn out due to the overwhelming amount of nutrients available within the soil.

You can alleviate this problem by filling with one part super soil at the bottom and one part potting soil at the top. This will give the young plants just enough nutrients to grow its roots. As it matures, its developed roots can handle the number of nutrients within the super soil.

Cultivating your cannabis plants with super soil still, require the same effort as growing any weed strains on potting soil. It is important to be watchful for the nutrient needs of your plant by catching any signs of deficiencies throughout its growth cycle. This includes yellowish hue on the leaves during its vegetative phase due to lack of nitrogen. If you see this type of sign, amend it with supplements.

Remember that the plant has most of the vitamins it needs from the organic super soil. Adding any kind of supplement may lead to nutrient toxicity, which can result in low-quality buds. Only add supplements if there are signs of deficiencies on the plant.

Lighting will be an important factor in the health and growth cycle periods of your plants. This is barely a problem for outdoor areas because of the natural light source. On the other hand, the yields of your plants growing in an indoor garden will depend on the light fixture you use.

You can choose an economical route for your indoor garden by using fluorescent lamps. Fluorescent bulbs emit a large range of light spectrum that your plants can utilize and they produce less heat. If you have the budget and want to produce high-quality buds, high-pressure sodium (HPS) lamps that produce red to orange hues, which are beneficial for flowering plants. Another is metal halide (MH) lights that give off blue lights to encourage healthy growth during the vegetative phase. The issue with both HPS and MH lamps are its heat, which requires ventilation to cool the fixtures.

Homemade or Garden Store Super Soil?

Mixing your own organic super soil at home lets you know what goes into the medium. This includes the use of organic materials and potting soil.

This is not to say that store-bought organic super soil is less effective to homemade ones. Pre-packed super soil contains most of the necessary components to a medium that any cannabis plants will thrive. Even professional breeders will choose to buy super soil from a garden store instead of spending time and effort in creating a batch for themselves.

The disadvantage of buying store bought super soil is its price tag. If you compute the overall cost of the ingredients in making your own super soil, you may find that the total amount is much cheaper than pre-packaged ones you find in the garden store. On the other hand, you may find the price of garden store super soils to be reasonable if you do not want to spend a considerable amount of time mixing soil and other ingredients.

By now, you should have a clear idea on the ideal of organic super soil as well as how you can make your own at home. Always remember to water your cannabis plants to avoid drying out the roots and to only give them vitamin supplements when signs of deficiencies appear.

How to Grow Marijuana from Seed

Growing marijuana seeds are entirely attributed to the quality of the seeds. There is no chance for the plants to grow better than the seeds to which they grow from. Back then, seeds shops were nowhere to find. Hence seeds were preserved from unique buds – however, this was entirely a shot in the dark with plenty of tests with possibilities of errors. Fortunately, people now understand more about marijuana seed growing.

The growing of marijuana seeds is not a hard method to follow. In fact, even the growers who have just first started the venture of marijuana planting can easily try it. Nonetheless, the method is an expedition of phases. Marijuana seeds are best to be grown with seeds because of the fact that their life cycle is short. With that being pointed out, you must be able to monitor daily your marijuana plants for moisture, diseases, pests, light, and nutrient inadequacy. If you are not confident with yourself in working with commitment and in dedicating enough time, then maybe you can blow the idea of planting marijuana seeds.

Similar to all types of gardening, growing marijuana is an ability that can be improved after a certain period of time. The process comprises steps that are easily learned but it requires a gleefully stoned life span to become adept. There is not enough justification for one to feel browbeaten by growing marijuana seeds. The method is actually simple but can either be cheap or costly depending on your preferences.

Gathering details and understanding the basics of growing marijuana seeds is a perfect state to begin at. Coming with a primed decision in the earlier period will boost your harvests. Here are the common basic steps on how to grow marijuana from seeds:

1. Choose Your Kind of Marijuana Seeds

The selection of seeds can be astounding. Ruderalis, sativa, and indica are some varieties which are accessible in just a click. You have gained personal knowledge based on your personal experiences. You may assess what kind of strains have suited well in your gutter before. Think about what kind of strain have worked well for you as a treatment to a certain ailment. These are basic things you can always go through when deciding for your own marijuana seeds.

After consolidating your personal preferences, you now contemplate on your growing lifestyles. Are you planning to grow your marijuana seeds in a small limited space where indicas or autoflowering strains can grow best? Or would you opt to grow your seeds in your huge backyard where your marijuana seeds can freely grow either in big pots or directly planted in the soil?

2. Basics of Marijuana

For you to achieve the best growth of your marijuana seeds while it gives you the dewy buds, your marijuana seeds would demand the basic things.

1. Air

To ensure the firmness and the appropriate exchange of gases, your marijuana seed needs an open fresh air. Well, there will be no issue if you grow your seeds outdoor since your plants will be denuded to air. However, indoor plants will require an intake of fresh air, old air exhaust, as well as a fan necessary for the movement of the air. Nonetheless, environments bolster molds, pests, and poor growth. The accumulations of gases will feat the growth of the plant.

2. Light

To ensure hearty vegetation of the marijuana seeds, there should be over twelve hours equivalent light for each twenty-four hour period. Growing the seeds indoor will let you control the light with the use of timers. On the other hand, in the planting of seeds outdoors, the germination should be deferred until the time when plants can finally be defined to the daylight of more than twelve hours and get direct sunlight of eight hours at a minimum each day.

3. Nutrients

Similar to other existing living creatures, marijuana plants also need fuel for them to grow. An ideal fragile mixture of soil that is abundant with minerals, vitamins, composts, and living organisms can provide your marijuana plant with sufficient food intended for the entire life cycle. You can further enhance the quality of your soil by watering it with a compost tea or other organic mixtures such as feather meals or molasses.

4. Water

Like the other living creatures, marijuana required water so that they can grow, flourish and deliver its biological purposes. If you are residing in a place where rainfall is a regular visitor, then the outdoor seeds can get all it requires. Huge marijuana plants are notably parched. If you intend to produce big plants, then you will definitely have to complement water in between the rainfalls. In indoors, the water turns to be the instrument that delivers nutrients. Uninterrupted water is made use to regularly lavish the soilless systems and the hydroponics.

5. Humidity

Growers do not have any command over humidity if plants are grown outdoors. Growers are literally under the grace of the climate. The positive thing is that the alternatives in humidity, as well as the healthy biological capacities, have to adjust to a modifying grow atmosphere and this makes your marijuana plant uniquely enduring. For indoor plant growing, the control for humidity is very necessary from the seeds to flowers. The leaves aspirate atmospheric moisture as one of their daily functions. A balanced humidity creates for hearty pests and mold-free surroundings.

6. Temperature

Marijuana plant is very tough and it can endure either in heat or cold temperature. But just like any other living things, the plant can also get stressed if they are exposed to extreme temperature. The marijuana plant can go through the survival stage with temperatures too high for over a long period of time. The acceptable temperature that would support a durable growth of marijuana is twenty-seven degrees centigrade. This ideal condition is easier achieved when indoor by securing fans, heating and cooling mats, and air conditioning units. The lights will definitely produce heat which requires being vented. For outdoors, the grower will have to choose their time. You must be aware of your specific climate. You can use a sun cycle to achieve the right timing.

7. Growing Medium

The organic growers shall make use certain types of soil each time inside or out. Nevertheless, the soil is not the only consideration. Balanced mediums which are completely dependent on nutrients consist of rock wool, perlite, or coconut coir.

3. Lights for Growing Indoor Marijuana Seeds

With the authorization of marijuana, choices of lights have been exploding absolutely. The deciding factor will be the budget.

Grow cupboards – Entirely tailored for marijuana and available to go refined grow cupboards created by individuals who have plenty of experience. If you have so many extra dollars, you can also use carbon filters, fans, lights, timers, another clone, and flower chambers. You can get these items and use them through plug and play.

Lights that are suited for each budget – You can use a primitive but proven to work effectively Compact Fluorescent Light (CFL) or a small Light Emitting Diode (LED) set up in just three hundred dollars, by average.

4. Germination and Marijuana Seedlings

The starting point of your marijuana growing is the germination of your chosen marijuana seeds. Every feasible seed has the complete information required to grow your chosen marijuana strain. The germination of seeds will only require the perfect conditions, and then the life cycle will start.  Remember that there is no way for the seeds to germinate unless the three common requirements are achieved – ideal location, water, right temperature with right warmth. Growing marijuana is a kind of organic procedure that does not impose strict rules. There are several methods known for germinating marijuana:

1. In Water

Just soak the seeds in water that is abundant in enzyme until you notice the taproot occur then place them in the medium. The seeds will rapidly drive and crack the surface after a week.

2. Straight Right in the Medium

Put the seeds right in the medium. This is to prevent any possible transplant injury. Almost all the time, it is more doable to germinate through a small pot of your preferred medium then put on larger pots or in the garden.

3. Germination Stations

Giving considerable manipulation over the environment of germination, the germination stations give temperature control, humidity, and can expedite the times of germination.

4. Paper Towel

The seeds are out on a paper towel that is moist and placed in a dark place with warm temperature. This is commonly enclosed with an improved plate or plastic to keep the humidity and the moisture. After waiting for a few days to one week, the seeds are expected to already germinate.

5. Jiffies, Rock Wool and Plugs Stations

Doable to keep as you can potentially have up to fifty seeds germinating right in a very limited space. The moment the seeds have already rooted, they can now be transferred to their ultimate location without having to damage the roots.

5. The Vegetation Stage of Marijuana

The instance the green leaves converge the light, the process of photosynthesis becomes enthusiastic. The plants begin to metabolize and the vegetative stage has started.

Indoors: The daylights are set to eighteen hours a day, while night lights should be six hours.  This does not require coordination with the substantial daylight hours. You have the option to schedule it to hours that would perfectly work for you. The use of electrical devices during off-peak times can help you save a significant amount of money.

The marijuana plants are delightful to be put in organic soil or if they are being nourished with nutrients which are created intended for the stage of vegetation. Plenty of fan-forced light winds hold temperature under full command and build up the young plants. Extraneous controls can be incorporated such as casting carbon dioxide in the surrounding. You can participate in training that is not stressful to boost the rate of plant growth and enhance the flowers potentiality of indoor marijuana.

6. Blooming Stage of Hearty Marijuana

The phase of blooming, flowering, and budding refers to a similar growth phase of marijuana. The next coming months is something to look forward since the aromas begin to manifest. Exciting floral setups also start to appear which are specific to your kind of strain. The phase of blooming has unique periods which are natural to all kinds of marijuana plants and start the moment vegetation is over.

7. Quality of Buds by Undergoing Harvest, Drying, and Curing

In the last periods, the nutrients are taken for granted and the plants will be cleared out with cleansed water. This ensures a classic nutrient flavor and accumulated salt piquancy.

1. Harvesting

Some would simply wet the trim by eliminating all the leaves as the plant is still firmly standing then crack the plant down beyond. Hang the branches until they get dry or simply lay the individual buds right on a drying rack. Others will choose to eliminate only the big sugar leaves than do the harvest and hang the entire plant. No specific rules were implemented except that you are required to do careful handling.

2. Drying and Curing Marijuana

Dry the buds in a dark place with cool temperature with minimal humidity. Preferably, this procedure would really take time and shall consume at least two weeks.

Monitor things regularly for tendencies of mounds and over drying: If dried, the thin branches will quickly break. The thick branches will still be minimally malleable.

3. Storage of Cured Buds

Open the top portion of the jar once daily during the first two weeks. This produces accumulated humidity which can moulder the buds. The moment the flowers get dried to the touch, belch the jar once every week.

You can do curing for as long as you desire. You can keep your basis by determining your choice of smoothness. The longer item you will do the curing, the smoother result you will get.

Taking the pleasure of growing your own marijuana seeds is not hard. Simply give the needed attention and enough patience so that you can gain the stinky advantages regardless if they were taken from the smallest spaces of your place.

How to Grow Marijuana with Low-Stress Training (LST)

There are some techniques that you can use in growing your cannabis plants. LST or Low-Stress Training is one of the best techniques so far. You can use it to increase your harvest and limit the height of your plants. If you have been dealing with poor yields, LST will be certainly a good solution.

What is LST?

Most marijuana growers train their cannabis plants. There are ways to do it: the high stress and low-stress methods.

Low-Stress Training will gently manipulate your plants. High-Stress Training includes more aggressive techniques. Such techniques can cause significant stress to your plants.

LST is exactly what it sounds like. It will not cause stress or even slight damage to your plants. It is a fun way to train indoor plants. In fact, many indoor growers love to use LST.

There are some distinct kinds of low-stress training. These are low-stress training, the screen of green or SCROG, and the sea of green or SOG.

Low-stress training mainly involves softly bending the cannabis plants while they grow. You can just tie down the longer branches. Such process will continue during the whole vegetative cycle in the growth of cannabis plants.

Tying the plants allows the hormone called auxin to spread all over the plant. Auxin is highly responsible for the plants’ growth. It will result in more buds trained to develop in a rounded pattern instead of just being straight with one big cola.

How Does LST Work?

When topping cannabis plants, you need to remove the apical bud where concentration and synthesis of auxin mostly occurs. Cannabis plants stress themselves that enables them to produce new sprouts on the stem. It forms new growth which will be the next apical bud. This bud will grow and soar to the sky.

LST helps in stimulating the growth close to the bottom by tricking the plants rather than chopping them. When something happens to the plants and the bud near the light gets jammed, plants try to move all over that something. If they can’t, the new growth forms on the stem and will try sending a new shoot upward going to the light.

When you use LST, you need to tie the plants down to confuse them. That will result in increased auxin production. Many cannabis growers prefer to train further their plants while they grow older. LST is best to use while the plants are young because auxin develops in the roots and will continue through the entire growth stages.

Continuous plant training is helpful in bringing every apical tip down to encourage new growth. Each time you bring down a tip, the cannabis plants will be more confused. While the new growth tries to get closer to the light, pulling it back down in less than 90 degrees will force the auxin to flow once more. It will happen again and again.

Is LST Suitable for All Cannabis Strains?

All cannabis strains will virtually adjust themselves to LST. More cannabis growers choose indica and indica-dominant strains because they enhance growth on the normally fruitless side branches.

LST is also applicable to sativa and sativa-dominant strains. These cannabis strains are great to grow if your grow is wider and larger. Their strong lateral branches can produce great-looking buds.

You can try several strains including White Widow, Super Silver Haze, and Blueberry. The choices are limitless.

But, what about the autoflowering strains? Unlike the ordinary marijuana plants, autoflowering plants will depend entirely on age. Autoflowering cannabis plants will still need light to grow, but it will be the same even when they matured or when they begin producing buds. Due to that, autoflowering cannabis strains can grow and reach their full maturity state in 2 to 3 months.

However, it does not mean the LST techniques like SOG will be ineffective in autoflowering strains. Also, it does not mean you should never cut these plants. Shrubs need time to recuperate from any invasive procedure, which the autoflowering strains do not have.

LST can be an excellent way of developing the bushy and flat plants even in a small grow space. More importantly, it is an effective way of getting massive yields in every harvest. While LST sounds intimidating, don’t hesitate to try it once because that will totally change your belief about it. For sure, you will be so surprised at what the LST can contribute to your operations.

Benefits of LST

Low-stress training is somewhat beneficial to cannabis plants. Here are the potential benefits you can enjoy by using LST:

  • Better yields – LST will help you gain more returns for your investments when growing your own cannabis. You can expect bigger and better yields, even if you use the same setup with the untrained crops.
  • Improved control – LST lets you have more control over the shape, height, and size of your cannabis plants. The result will be fun and satisfying whether you’re growing the plants indoors or outdoors.
  • Bigger buds – LST will help you produce bigger buds rather than having a solo main bud and more tiny buds. With LST, your cannabis plants will have more colas and growth sites.

What is the Difference Between HST and LST?

HST or high-stress training is different from LST. Their names will reveal it to you. HST or high-stress training includes trimming the upper leaves called “topping”. Trimming them will let the light penetrate even the leaves on the bottom.

High-Stress Training may sound pleasing to your ears, but it can be somewhat risky for your plants. Its stressful effect will encourage most of the smaller branches to grow. As a result, your plants will have tiny popcorn-like buds, not the large colas. In fact, extreme stress can make your cannabis plants become hermaphrodite.

However, Low-Stress Training induces low stress which is safer for cannabis plants. When you do it right, LST will not even cause any stress to your cannabis plants anymore.

Low-Stress Training is not hostile for the plants. Likewise, it does not involve trimming any part of your cannabis plants. Instead, you just need to stretch the upper branches out and tie them loose in a more suitable position.

It will form a smoother surface. That means the buds will receive an equal volume of light. Thus, you can expect your buds to be more delicious and bigger when you harvest them.

However, LST is not just all about increasing your plants’ exposure to the light. The truth is, LST triggers a chemical reaction on your plants. This chemical reaction will encourage your marijuana plants to produce more colas when the flowering time kicks in. More colas mean more buds to collect after two to three months.

When you bend and tie down the branches and stems of your plants, they will assume they have lost those shoots completely. Due to this, your cannabis plants will produce chemicals that will spread all over their body.

These chemicals are responsible for increased cola production and extra growth sites development. The effect of these chemicals will eventually lead to increased bud production. That means a more decent yield each time you harvest. It’s why most cannabis growers like LST. This way of training cannabis plants is certainly the cheapest way to increase your yields.

When Should You Use LST?

LST will make you more flexible by doing it at the right time and place. It’s too late to do it when the plants are late bloomers and when their stems are extremely firm to bend.  

Microgrowers with smaller grow spaces often use LST early to gain more in every harvest. Many indoor growers train their plants throughout the vegetative phase while the shoots are pliable and green. The sooner LST begins, the better the result will be.

If you’re serious in maximizing your yields while keeping the flowers in their sweet spot, then you must use a ScrOG on your grow-up. It’s the only viable choice you have if you choose to train your plants using LST.

Where Should You Do LST?

LST is not only for indoor cannabis growers. The roots of espalier are within the outdoor cannabis cultivation. Outdoor cannabis growers, particularly those who live in areas with northern European-like climates, are successful in using LST.

The plants will be smaller but more productive than they will if you don’t train them using LST. Removing the apical domination of cannabis plants to redirect the growth hormones to several shots instead of one is a great strategy. It will be effective whether you use it indoors or outdoors.

Tools Needed When Training Cannabis Plants Using LST

You just need a few things in getting started with LST. In fact, you can start by having only a minimalist kit. The soft ties of your plants are the leading essential. You need them for holding the shoots and keeping them in place.

There are more options for bracing the bend. These include drilling the holes all over the lip of your pots. You can use bamboo stakes, too. However, training your cannabis plants using LST is easier to do if you use wooden skewers. They must be roughly 30 centimeters long for hassle-free use.

Whatever you choose between those options, do not secure the shoots to the ground. That’s because some adjustments will be necessary while your grow progresses. Maybe, moving your plants is a must for some reasons. Also, you should have duct tape in your minimalist kit.

How to Prepare Your Cannabis Plants for LST?

Helping your plants in preparing themselves for LST is important. That’s a crucial task to do aside from making sure that your plants are 100% ready for the process. Getting them prepared for this process is easy. All you need is to massage the branches and stems.

Plants need some kind of “warm-up” for a physical activity like humans. One of your options to “warm-up” them before LST is the method called massaging the branches and stems.

Some cannabis growers spend some minutes each day to massage the newly developed and young branches. Massaging will make them stronger and resistant to breaking when you try to flex them.

In massaging the branches and stems, you need to gently grab the stems between your fingers and lightly twist and bend them all over for a few seconds. You should do this per branch.

These little and soft movements will develop microfractures in the tissues of your plants. These microfractures promote sturdiness and healthy growth in plants. It is the same with the microdamage due to wind blows that occurs to plants cultivated outdoors.

When you massage your cannabis plants every day, you will notice significant changes sooner on your plants. They may likely have thicker stalks and sturdier lateral branches. These lateral branches will be more able to hold up a lot of bigger buds when the flowering time comes in.

How to Train Your Cannabis Plants Using Low-Stress Training

While training cannabis sounds intimidating particularly to beginners, doing it is so easy. You’re just a few steps away from success in using LST:

1. Grow Your Plants Until They have 3 to 4 Sets of Leaves

Some cannabis growers out there prefer to wait a little longer until their plants have 5 sets. However, extra caution is necessary when doing that.

While cannabis plants are growing, their main stem will begin to become rigid. Therefore, bending the main stem, in that case, is more difficult to do unless you break it. You should not break it as it can stress and even damage your plant. When you break the stem, the plant will die.

2. Choose a Tie to Use

Some people prefer hooks. They use it for hooking in the ground after you bend a branch. You can use anything.

However, your ties should be soft, so they won’t cut the branches and the leaves. Pipe cleaners are effective. You can tie them loose and adjust them while your plants grow.

3. Choose How You Should Tie Your Plants

Again, you can use hooks to secure in the ground. You can tie down your plants on a pot. Or, you can also secure them elsewhere.

4. Tie Your Plants All Over the Last Internode

This is the space between the final set of leaves and the second to the last set of leaves. Lightly tie this part and secure it to your chosen spot.

5. Use Powerful Lights

The bent part of your cannabis plants will begin to flex back up on the way to the light. It can take up to 8 hours, but you can shorten it by using under powerful lights. These lights can get the job done in just 3 hours.

6. Continue Waiting

Don’t tie your cannabis plants until the new leaves appear. In this way, much light will reach the main stem. When the new sets of leaves begin to form, tie them all over the pot until there’s no space left inside or all over the pot.

7. Use Soft Ties or Metal Hooks

At this point, there must be new leaves which makes the stem bent horizontally all over the interior of the pot’s edge. You can use soft ties or metal hooks. In this time, more side branches must come in.

You can redo steps #6 and #7 while growth continues. This will help the side branches to form and grow further until they reach the light.

8. Wait Until the Flowers Begin to Appear

It will happen when your plants switch to the 12/12 light cycle.

Some cannabis growers out there turn the light off two days before they harvest. It means no light will touch their plants for the last 48 hours before the big days.

This will confuse the plants again. They will think they’re dying. That feeling will cause them to release the resin or THC in their system and distribute it to the well-formed buds. Therefore, you will see the buds having a beautiful crystalline look when you harvest them.

Helpful Tips to Follow When You Use LST

There are several various low-stress training methods. Also, many cultivators have their own approach. The best time for doing LST is when your plants already have 4 to 5 nodes. Smaller plants can’t handle the effect of LST. That’s because their roots are still fragile and may uproot when you try bending and training them.

Likewise, make sure your cannabis plants are not too old for LST. Older plants have tough woody branches which are less flexible and more prone to breakage.

In training cannabis, you can tie them down by using nylon cord or string. Before you begin, make sure there’s something besides you which can hold the string or nylon cord in place.

When training your cannabis plants using LST, you can make some tiny holes under the pot’s rim. Here, you can secure the nylon cord or string to the branches.

  • The main stem should be the first one you train – Secure the main stem by using two pieces of string or nylon cord. One of them must be around one to two inches from the plant’s tip while the other should be around one to two inches from the lowest.
  • Begin from the stem’s tip then bend it down – This tip should not be the plant’s highest point anymore. Try bending the tip as low as you want and secure it by using a nylon cord or string.
  • Run the nylon cord or string over the hole within the rim, up and all over the branch and back down to the brim – Make sure you tie it securely and tightly to keep the twig in place.
  • After tying the stem’s tip, do the same on the bottom – The thinner and higher portions of the stem will flex easily than the bottom parts. Therefore, you must be more careful to avoid damaging the stem throughout this step. When bending the stem back, support it by using a nylon cord or string like the one you did previously.
  • This time, you can work on the remaining twigs of your cannabis plants – Start working on the top twigs first. Flex them just like what you did on the main stem. When bent down, they should be pointing outward. This way, the leaves and branches on top of your plants will not block the light from touching the bottom. When you flex a twig, make sure you secure it tightly using a string or nylon cord.
  • Continue working until the branches are all bent back – Once finished, put the plants back under their source of light. Observe how the light touches the plant and make sure it reaches even the bottommost parts.

Note: Make sure the ties are loose. The branches will continuously develop even when you tie them. They need some space for the new tissues. The branches will suffocate and may fail to develop properly if tie them tightly.

Is LST Safe for Flowering Plants?

You can do LST even while your plants are in the flowering stage. However, you must do it only within the first few weeks. During the flowering phase, your plants will tend to grow more rapidly. Therefore, you must keep them in shape.

Once you do this, avoid touching the new buds at all cost. Don’t worry in case you accidentally touched it once. This is hard to do but try not to make the same mistake again. Continuously train your plants using LST within 30 days.

Still, you need to check your plants for stray colas that may block the light or get too close to the source of light. Tie them back accordingly.

LST or Low-Stress Training is a good technique to use for some reasons. It is a nice option for cannabis growers who are on a tight budget because it just needs cheap materials like ties and bamboo sticks.

If your grow room has fewer light sources, using LST will be an inexpensive way to upgrade. If the grow space is too tight, LST will help you use that efficiently.

In fact, more great things will happen if you use Low-Stress Training with other training techniques. Combining LST with your preferred method will supercharge your marijuana plants. What you’ve learned today are just the basics.

How to Make Bubble Hash from Marijuana Bud or Trim

Are you looking for a marijuana product with potent yields? Then you may want to try bubble hash. Albeit it’s already circulating around the cannabis sector for some time, many people still don’t know of its existence.

The continuous spread of the fame of marijuana across different locations helps in bringing bubble hash to the hands of cannabis connoisseurs. Read on as we help you discover information about bubble hash. We’re also going to give you a guide on how to make bubble hash from marijuana buds or trims.

What is Hash (Hashish)?

All cannabis plants regardless of heritage or genetics produce trichomes. These tiny outgrowths are unseen to the naked eye but tend to look like fine hairs upon closer inspection. Aside from having the appearance of hairs, these elements have a stalk with a round head. Trichomes have the form of very small mushrooms living on the surface of cannabis strains.

Now, cannabis plant manufacturers store cannabinoids, flavonoids, and terpenes on the “head” of trichomes. These areas give cannabis users highs and may even help in relieving pain. Most marijuana plants offer several hundred trichomes mixed with other cannabis plant matter.

If you separate the trichomes, you get a highly potent extract from the marijuana buds. This extract is known as a concentrate which is also known as a hash. Otherwise known as hashish, the concentrate also has other slang names like weed wax, marijuana wax, and kief.

Regardless of the name you want to call it, trichomes bunched together help inventive marijuana consumers in experiencing more potent highs and effects. Bubble hash is a type of hash made with certain methods like ice water or hand-rolling extraction techniques.

Bubble Hash: A Quick Overview

The concentrate known as bubble hash is a cannabis concentrate created by acquiring dried and cured buds or trims. Users would pass the plant material to small screens the progressively become smaller until the trichomes are left.

Bubble hash acquired its name from bubble bags. It may also refer to the bubbles when the cannabis connoisseurs smoke the concentrate.

Things to Need in Making Bubble Hash

Bubble hash is a high-concentrate yield coming from old and pure methods of bringing more potent effects and highs to marijuana users. Some of the things needed to create the product include:

  • Stir sticks
  • 3 to 4 ounces of a chosen cannabis strain
  • Purified water
  • Bubble bags
  • 10 to 15 pounds of ice
  • A 5-gallon bucket
  • Cheesecloth

The Pros and Cons of Hash

While there are benefits to obtaining and using the hash, it doesn’t mean the concentrate is for every cannabis consumer out there. Let’s check the pros and cons of hash:

Pros Cons
It’s very strong. A small amount can get users high faster than traditional cannabis strains. It has a longer shelf life than regular weed. It can produce cleaner smoke. It has lesser tar.High potency may provide stronger pain relief benefits.Easier to consume as compared to smoking. Plenty of cannabis plant material gets thrown or re-used.It has lesser aroma and flavor than many cannabis strains. High potency may lead to stronger adverse effects like anxiety. More expensive to purchase or produce.

The Different Methods of Making Bubble Hash

As we’ve mentioned in an earlier segment, hash has been around the marijuana sector for a long time. Many cannabis connoisseurs now use different techniques to extract the concentrate from marijuana plant material. Continue reading as we guide you through some of the common methods in making bubble hash from marijuana buds or trims.

The Hand-Rolling Method

If you’re looking for a method to extract cannabis concentrate without spending a penny, then try the hand-rolling method. It’s a technique that virtually requires no equipment except non-dried cannabis buds and very clean hands. Take note that you shouldn’t use dried cannabis trimmings when opting for this technique. Also, this particular procedure produces smaller yields as compared to other known methods.

To use the hand-rolling method of extracting bubble hash from marijuana plant material, start by making sure you’re hands are squeaky clean. Ensure the most organic results possible by using non-scented hand soap that won’t leave residues in your hand. Now, take your chosen cannabis strain in your hand. Remove any visible leaves or stems from the plant.

Next, place the non-dried cannabis bud in between the palms of your two hands. Gently roll your hands together (with the bud in between) in a circular motion. Make sure you don’t apply too much pressure to the bud. Too much stress can contaminate the hash with other plant particles.

When done correctly, you should see a thick, black resin appearing on the insides of your fingers and palms. This residue is your concentrate. All that’s left to do is to scrape the bubble hash to a clean surface and press all the material together to form a block or ball.

The Dry Sifting Method

If you thought the hand-rolling method was easy, then the dry sifting technique in creating bubble hash is simpler (and less messy). Many cannabis connoisseurs even prefer to dry sift their hash as compared to rolling their hands together to extract the concentrated material. Before we teach you this procedure, you may want to freeze your chosen cannabis strain in a Ziploc bag first. Place it inside the freezer overnight to make it easier to split the plant material and trichomes apart.

The dry sifting method of making bubble hash requires cannabis trimmings, baking paper, silkscreen, and an old credit card.

Start the process by placing a sheet of baking paper on a clean surface. You can use your kitchen table for this procedure but ensure there are no food byproducts found on the surface before you begin. Also, the baking paper should have slightly larger dimensions than your silkscreen. You need the large baking paper to catch the material falling off the screen.

Now, place the silkscreen above the baking paper. Place the cannabis trimmings on top of the silkscreen and proceed to move the screen around. Don’t make any sudden rocking movements as it won’t generate enough fine movements to extract the concentrate. Instead, use your hands to gently move the marijuana trimmings around the silkscreen. This movement helps separate the trichomes from the other plant materials. To know if you’re doing it right, there should be a small amount of black resin starting to form on the baking paper.

Continue to sift the marijuana trimmings through the silkscreen until you see about 10 to 20% of the total number of trimmings used. For instance, if you’ve been using 200 grams of marijuana trimmings, then you should now be looking at approximately 20 grams of concentrate.

Collect the concentrated cannabis material after you’ve sifted the trimmings. Use the old credit card to push all the bubble has to form a pile on the baking paper. You can also use the card to press the material to form a hash block.

The Blending Method

Another simple technique in extracting bubble hash from marijuana strains is the blending method. You’ll need your chosen cannabis plant, a blender, a coffee filter, ice water, a silkscreen, and one extra large glass jar.

Start by placing the trimmings of the cannabis plant in a blender. Fill the kitchen appliance with enough water to cover the marijuana in it. Add plenty of ice and blend all of the ingredients together for about one minute. You should have a thick, frothy mixture afterward.

Next, drain the mixture by passing it through the silkscreen to the glass jar. After you’re done, let the mixture settle for at least about 30 minutes. After going back to the glass jar with the mixture after the time period, you should now see sediments forming at the bottom of the container. These particles are essentially the bubble hash.

Pour about 2/3 of the water found inside the jar. To this process slowly to avoid losing the concentrated cannabis material found at the bottom. Fill the jar with more ice water next. Let the mixture settle for another 3 minutes after. Repeat the process of pouring off water from the jar, filling it with ice water again, and settling the mixture to separate as much has as possible.

Once you see that there’s little substance left at the bottom of the container, you can now drain the water off of the jar without worry of losing hash. Strain the remaining mixture found in the jar with the help of a coffee filter. Remember to squeeze gently to remove any excess moisture from the concentrate.

All that’s left after that step is to dry the material and enjoy consumption.

The Bubble Bag Method

Unlike the other known methods in making bubble hash, the bubble bag technique is relatively new. However, many cannabis consumers now see it as an extremely efficient method in gaining a large yield from chosen marijuana trimmings.  

For this method, you’ll need cannabis mesh bags, ice water, two buckets, a wooden spoon, and your preferred marijuana trimmings. Start the procedure by putting plenty of ice in one bucket (the more ice the better). Next, place the cannabis trimmings in the ice-filled bucket. Add enough water to submerge the ice and marijuana mixture.

Stir the ingredients in the bucket for roughly 15 minutes. The cold water helps in making the trichomes on the marijuana trimmings brittle. Also, the agitation caused by stirring allows the trichomes to break off when they’re thrown into the water.

The next step is to place your mesh bags in the other bucket. Curl the tops of the bags over the edge and secure them. Start with the finest mesh when placing the bags in the bucket. Now, carefully pour the ice and cannabis mixture to the bucket with the mesh bags. Wait for about 15 minutes for the mixture to sit and drain through the mesh bags.

Remove the first mesh bag you placed into the bucket and hold it above the container. Pour more ice water on the mixture afterward to help wash the remaining trichomes still present. Shake the bag slightly by doing small, rocking motions with your hands. This part of the process helps drain the mixture of moisture and water.

Repeat the process with each bag until you remove the last bag with the finest mesh from the bucket. Remember, don’t mix the different qualities of hash together. Once the mixture is dry, press each pile together to form a ball or block.

Tips to Acquire Quality Bubble Hash

Just like using any technique, there are ways to help guarantee the quality of the bubble hash extract. For starters, you can freeze your cannabis before attempting to remove the trichomes. Also, don’t forget to use clean water when using some method. Take advantage of purified water as tap water may contain chlorine and fluoride. Last, never use bad quality cannabis. There’s no remedy to using bad quality marijuana strains in attempting to extract trichomes from low-quality plant materials.

How to Use Bubble Hash?

After extraction, there are a number of ways for you to enjoy bubble hash. For instance, you can use the concentrate as an ingredient mixed with certain food. Sprinkle it on many food items like butter, honey, tea, or even candy. You may even want to sprinkle it on a salad for a healthy kick.

You may also want to sprinkle some bubble hash on joints and blunts. It’ll give your smoking experience a dash of flavor and an explosion of psychedelic effects. Sprinkling it in bongs and pipes may also be great ideas.

Make sure to stay patient when extracting the trichomes from other cannabis plant materials. Being hasty may lead to dire consequences, regret, and unwanted results. If a step requires you to wait for 30 minutes, don’t get too excited and move to the next step before the timer runs out. All your patience will pay off in the end as you can finally enjoy bubble hash from your chosen marijuana buds or trims.

How to Make Dry Ice Hash from Trim or Bud

Dry ice hash is one of the easiest and fastest ways that you can make hash from trim or bud. This method of extraction of that psychoactive resin from those awesome bugs is said to be the most efficient way to do so. Not only that, but it does not require you to use any solvents in the process.  Making dry ice hash from trim or bud not only helps you avoid inhaling any harmful chemicals but also allows you to have one of the smoothest and purest experiences of cannabis ever if done right.

Hash Potency and Purity

The potency of the hash is also dependent on the weed strain used and the extraction method used. Hash is definitely more potent than unprocessed buds. Note that hash purity varies as, in Europe, the confiscated hash during 2011 had 4 to 15% purity. This purity level was improved from 2000 to 2005 as the percentage of purity went up to 18. Note that purity means that the hash is free of adulterations such as plant material and other kinds of matter.

Concentrated Marijuana Resin

Note that the quality of the hash that you make is also highly dependent on the nugs. One great advantage of making hash is those lower quality buds will be extracted to become a concentrate that is a better form to take as it would require less consumption. Yet, keep in mind that the properties and medical benefits will still be the same. Hash is the buds separated to keep the precious resin to be kept in storage in that form. Be it indica, sativa, or a hybrid weed stain, the hash will be only good as the buds.

Making Hash is Easy

Now you may be thinking that making your own hash at home is difficult. You can do it if you approach it as a challenge that you can excel at. It truly is a breeze! And, what you will be making is a marijuana product that is so concentrated, just a little will go a long way to give a high that is that of world-renowned hash. You can even make your own hash according to weed strain!

Not a Chemical Process

You can make excellent hash and there is no need to have a science lab to do so. What you’ll require is easily available materials, a clean table to work on, a few minutes of your time, a bit of elbow grease, and of course, those fabulous buds to make into hash. And, using the dry ice hash method, you can use the dry ice again to make one to three batches of hash.

Hash Making

The process of separating the resin from the plant material has been done for hundreds of years. Here are a few other methods of making hash from trim or bud:

Charas

There is the making of small balls of hash that are known as charas. This is done with using the crude method of gathering the precious cannabis buds and then rubbing these between the hands. Then the sticky resin is collected and formed. This method may seem primitive but it works.

Drysift

This is the removal of dried plant material from the resin by using a screen to sieve it to become a powder. This drysift powder is also called ‘kief’. This powder is then processed further with the application of heat to make it into a hashish block. This block is pliable and gooey. This marijuana product is rather transparent and will melt if touched.

Chemical Separation

There is a chemical method of separation with the use of a solvent such as butane or ethanol to dissolve the resin from the buds. The plant material that does not dissolve will be filtered out and discarded. The solvent is subjected to the process of evaporation by being boiled so what will be left is the resin that is transformed into hash oil.

Why Make Dry Ice Hash?

There are many different ways of making hash. One of the more popular methods is with the use of butane as a solvent. Although this is pretty effective in extracting the resin from cannabis plants, there may be instances that traces of butane can be left in with the finished product. This makes it “tainted” and can leave you to inhale this harmful substance.

CO2 extraction or the dry ice method, on the other hand, allows you to get as much as of the cannabis resin as possible in the safest way there is. Not only that, but this process won’t pose too much danger in doing unlike with butane which is highly flammable.

Here are other reasons why making dry ice hash it the way to go:

It is Simple to Make

Dry ice hash is uncomplicated and very easy to make. You won’t need any expensive equipment at all to make it. You are basically just shaking a bucket to make it.

It Only Takes a Few Minutes

Other methods of making hash require the most part of your day to prepare. When you do it with dry ice, you can be done in just minutes. All you need to know is the right method and your bud or trimmings to be able to get your hash immediately.

You Can Use it Right Away

Making hash with dry ice avoids any moisture from seeping into the resin. This means that you can use the hash right after the process is over.

How to Handle Dry Ice

Before we go into how to make the hash, it is important that you know how to handle dry ice properly first. Dry ice is not dangerous at all there are just some precautions that you have to do to be sure that you are handling it properly. Because of its really low temperatures and it’s turning into gas, knowing these things are important.

  • First, you have to think about ventilation – Dry ice turns into CO2 when it evaporates so it’s best that you keep it in an area that has good ventilation to help you breathe. It’s really nice to see dry ice ‘smoke’ when this process happens.
  • Second, have some protection for your hands such as gloves when handling dry ice – The warmest temperature that dry ice has is  -190.3°F. If you use your bare hands to hold the ice, you can burn it quicker than putting it over a burning fire. Yes, dry ice will cause a kind of burn on the skin so be careful.
  • Third,  don’t use airtight containers – You want to avoid putting dry ice on these types of containers so that they won’t suddenly explode. This is because dry ice converts into CO2 very quickly so they need room to turn into gas.
  • Fourth, the last thing you have to know is that dry ice should be disposed of in the proper way – You can’t just put them down the drain since doing that will freeze your pipes. The proper manner to dispose of that the dry ice when it is used is to leave it in a well-ventilated area and allow them to disappear into gas.

Materials That You Need to Make Dry Ice Hash

  • Sanitized five-gallon bucket
  • Snow gloves or bbq gloves
  • Dry ice – 3lbs is needed about 6 ounces of hash
  • Hash bags, bubble bags, pollen bags, or mesh bags with small holes
  • Ground cannabis buds or trimmings
  • A credit card or an unused paint scraper
  • A large clean flat surface, tray, or plexiglass

How to Make Dry Ice Hash from Trim or Bud

  1. Place the ground marijuana and dry ice into the sanitized bucket. Just add it all in.
  2. Take the hash bag or any other kind of bag that you will use and fit it on the bucket opening. Make sure that if there is a mesh side, that it is correctly placed and is facing down to properly facilitate the filtering when the bucket is turned upside down.
  3. Pick up the bucket and slowly shake and swirl it. Do this for around 3 to 4 minutes. The movement will make the resinous stalks separate from the bud plant material.  Place the bucked down.
  4. Make sure that your clean surface, tray, or plexiglass is ready. Also, ensure that the bag covering the bucket opening is secure and will hold. Then, in one sure move, turn the cannabis and dry ice filled bucket upside down. This move will empty out the contents of the bucket into the bag. Simple but don’t make a mistake when you turn the bucket as all the stuff will fall onto a table or floor instead of into the bag.
  5. Once the bag has the contents of the bucket, hold the top part to close the ends. Then, start shaking the bag on the clean surface, tray, or plexiglass. Make sure that you are holding the bag securely. Keep on shaking. The resin will be filtered by the bag to drop onto the catch area.
  6. Keep on shaking the bag, making sure the dry ice is moving around so that the precious marijuana resin will fall. Stop shaking the bag when there is no longer any resin falling from it.
  7. Place the bag aside on top of a clean surface as you can use it again to filter more cannabis buds or trim if you plan to make more hash while the dry ice is still in good solid condition. If you don’t plan to make another batch, dispose of the used bag properly.
  8. Use a scraper or a credit card to gather the resin that is on that flat surface. You can push all the resin from the sides to make a neat pile in the middle of the area.
  9. Transfer the resin to a clean container.
  10. Repeat the process if you want to make hash using another weed stain by pouring the dry ice bag contents back into the bucket. Replace the hash bag.
  11. Repeat the process by pouring the dry ice bag contents back into the bucket. if you want to make hash using another hash bag with a different micron count.

Your dry ice hash from trim or bud is now ready to use!

About the Hash Bags

The mesh is important. The smaller the micron count of the mesh, the higher the quality of the marijuana product. A 73-micron hash bag is to be used to make golden kief which is hash resin in powdered form. If you use a 160-micron hash bag then there will be a bit more of plant material in the powder mix. If you are using other kinds of bags to make dry ice hash from trim or bud, just keep in mind, the smaller the holes used for filtering, the higher the quality of the hash that will be produced as it will have less plant material.

Don’t Cry Over Spilled Resin

Don’t gather any a dirty area as it has missed the tray or has fallen onto the floor as it will lessen the purity of your hash as that kind of resin you might want to save can be contaminated and adulterated, to spoil the quality of your DIY hash made using dry ice.

About Hash

Hash, also known as hashish, comes from the Arabic word that translates to the word “grass”. It basically is the essence of cannabis drawn out of the marijuana plant. Basically, it is the literal definition of cannabis concentrate and is also called cannabis resin.

The Very Essence of Marijuana

This is made out of the extraction of the trichomes, which are the stalker resin glands of the buds of a female cannabis plant. The resin is what holds all the medicinal cannabinoids and aromatic terpenes. These trichromes are the very essence of a marijuana plant. Since hash is derived from the buds of a  female marijuana plant, it does have the same properties. It is simply more powerful than smoking the buds as hashish mainly contains the resin.

How to Use Hash

It is difficult to smoke hash when rolled into a joint as it burns poorly. When rolling into a joint, the hash can be mixed with marijuana or tobacco so it will be easier to burn and smoke. Hash can be smoked using a pipe, bong, or herbal vaporizer.  It can be consumed orally as it is edible when it is in an oil form. Hash can be added to food when making edibles the proper way by subjecting the food item to heat, but make sure just to add a very small amount as it is a concentrate. Hash oil can also be added to food and drink to make it into edibles.

Enjoy using your own hash immediately after making it using dry ice!  

How to Make Hash – Your Ultimate Guide

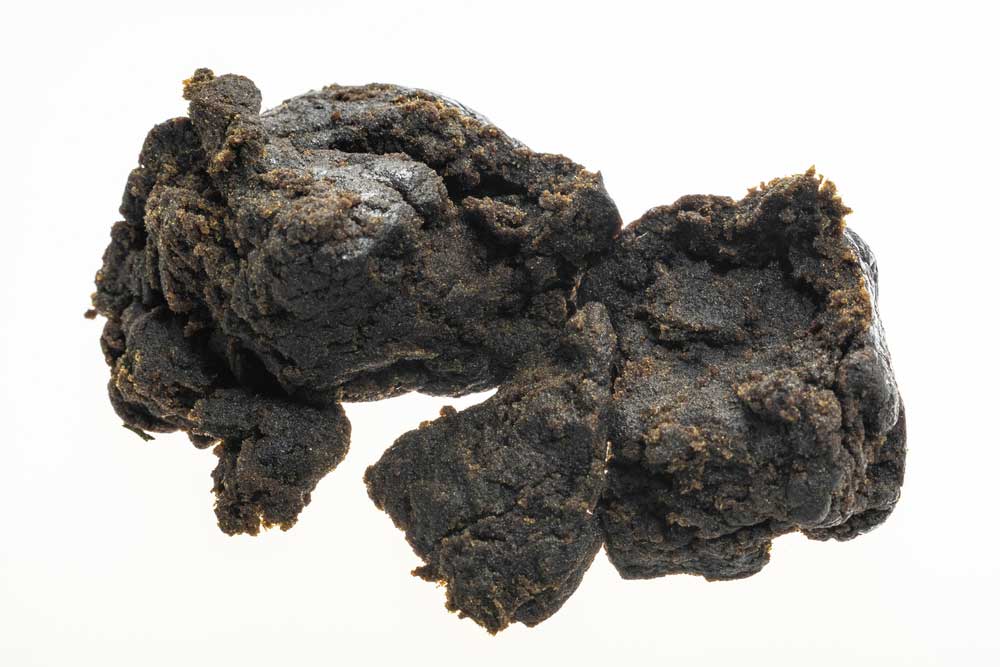
One of the most potent forms of cannabis concentrates is hash. This goes by different names but to concentrate makers, this is simply known as hash. If you are growing cannabis and you would like to venture into making hash, it’s important to learn how to make one safely and efficiently.  

What is Hashish?

One of the earliest forms of cannabis concentrates is hash or hashish. This term is recognized all over the world as a potent form of cannabis because it is pure and unprocessed. Some hash makers use minimal heat and pressure to manufacture hash but the traditional way still holds till today.

Hash was initially enjoyed in Eastern Asia and is known as the word Charas in Hindi, a word that meant hashish. It is quite easy to harvest and manufacture hashish because all you need to do is to rub the buds between your hands or between any coarse materials like a piece of cloth, to collect the trichomes.

As you rub the buds, the precious trichomes naturally stick to your hands or on cloth. Workers further compress the collected trichomes into tiny balls and this is sold in the market as a potent, unprocessed hash.

Hash was already enjoyed in many areas in Asia but it was only in the 12th century when smoking it became popular. Smoking hash became quite a sensation especially in the different regions in the Middle East that different tools were invented just to enjoy its smoke.

The popularity of smoking hashish led to the creation of new techniques on how to process hash and to create purer substances. Hashish means grass and in Arab nations, hashish was made by passing cannabis flowers through a sifter or a sieve. The process was named dry-sifting and also included the application of low temperature and low pressure.

In dry sifting, the flowers are passed through the sieve which separates the resin glands from the flower as well as other unwanted plant matter. These are discarded because workers only want pure and potent products sold in the market. The harvested trichomes are dirty white in color and have a powdery appearance. The end product of dry sifting is kief.  This is usually heated and then pressed to make blocks of hashish. Hash is sold in blocks and you can actually find a number of sellers that sell these blocks in marketplaces in the Middle East.

What is Kief?

The growing and consumption are prohibited in most places around the world but in Lebanon and India, hashish is openly exported to different countries to manufacture all kinds of products.  

For many years, there have been a number of ways to collect the resin glands from the buds. But no matter how updated some techniques are, many kief manufacturers prefer to use a three-stage grinder.  A three-stage or three-chambered weed grinder will make sure that the buds are efficiently processed to get pure and very potent results. What happens during the grinding process is that the buds are loaded inside the first chamber.

The trichomes will then pass through a mesh screen. The trichomes will be broken off from the buds because of agitation.  The third chamber agitates the trichomes even further to remove all plant matter that would otherwise affect the potency and the aroma of the end product. The trichomes that will be harvested are used to make a variety of concentrated products. This may also be smoked and called kief.

Modern Techniques to Make Concentrates

While traditional techniques to make concentrates are still being used till today, modern techniques have been developed as well. These new methods make concentrate-making more efficient and high-yielding. However, there are some setbacks when using modern techniques. Some of these are known to be dangerous especially using solvents to remove THC from concentrates. So before trying any method, be sure to get proper training on the use of solvents and other chemicals for extractions. Safety is the number one priority when it comes to solvent extractions.

There are two main ways to create cannabis concentrates solvent based and non-solvent based extractions. A solvent is a liquid that dissolves a solute to create a solution. When you extract cannabis using solvents, you will use a solvent which will separate the psychoactive compound THC from the buds.

There are a few solvents used for making concentrates. You may use butane, carbon dioxide (CO2), propane and alcohol.  Chemical solvents like these will be fed inside a chamber filled with dried weed. The solvent will separate the resin glands which have THC from the flower. In the case of non-solvent extractions, solvents are replaced with water, temperature, and pressure.

Using Solvents for Extraction

Solvent-based extractions use chemical solvents and are known to be very efficient. But chemical solvents are often very flammable and are dangerous when extracted indoors. To improve safety, professional extractors use a “closed-loop” system to prevent the exposure of the concentrates to harmful chemicals. A closed-loop system will reduce risks of fire and explosion.  

Safety should never be overlooked which is why production should only be done by licensed professionals. It is very dangerous and illegal to make these concentrates at home so as much as possible, leave concentrate-making to professionals.

The Process

1. Packing the Cannabis Buds

A cylindrical container is used to pack the buds. This container is open on both sides but the top is a bit narrow to allow the solvent container like a canister to fit comfortably. The buds are loaded in the canister but are not packed very tightly. The buds need to be packed loosely to freely allow the solvent to pass through.

2. Insert the Solvent Canister

The solvent canister tip is inserted in position while the container is pointed downwards. A tray is positioned at the other end to catch any drippings or cannabis material that may fall as the steps are done.

3. Release the Solvent

The solvent is released from the canister by pushing the spray system forward. Usually, it could take a number of canisters to complete this step. This is what happens when butane or propane solvents are used.

4. Creating a Slurry

The solvent will pass through the container where the flowers are packed. As this passes, it will create a thick material known as a slurry. This is so called because it almost has the same consistency as a slurry drink. The slurry is very thick because this is a purely concentrated solution.  It has high amounts of residual solvent and will need further processing before this is can be consumed.

5. Purging the Slurry

The slurry will now need to be purged from solvents. Whether you are using butane, CO2, propane, or alcohol, removing any remaining solvent is necessary to get rid of the smell and the taste of solvent. Purging brings back the original taste and aroma of weed.

Purging may be done through evaporation, by vacuuming or by hand-whipping. Each method has different variations and will create different products with varying consistencies. Of all the three methods, the most common is vacuuming or using a vacuum oven.

6. Using a Vacuum Oven

When using a vacuum oven, the solvent is removed from the slurry leaving a residual solvent. There are many factors that can affect the way vacuuming is done but the most traditional vacuum method can last up to 7 hours.

Butane Hash Oil or BHO

Butane hash oil (or BHO for short) uses butane as a solvent. BHO is actually a versatile solvent because it can give you a number of end products with varying potencies such as shatter, wax, sap, budder and so many more. Using BHO is dangerous and you should never attempt to perform extractions unless you are an expert.

If you are going to make concentrates with this method you should work outside or in an area where there is adequate ventilation.  Using butane is exactly similar to what was explained above. And to prevent explosions and fires, BHO should be performed in a closed-loop system.

Extracting Using CO2

A safer way to extract concentrate from cannabis is the use of CO2. Because this solvent is natural gas in the body, it won’t cause any threat or explosion when used. CO2 extractions use temperature and pressure to remove the concentrate from the bud as well as the plant matter. To do this, special equipment is used. Various high-end equipment and tools are available and with these, the appearance and the effect of the final product may vary as well.

Propane Hash Oil or PHO

Propane hash oil (or PHO) uses propane as a solvent to extract concentrates from the bud and cannabis plant matter. PHO needs a higher pressure and lower boiling point. PHO is often favored because of its terpene preservation and more effective purging.

PHO creates concentrates that are the same as BHO such as wax, budder, shatter, live resin and so many more. Of all the flammable or combustible solvents, propane is more popular because the final product is a cleaner final product that is comparable to BHO. But there are a few downsides of using propane too. It is more expensive than butane.

Alcohol Extractions

Isopropyl alcohol or ethanol is considered one of the safer methods for concentrate extractions. The method is called QWISO” which stands for quick-wash isopropyl alcohol. Alcohol extractions are done quickly and use only minimal equipment and tools used. Ethanol is mostly used because it can be used and reused over and over again. The high recovery rate is a good thing because ethanol is quite expensive to purchase.  

The Most Popular Solvent-based Cannabis Products in the Market Today

CO2 Oil

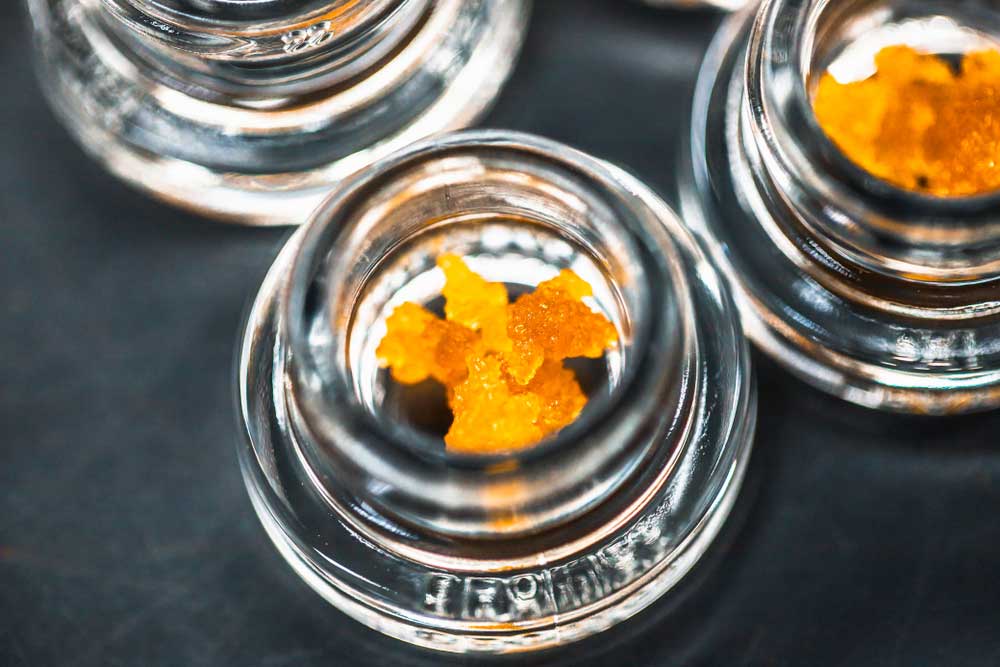
CO2 oil is made by using CO2 as a solvent for extracting concentrates. Another name for CO2 oil is supercritical fluid and is manufactured by exposing the cannabis in extreme amounts of pressure and carbon dioxide. The final product is amber-colored oil.

CO2 extraction is safe and is very popular in commercial extractions. CO2 is more preferred because it yields purer, cleaner concentrates which can be made without wasting time and effort. CO2 is a natural gas which is even created by the body as a product of respiration hence, CO2 products will not be a concern to health.

After extraction is done, the product is sterilized so enhance shelf life. Usually, CO2 oil can be purchased in pre-filled oil cartridges. These cartridges are used to load vaporizers and can even be used to manufacture make edibles.

Wax/Budder

Wax and budder are very common concentrates and are made by treating plant matter with a solvent under a closed loop system. The result is a slurry that is very thick with a dark gold color and rich flavor. But this is not yet safe to consume. It will be hand whipped under low temperatures to remove all residual solvent.

The final product looks like whipped cream with an amber color. The aroma is very light with an accompanying light flavor profile as well. Although both products are produced the same way, budder is a finished product with higher moisture content and has an oily consistency; quite similar to butter. On the other hand, the wax is dry, solid and may crumble easily. Budder contains more moisture because it is subjected to less whipping than wax.

Live Resin

Another popular solvent-based concentrate is live resin. The process of how live resin is made is quite similar to how budder and wax are made but the material or the starting product used is freshly frozen cannabis buds or plant material. Cryogenically-preserved cannabis plant material is used hence; the finished product is like fresh cannabis. You will taste a strong, exceptional terpene and cannabinoid profiles comparable to the terpene and cannabinoid profile from a “live” plant.

Expect live resin to give you an excellent flavor and aroma which you will only be able to taste from an actual plant. And of course, depending on the strain you want to use, the flavor, taste, aroma, and effects of a live resin product, may vary. Live resin concentrates range in color from light amber to yellow and has a rich smell.  

Shatter/Taffy

Have you ever eaten taffy? We all know what taffy candy tastes and feels like to eat but do you know how taffy and shatter concentrates tastes like? Shatter and taffy were made by treating the plant material or buds with solvent inside a closed-loop system.

The slurry that comes from this extraction is collected on parchment paper and then placed inside a vacuum oven to purge the solvent. After purging the shatter will form and then spreads on the parchment paper.

The slurry may be baked in the oven for less than an hour while some do this repetitively until the solvent has been completely removed. Results may vary depending on how long the slurry stays in the oven as well as other factors. Sometimes purging may not proceed correctly and the product becomes “taffy-like” in texture. When the solvent is successfully removed from the concentrate, the end result is shattering. This is exactly what the name is; it shatters easily and can snap off easily as well.

Shatter comes in varying color from light to dark amber with a high terpene content and a fantastic aroma. Taffy may also look like shatter but may contain trace amounts of solvent because of any mistakes during the manufacturing process.

Distillate

Distillates are an updated type of concentrate manufactured using scientific equipment.  Machines are used to heat and vaporize THC and CBD the plant material or buds. As the plant material is heated, the vapor is collected inside a cooling system and then consolidated into beakers. The distillation process is repeated again and again in an effort to yield pure and potent concentrates.

“Short path distillation” creates a cleaner and more potent end product. There is little terpene left in the concentrate because of the heat applied to the material.

Pie Crust/Honeycomb

Concentrates may even take the form of dry pie crust. This is made by treating the plant material with solvent inside a closed loop system. As the slurry drips from the system, it is collected on a piece of parchment paper and then placed inside a vacuum oven to purge the solvent

After a few minutes inside a vacuum oven, the concentrate will begin to look like a patty. The patty is pressed to improve nucleation; this will transform the shatter-like concentrate into a pie crust form. Upon closer inspection, you will see that it has a honeycomb appearance.

Caviar & Jelly Hash

Cannabis caviar is as expensive as it sounds. This concentrate will have your pockets empty by the minute because it sells about four times the price of popular and quality cannabis concentrates and strains. The reason why caviar is very expensive is made by soaking the buds in potent hash oil. After a dip in oil, the flower is coated in kief and then dried for hours.

By the time the product is dry, it will have a very pungent smell with an extraordinary flavor. When you first see this concentrate, it looks like a regular flower, but the kief-coating envelopes the flower like a soft cocoon. And because of the many layers of potent products, the effects of this concentrate lasts longer compared to regular buds.

Meanwhile, the jelly hash is made by mixing kief and hash oil. Jelly hash is recommended for patients that are undergoing chemotherapy because it can deal with nausea, vomiting, poor appetite and for pain. Jelly hash has a jelly-like consistency and has a mild aroma and a fantastic earthy flavor.

Rick Simpson Oil

Rick Simpson Oil (or RSO) was created by Rick Simpson himself who claimed that this oil was able to cure his cancer. He made RSO using pure and light aliphatic naptha which removes resin. The end product is a very potent decarboxylated concentrate.

RSO is used for a number of medical conditions. Its therapeutic effects soar because of its THC levels as high as 90%. This oil is known as one of the earliest forms concentrates made through solvent extraction. Sadly, this oil is unavailable for purchase online or offline. But if you want to know how to make RSO, check out Rick Simpson’s official website.

Non-solvent Extraction Cannabis Products Sold in the Market Today

Non-solvent Extractions

Non-solvent extraction involves the use of ice to chill cannabis flowers up to sub-zero temperatures. This step agitates the resin glands so that these detach from the flowers. Heat and pressure extraction methods may also be used in non-solvent extractions.

Concentrates made by non-solvent extractions are popular for their smooth effects that highlight the aroma, flavor and overall effects of a product compared to products that use solvent-based extraction.

Non-solvent concentrates such as rosin and full-melt bubble hash are becoming more popular since these are extracted without chemical solvents similar to the cannabinoid and terpene profiles of solvent-based concentrates.

Non-solvent concentrates are considered a healthier alternative due to the absence of any residual solvent in a part per million (PPM) scale. All medical and legal solvent-based concentrates produced are purged and tested to make sure that residual solvent ppm levels adherence with FDA regulations.

The best non-solvent concentrates are made using fresh-frozen, high-quality cannabis flowers. Because there are no chemicals used the chemical structure of the plant remains unaltered. You will get rich and complete terpene and cannabinoid profiles.

Kief & Live Kief

Kief is the most traditional types of concentrate. It can be manufactured in a very natural way just by moving the buds in between your fingers. You may also use a three-chamber grinder that comes with a screen at the bottom to collect the trichomes. Processing of kief can take anywhere from a day to a week depending on the material that you used. Longer processing times is sometimes needed to get the right consistency of the kief.

Kief that has a fine texture may be the product of days of processing. The color may range from a light brown to brown or even tan color. The smell and the aroma depend on the strain you used. This form of cannabis concentrate is more potent compared to other forms because the buds were not altered in any form.

A product similar is live kief which uses the fresh-frozen flower. The weed plant that was used was cut during harvest then frozen immediately afterwards. Doing so preserves the cannabinoids and terpenes found in an actual plant.

A liquid nitrogen bath will remove the live kief. This final product is more preferred because of its more potent, flavorful, and aromatic characteristics. If you get a chance to smell live kief, you won’t be able to tell the difference from an actual plant. The aroma is like fresh cannabis plant and flavors are stronger compared to other concentrates.

Bubble Hash

Another form of a concentrate that has been manufactured without any solvent is bubble hash. Also known as water hash or ice water hash, this is made using ice, water, and a fine micron bag. The ice and water will freeze the trichomes so these can be easily harvested while the fine micron bag will remove plant material and residue.

Bubble hash is considered one of the safest concentrates because it does not use solvents as well as heat. No heat applied to the buds preserves the flower and thus the flavor and aroma plus the effects are not affected at all.  

What happens is that Ice water freezes the trichome glands. When the trichome glands are solid, these can be easily agitated and thus will snap off easily. The trichomes will sink to the bottom of the container because of their weight and this also makes it easier to collect them. Because the material is dipped in water, plant matter also separates and rises to the surface. The trichomes that are at the bottom of the container are extremely potent.

The material is further strained and dried. Drying removes any water left from dipping these in water and freezing. Drying also removes any residual plant matter.

How is bubble hash produced? First, you must decide how many bubble bags you need to extract the trichomes. Bubble bag sets are available in 25, 45, 73, 90, 120, 190, and 220 micron bags. These bags are placed inside a bucket, arranged from the lowest number to the highest with the 220 micron bag as the final stage.

The flower is placed in a machine called the washing machine. This is where it’s washed and agitated. Works like a regular washing machine; you can set the timer and the number of cycles per minute you want to use. The micron bags are used, but not within the washing machine.

Water, ice and the buds are combined with the washing machine. Once the cycle is complete, the water is removed while the extracted trichomes are drained and placed in a bucket that has the different bubble bags. Next, the trichomes are subjected to techniques similar to hand-washed extractions.

The bubble bags are filled with trichome-rich water. These are lifted and shaken to agitate the trichomes and to remove water from the bucket. Open the bag and you will find a patty made from pure trichomes.

The process is repeated for each bag while the hash that has formed from each bag is collected, separated and dried. The parties may also be placed in the freezer and when solid, grated onto parchment paper. This end product is fine and sifted and may be further processed in rosin extractions.

Full-Melt Bubble Hash

Another non-solvent concentrate is full-melt bubble hash. The way this is produced is similar to bubble hash but the end product is more refined. Because of its amazing quality, it is perfect for dabbing or vaporization. What is used initially is fresh-frozen flower a bud that has been frozen immediately after it was harvested. Even plant material (not the buds) may be cryogenically frozen and then used to make full-melt bubble hash.  

Using fresh frozen starting material will guarantee that the final product will give you a strong terpene and cannabinoid profile. Compared to other concentrates made without solvents, a full-melt bubble hash is more pungent. This is also slightly more potent than traditional bubble hash concentrates.  

Only trichome heads are used in this method, therefore, the final product has more terpenes with a fantastic flavor profile. The way the trichomes are washed is very important at this phase. It should be done very gently because the more trichome stalks will create a poor quality product.

The process used to make full-melt bubble hash is the same as making bubble hash. This is accomplished by bathing the flower in ice and water and by sifting this in micron bags. You have an option to hand wash your buds or use a washing machine instead.

Compared to making regular bubble hash, the washed product is freeze-dried and is made into patties once these are in solid form. When the patties are ready and are solid in form, these may be sifted and then placed over parchment paper using a fine mesh sieve.

The dried final product appears like kief, but this does not contain any plant matter. The end product is light brown to white in color.

Dry Sift

A form of kief is dry sift. This is a refined form of kief that was obtained by manual or mechanical extraction using screens. The product is placed through the sieve where it is passed over and over again to preserve the trichomes.

You will find products like full-melt dry sift. This is known as the highest grade kief and may contain 90% trichome resin depending on how it was manufactured. Because of this fine quality, this product may already be dabbed.

Half-melt dry sift will contain both trichome heads and stalks.  Kief is classified as the lowest grade, which means that this has the most number of plant contaminants and is not ideal for dabbing.

Meanwhile, live sift is from the fresh-frozen flower. This is to keep all of the cannabinoid compounds intact. Live plant matter produces more potent and very flavorful, aromatic features. You will find dry sift very fine with a nice light color.

Live sift is perfect on top of a bowl or consumed as it is. The reason why this concentrate is very potent is that it uses a live plant where the majority of cannabinoids like THC or CBD plus the terpenes are still present inside the trichomes.

Rosin

To make rosin you need a machine that will deliver heat and pressure. These machines will isolate the essential oils from the trichome heads and the end product looks like a solid resin.

Rosin is known as one of the easiest and the safest way to make concentrates. Before rosin presses and machines were used, home appliances were used to make rosin. Take note that it is legal to produce rosin at home because you don’t need to use any solvent to make concentrates.

Way before specialized equipment was made to make rosin; people used hair straighteners, various kinds of presses and kitchen equipment like tortilla presses to create rosin. These various household tools and equipment can do the job but are not that efficient. The finished product also varied in color and consistency.

Industrial-grade options started to be available after the need for a better and more efficient rosin press were in great demand. This demand triggered the DIY movement among concentrate-makers who want to own their own presses and make their own rosin labs at home.

Rosin presses are indeed efficient compared to home equipment and kitchen tools but are not recommended for home use without training. To date, there are new pieces of equipment that are available in the market to create a safer and top quality way to make rosin.

The most popular equipment by far is small hydraulic presses. These machines were able to help cannabis concentrate enthusiasts to make legal and safe rosin concentrates from home.

Rosin allows users to experiment in making other types of concentrates. And because solvents are not used the chemical structure of terpenes and cannabinoids are present in the flower. The end result is rosin with flavorful and pure effects.

A Few Tips to Remember

Find out more about the effects of the strain that you wish to consume so you will be able to have an idea about any side effect. Don’t rush; just enjoy the effects and you’ll surely have a lot of fun when you use hash and other cannabis concentrates.

To stay safe as you get high, try concentrates in a familiar environment. Take a moderate dose and if you are taking concentrates for medicinal purposes, use half your dose to avoid a very potent effect. Don’t use any concentrate to treat any medical condition. Consult your doctor first.

How to Make your Own Feminized Marijuana Seeds

Discover the easiest, cheapest, and most natural way to make your own feminized seeds.

If you cultivate your own weed or would like to learn this skill to stop growing male plants that will end up pollinate those buds and make them have seeds, making a decision to DIY feminized marijuana seeds is wise.

Maintain Quality

The reason why you feminize seeds is to maintain the quality of a good crop. You want to recreate the harvest that you like at this cycle, you can feminize the seeds. That means you are saving that generation of seeds for it to be the next gen without men plants so your buds will not be pollinated to have any seeds.

Keep Your Crop Protected

If you are a breeder, this protects your seed strain. It ensures that propagation by seeds of your weed strain won’t happen as the buyer will only have female plants that won’t bear seeds as there is no male. Another marijuana plant can be made from a female plant would be by using the clone-only method or other methods, but that would complicate the process of propagation. As such, it is more profitable in the long run for breeders just to sell feminized seeds as their weed strain would be more difficult to replicate.

Simple Breeding Process

Making feminized seeds is a thing that some breeders do, and you will become a home cannabis plant breeder when you do this procedure. Doing this process makes your gardening skills much better. It is a simple process that can be done for crop production and to save money, also. You might be aware that feminized seeds are more expensive than regular seeds. Making your own saves you money.

For Storage of Seeds

It is also good to create these kinds of seeds for storage. Cannabis seeds that are kept properly will last for a long time. Seeds are collectible and can be kept as novelty items. You would love to store feminized seeds if you have no plans of growing them right away.

There is also a profusion of weed seeds that can be harvested, maybe much more than you are allowed to cultivate. That extra, bountiful amount of seeds can be kept for future use. Seeds have value and who knows, it can even be left to be passed down to future generations. And, the value of those seeds can increase. You can also keep the seeds to be part of your holocaust survival items so that you can propagate those, just in case the world gets devastated and you need to grow marijuana plants.

When Deciding to Cultivate

One of the steps to take when planning to grow a marijuana plant is what kind of seeds to use. There are 3 seed types to choose from which are regular, feminized, and autoflower. Regular seeds will germinate both male and female plants. Feminized seeds will grow into flowering cannabis plants. Autoflower seeds will grow cannabis plants that do not require the changing of light cycles to flower. Autoflower seeds will go female plants and these seeds are feminized.

Advantages of Using Feminized Cannabis Seeds

Eliminates growing male plants. It is a practical decision to prevent the waste of time and effort to growing male plants that will ultimately be discarded, anyway. After nurturing a male plant for a number of weeks, you might have spent good money on it to just trash it.

Growing a Mother Plant

Weed strains are made by crossing two or more plants. It is possible to extend the vegetative time for that stage to get cuttings for yet another yield for uniformity of crop product and even larger production.

Light Scheduling

Feminized seeds are photoperiod strains. That means that it requires the changing of light cycles for it to flower. It gives you the control to shorten or lengthen the time of the vegetative stage which can be done by light scheduling.

More THC Content

Feminized weed plants have more THC content than male cannabis plant because of the trichrome in their flowers. It will also contain more CBD and CBN if these are present in that weed strain.

Naturally Made

It is a common misconception that feminized seeds are genetically modified. These are not and are made through natural means, especially when using the method featured in this article.

Imagine, the time and effort required to take care of a male plant that you might have to get rid of after such a long time. When those male plants enter the flowering stage where the sacs meet the stem, you will notice it is a male plant. That will take at least 5 weeks of nurturing the plant until flowering time. That means all the expenses are wasted if you plan to remove the male plant.

Rodelization

Rodelization is the cheaper and easier way to create feminized marijuana seeds. It is the process of manipulating the biological factors of the cannabis plant to create feminized seeds. This is an all-natural process that has its advantages and disadvantages.

Rodelization is the easiest, most natural, and cheapest way for you to get feminized seeds from the strain of your choice.

The main advantage to this method of feminization is that it is all natural and you won’t have to rely on chemicals to do this. The downside is that it requires you to apply some stress on a female marijuana plant that can be tricky.

This is the act of having a female cannabis plant essentially fertilize itself and will often result in seeds with female characteristics.

How to Make Feminized Seeds Using Rodelization

The main purpose of rodelization is to keep a female marijuana plant in their flowering stage long after their harvest time to get them to create pollen sacs on their own. This can be a bit tricky since you won’t know the reaction the plant will have at this state unless you are working with a particular strain that is known to react positively to rodelization.

The main effect that you are looking for with the female plant is for them to get stressed enough or near enough to the end of their life cycle to start producing their own pollen sacs.

It is more recommended to use just one female plant to start off with if you are still new to this.

Once the pollen sacs have emerged, you can then choose the colas and buds from your other female plants for pollinate to create all female seeds. Note that this can also create hermaphrodite marijuana plants especially if the strain you are using is prone to this.

When pollinating the female marijuana plants, break open the sacs carefully into a clean container to avoid them spreading around. You can use a sheet of paper or a gloved hand so that you can apply the pollen into each of the colas more carefully. This will initiate the fertilization process and the plants will start creating the feminized seeds.

However, if you only want to get feminized seeds from a small number of the female plants that you have, be sure to isolate them from that plants you wish to keep untouched. This is so that you will be able to harvest colas without any seeds.

Other Methods of Making Feminized Marijuana Seeds

Harvesting the pollen. When the colas are ready to harvest, there might be a few male flowers that will appear. That also signifies that the cannabis buds are totally ripe. It is said that pollen can be harvested by placing a newspaper on the ground surrounding the plant but that is the lazy way that can be a fail. The most efficient way to gather the pollen is with an unused watercolor brush. Open the sacs and use the brush to gather the pollen. Then, brush the pollen on the flowers of the same plant or the other female plants that you wish to fertilize.

This pollen can also be stored in a small glass or metal container. It can be stored for a few months in the refrigerator or freezer for future use. Female pollen is currently being sold by some cannabis farms as there is the demand for this marijuana product because of the growing popularity of making your own feminized seeds.

Chemical Methods

There are 3 chemicals that are used to make feminized cannabis seeds. The chemicals are gibberellic acid, silver thiosulfate, and silver nitrate. These three chemicals work as an inhabitant. It inhibits the capacity of the plant to produce the hormone that works to promote female flowering. This hormone is called ethylene.

Colloidal Silver

These are minute particles of silver which are suspended in water. It is also natural and is safe to use. The colloidal silver can inhibit the ethylene hormone also.

Choosing the Right Method

As rodelization is the most natural way to make your own feminized seeds, take note that in the other methods that require using a paintbrush as a tool for pollen gathering is also an organic procedure. Gather the pollen carefully as bees do so to create honey, and you will be like a busy bee, making feminized seeds.

There is the ease of when using the chemical methods and colloidal silver. It is said that there are harmful effects when using such chemicals yet that is a common misconception. It is still not organic products though colloidal silver is natural. Yet, it does bring about a chemical reaction in the cannabis plant.

When deciding what method to use, the first thing to consider is if it is organic or not. That should be the basis of the decision as we must all go back to using natural methods in cultivating our marijuana plants. Cannabis is natural medicine and if a chemical is applied to it, it will disrupt the process of the production of a certain hormone. If pollen is placed, then that is natural.

Pollen gathering using the hands, paper, or a brush tool is a process that should be done with gentleness. Pollen is delicate and the flowers and sacs are also fragile. Do this task with light hands to prevent harming the buds and other plant parts during the pollen gathering and pollen application procedure.

Be Organic

We nurture plants for these to grow well, to the best of our ability. To ensure that our finished product is organically grown and harvested, we must also ensure that our feminized seeds are also organically made. Avoiding the use of chemicals is just the thing to do. There are many commercial growers that do use chemicals. These chemicals are readily available to buy yet, we have to make the right choices.

Though these chemicals are safe, it is advisable to choose to grow marijuana organically. It may present some difficulty to home growers as even the choices for organic products to use such as fertilizers can be limited – but there are those products that can make the change that we need to save our planet.

Marijuana is Natural Medicine

Going back to basics is necessary. When weed was recognized as medical marijuana, it made the changes necessary for us to stop being dependent on synthetic drugs as that was then the only option for a prescription. Now, we have the medical marijuana option as a prescription medicine. It gave us treatment to stop the side effects of cancer treatments such as chemotherapy. Marijuana is natural medicine and should ideally be grown in the most natural way possible.

We have to invest in containers, growing medium, and other things that our cannabis plant needs to thrive. Using the natural method eliminates the need for buying chemicals. That means savings while choosing the better option.

Grow Marijuana as Naturally as Possible

Now that you have learned how to make your own feminized seeds, you can do so without using chemicals. It is a fun procedure to do. It will make your gardening skills improve. It will be an interesting challenge to open those sacs and get the pollen. You can get to save the precious pollen and get to store the feminized seeds.

Ensure that the feminized seeds that you will use are made without the use of chemicals. Make your own. Marijuana flowering time is exciting enough as the buds will be ready to harvest soon and yes, it can be collectible seeds that do have a monetary value that can be kept. You’ll have the additional marijuana seeds product to store. The price for any given weed strain’s feminized seeds is more expensive than regular seeds.

Replicate Nature

When marijuana is grown indoors, the ideal atmospheric conditions are created to replicate nature. When making feminized seeds, replicate what a bee would do so it would be natural. The value of improving your gardening skills is priceless. In this easy tutorial on how to make your own feminized marijuana seeds, you have learned to do so using the most natural way possible.