605+ Cannabis Strains over 20 Breeders worldwide.

Toll Free: +1 (800) 805-7835

Cannabis Flowering Stage Timeline – 12/12 to Harvest

Cannabis farmers are looking forward to the final process of growing their plants – the flowering stage. If you are still discovering how to produce the best qualities of marijuana, this guide is what you are looking for. In this page, you will learn how to take good care of your plants and obtain an abundant yield in each plant.

Flowering stage is quite different from the vegging phase in terms of growing period, care, and nutrition. Once the plant switches from vegetation period to the flowering phase, expect a slow growth among the plants. This is where you see the development of buds in preparation for producing flowers. It is a sign that you should start treating them differently. It is all about being more oriented in proper nutrition and light schedule changes.

Best Time To Harvest Your Cannabis Plants

As the third week of September approaches, cannabis growers are closely inspecting the crops for harvest. As a marijuana farmer, you cannot harvest the plants too late or too early. Doing so can affect the smell and taste of the finished product. Moreover, you must also consider the psychoactive effects and THC levels of the plants before the harvest time.

For your guidance, you can refer to the details provided below. These are considered as the tools used in distinguishing the perfect time to reap the fruit of your labor.

  1. Flowering Time – Take note that the guidelines for flowering time serve as harvesting guidelines as well. However, you should also know that these are not accurate all the time. You usually obtain guidelines for Sativa, Indica and even hybrid strains. Those guidelines for individual guidelines are more accurate.

Indica dominant strains usually take 7 to 9 weeks. Sativa-dominant marijuana strains may require 10 to 12 weeks of waiting before harvesting. Lastly, hybrid-dominant strains take between 7 and 10 weeks before it becomes fully grown.

Furthermore, those timelines that come in weeks are often regarded as an ideal match for light-dep and indoor growing conditions. On the other hand, time-of-year estimates become more accurate when it comes to full-sun cannabis growers.

  1. Hairs/Pistils – The hairs or pistils can be found among female marijuana plants. These are a location on the plant sex organs. Pistils come in white colors which appear during the flowering cycle. As the female cannabis nearly ends its cycle, it gradually turns red or brown.

For most strains, you can determine that the plants are in their highest THC levels when their pistils turn 60 to 70 percent red or brown. Checking the pistil condition can help you estimate when to harvest the crop. Here’s a quick guide to check on the pistils of the plants:

  • Mostly white pistils: too early for harvest;
  • Less than 50% red or brown; early and not yet ripe;
  • More than 60% red or brown: an ideal time to harvest and has a very high THC level; and
  • 90% red or brown: over ripe, completely ready for harvest yet loses flavor or potency.
  1. Trichomes – The life cycle of the trichomes resembles the type of marijuana plant where it exists. As the cannabis ripens and matures, you will notice a change of color in the trichome’s head from clear or transparent to fully amber. Once your plant approached the harvest date, the pistils turn mostly brown.

Checking the trichomes of your plants using a handheld microscope can give you a rough estimate of when they are at the optimum ripeness. You will also see that the trichome head develops clear liquid in it. Over time, this liquid changes into amber and become milky white.

  • Clear Trichomes: The plant is not yet ripe.
  • Most parts are white trichomes: Perfect time for harvest.
  • Amber Trichomes: Overripe and THC content reduces.

Marijuana Plants Flowering Stages

After the vegetative stage, here comes the cannabis flowering stage. This is the last stage in the growing cycle of your crops. For the marijuana growers, this is the most exciting part. It takes only patience of growing and a few months of waiting to get the best results.

Unfortunately, the flowering stage is less forgiving, unlike the vegetative stage. If you want to obtain maximum yield and outstanding quality of the plants, there is no room for mistakes. At this point, you should realize the significance of your personal knowledge. This way, you can save time and energy by doing the right things.

  1. Entering the Flowering Stage

In some cases, your plants may not encounter entering a flowering period unless you grow autoflowering varieties of strains. However, you can also switch the light cycle into equal darkness and light cycle (or 12/12).

For some growers, they even go beyond keeping the plants in darkness. As soon as the plants realize that it is already winter seasons, they enter the flowering period.

On the other hand, outdoor growing means that this process starts automatically. However, the plants should not be exposed to an extreme environment. For instance, if you start planting the cannabis seed in early weeks of spring, it will continue through summer. Hence, you can expect its flowering stage in the fall. But again, it always depends on the variety of strain.

Take note that the flowering stage of outdoor and indoor cannabis plants is triggered once they are deprived of light.

  1. Knowing the Sex of the Plant Organs

In changing your plant’s light schedule, it is crucial to assure that there is no light entering the tent or room if you intend to grow indoors. A slight disruption leads to messing up the plant development. Thus, it can cause hermaphroditism or worse, no buds at all!

In the first weeks of cannabis flowering period, the plants usually grow vigorously and double in size quickly. If you did not train your plants, see to it that you get overhead to prevent the canopy from touching your grow lights. In addition, this is the best time to identify the sex of the marijuana plants.

In fact, it is so easy to know the difference between a female and a male organ among plants. Male cannabis plants do not grow bud. In fact, their pollen sacks will make the whole crop burst to pollinate female plants.

For female cannabis, you will notice the growth of pistils. The male counterparts grow some pollen sacks. So, you need to get rid of these plants as soon as possible. Pistils can be described as the elongated hair-like and tiny leaves. Pollen sacks are like balls. Your plants can grow both, a condition which is called hermaphroditism. If this happens, remove such plant immediately.

Check out the additional information provided below for more details on the flowering phase timeline of your cannabis plants.

  • Weeks 1 to 3 (The Stretch Phase)

As mentioned earlier, the first stage is the early flowering or “stretch phase” of a plant. It is the time you should be read since other plants have a tendency to grow extremely tall. Otherwise, you need to begin with training your cannabis plants. You can count on LST methods to prevent hurting the plants in this delicate phase.

  • Weeks 4 to 8

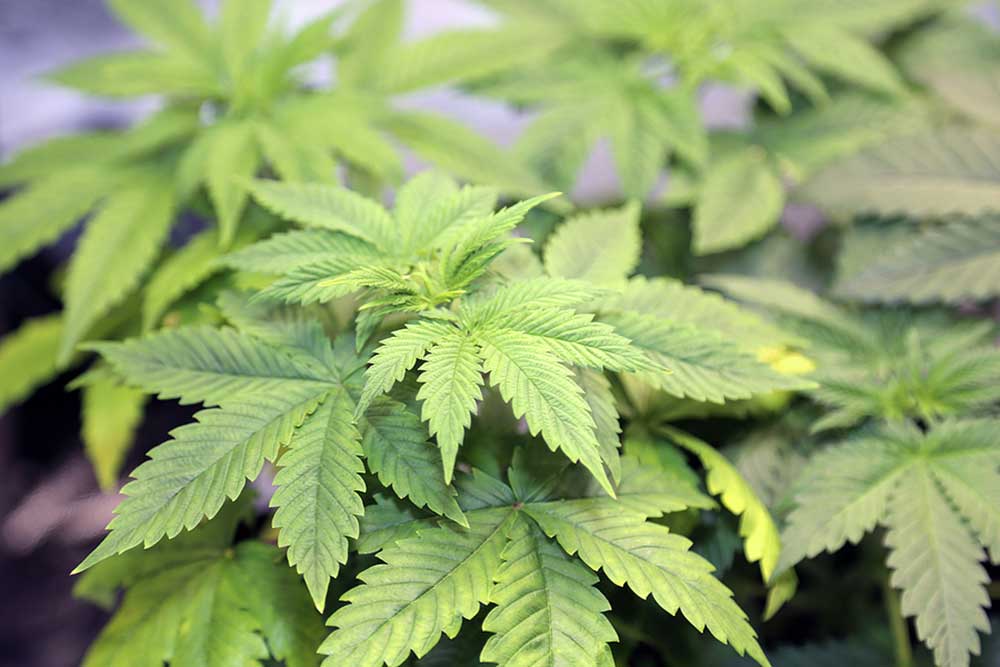
The week three of marijuana flowering stage gives you some signs like slow growth and production of small buds. In this process, the main focus of the plant is to gain energy to develop buds. Thus, do not worry if you notice discoloration and loss of leaves rapidly. You should be able to diagnose deficiencies and find the best remedy for it.

As a cannabis grower, you should know that too many nutrients burn your cannabis plants. It characterizes the production of yellowish, wilting and falling leaves. You can opt for organic solutions if possible.

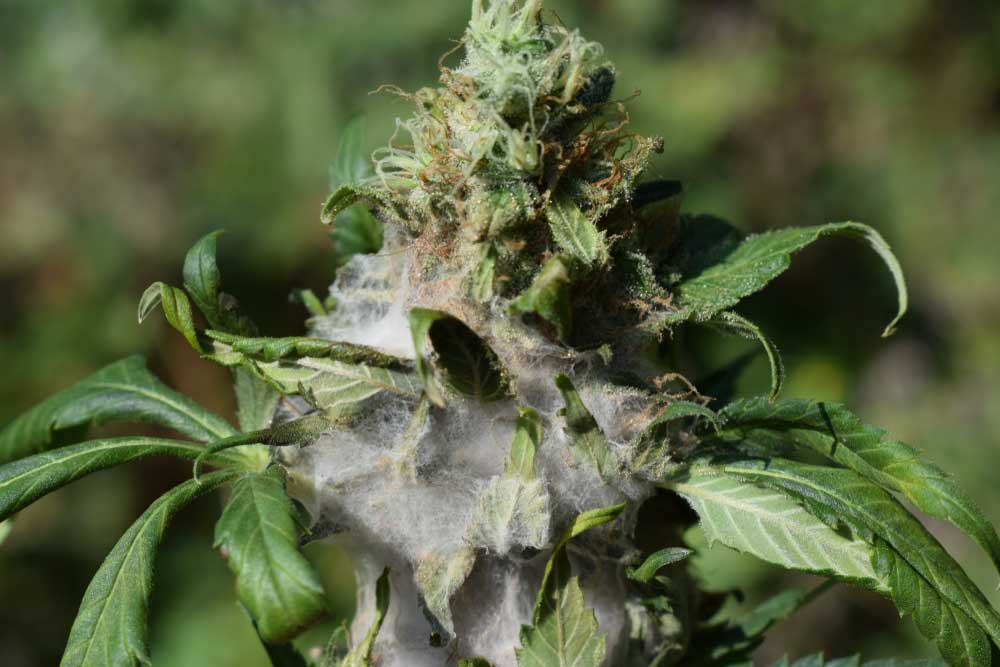
As the stage approaches weeks 7 to 8, the buds turn ripe and fat. This is also the part where you measure the temperature of the grow room and pH level to prevent bud problems like foxtailing. Foxtailing refers to the condition when the buds grow out on the other side of an older bud. Avoid touching or training your plant in this case unless it is close enough to grow lights. All you need to do is to tie it down gently.

  • Late Flowering Stage

In this stage, your plants are beyond eight weeks and you are certainly one step away from harvest period. You will begin seeing the buds overpowering the cannabis stench and covering the kolas. Now, it is your responsibility to make sure that everything comes according to plan until the harvest season. Be very cautious of major discoloration or any deficiencies.

Some Tips To Ponder on Flowering Stage for Cannabis

After acquiring basic to advanced information on cannabis flowering stage, it is time to learn about some tips from professional growers.

  • Cut dead branches and leaves only. In the first place, you might be tempted to cut out bigger branches and leaves. However, you should not forget that your cannabis plants need much health and power at the moment. You can bend your plants. Then, tie each of them down to develop a horizontal shape.
  • Leave the newly developed flowers. Do not taste them.
  • Maintain humidity at 70 percent. If you switch to a flowering light cycle, make sure you will not go back. Avoid exposing your cannabis plants to light particularly during the dark phase. This common error in flowering stage of marijuana growing has a great impact on the yield. If possible, grab a timer. This way, you will not forget when to turn the lights off or on.
  • Uninterrupted darkness is a secret to a successful flowering stage of plants. The darkness should be definite and not even a minute of light touching your plants at night.
  • Utilize a carbon-filtered air ventilation system. In some circumstances, plants develop a marijuana scent immediately. This implies that you need to provide the plant with an airflow system (carbon-filtered). This system is highly essential in maintaining and generating fresh air inside the grow room. This is the phase when Carbon Dioxide becomes a crucial element for the overall health and growth of the marijuana plants.
  • During the weeks four to six, the flowers seek more supplies of potassium and phosphorus. These are both vital for perfect bud development. They support the fruiting and flowering phases of the plants.
  • Do not overfeed the plants with nutrients. If so, the tip of your plant leaves will look like burned and dried.
  • Manage and support heavy buds for consistent light exposure. Consider holding the buds up close to the light if these are very heavy for the plant.
  • Some expert growers usually trim the leaves (defoliation). They do this to help their plants stay focused on producing buds. Make sure there is a sufficient amount of healthy leaves in the plants. Leaves serve as fuel to the plant system and bud development.
  • Your plants may love strong grow lights. However, you cannot get them spoiled by exposing them to high heat and light. If you are growing in a tent, the lights should be high enough (12 to 36 inches above the plant canopy). If you are using a higher wattage lamp such as 1000 Watts, you should place it at the top end portion. Meanwhile, a lower wattage lamp (around 250 Watts) must be at the lower end portion.
  • Watch your plants closely. As other pros say, “treat your plants like a lady”. Provide everything they need in order to bloom flowers abundantly. In some instances, your cannabis plants might turn yellowish. Do not get bothered if it happens as it is sometimes a part of the process. At week 8 to 10, your cannabis should be ready to harvest.

Perhaps, you have a lot of questions in mind about this cannabis flowering stage guideline. You must read and understand all the details provided in this article first. Then, you can ask some questions to experienced growers regarding more specific topics. Always research first before trying to grow strains with different varieties.

Cannabutter Brownies Recipe – Easy and Potent

What do you do with extra cannabis-infused butter? Aside from using this tasty and potent butter on dishes, you can actually use cannabutter to bake all kinds of bread and pastries including special pot brownies.

This is a weed brownie recipe that will make tasty and strong cannabutter brownies. Cannabutter has been around to spice up edibles but it is more commonly used to bake brownies with a zing.  Do you want your brownies to have a smooth yet potent high or do you like being taken to the moon and back? The key to making very strong weed brownies is to add as much cannabutter as you can.

Not only will you be able to get the most potent brownies but also the most delicious. Cannabutter is naturally a bit bitter but it can be enhanced with the type of chocolate recipe for brownies you will use. Chocolate will hide the bitterness in weed butter but won’t affect the potency of the cannabutter.

Also, water is added to the mixture to also filter out any other bad-tasting ingredient. Those who have tried cannabutter in brownies swear that this is one of the best they have ever had. Cannabutter is also better tasting than regular butter too and has the recreational and therapeutic effects that you won’t get from your usual brand.

The Easiest Cannabis Brownie Recipe

Ready-to-bake brownies or even no-bake brownies are now available in most supermarkets making it easier even for a five-year-old to make brownies. This recipe uses a commercially prepared brownie mix so everything else is already taken care of. All you need to do is to find the most potent cannabis butter you can find and add this to this recipe. Here is a very short list of all the things you need:

  • Brownie mix (commercially-prepared)
  • 1 cup (8 oz., or 2 sticks) of  cannabutter

Instructions

1. Prepare Your Oven

Heat your oven up to 350 degrees Fahrenheit.

2. Prepare the Commercially-available Brownie Mix Batter

Read the instructions found at the back of your brownie mix and follow this well. The mix will be ready to use but usually, it will indicate that you need to use oil. You will substitute oil with cannabutter.

How much cannabutter you will need to substitute a few tablespoons of oil?  You substitute a tablespoon of cannabutter for a tablespoon of oil. Simply melt the cannabutter in a small pan and once the butter is ready, take only the amount you need.

But as what we explained here, you can use more cannabutter if you want a more potent brownie. In this case, add cannabutter only a small amount at a time so your recipe won’t end up too greasy or too runny.

3. Line the Baking Pan with Cannabutter

Take any remaining butter and use this to line the pan. This will make it easier for the cooked brownie to slide right out from the pan after you are done.

4. Pour the Brownie Mix in the Pan

After lining the pan with butter, pour the brownie mixture in. Tap the pan slightly with a spatula to let the mixture settle evenly at the bottom. Doing so will also help remove any air pockets that may have developed as you poured the mixture from the bowl to the pan.

5. Bake Your Cannabutter Brownies

Place the pan in the middle portion of the oven. Bake according to the directions on the brownie box. Test the brownie if it’s ready using a toothpick.

6. Cool the Newly-baked Brownies

When your brownies are ready, remove these from the oven and place it on the counter. Let it stand for at least 20 minutes.

7. Cut the Brownies into Smaller Pieces

With a sharp knife, cut the brownies accordingly. This way, you will be able to dose on cannabutter brownies better.

Another Cannabis Brownie Recipe

This time we will make a brownie mix from scratch. If you want to make your own brownie mix and use fresh ingredients then this is the recipe for you. Take note that you can enjoy your brownies as is or you can make it festive and add frosting. Brownies with frosting mean that you will get a more potent variety since you will also be using cannabutter to make the frosting.

What You Will Need

  • 1 cup of cannabutter
  • 1 cup white sugar
  • 2 medium-sized eggs 
  • 1 teaspoon vanilla extract 
  • 1/3 cup unsweetened cocoa powder 
  • ½  cup all-purpose flour
  • ¼ teaspoon baking powder 
  • ¼  teaspoon salt 

Optional Frosting

  • 3 tablespoons softened cannabutter or regular butter
  • 3 tablespoons unsweetened cocoa powder
  • 1 tablespoon of honey 
  • 1 teaspoon vanilla extract
  • 1 cup confectioners’ sugar

Instructions

1. Prepare your oven

Preheat your oven to 350 degrees Fahrenheit.

2. Soften Cannabutter in a Small Saucepan

Melted cannabutter will substitute for oil.

3. Combine Eggs, Vanilla, and Sugar in the Saucepan

Combine eggs, sugar, and vanilla in the saucepan where you melted the cannabutter. Use a spatula to blend everything while the saucepan is still over low heat. Remove from heat when the cannabutter has completely melted. Wait till the mixture has warmed a bit and stir in the sugar, eggs, and 1 teaspoon of vanilla.

4. Mix all Ingredients in a Large Bowl

Place all the ingredients in a large mixing bowl. Use a spatula to combine the ingredients completely.

5. Grease an 8-inch Square Pan

Use a small amount of cannabutter to line a square pan. Spread the butter carefully. This will prevent the brownies from sticking to the sides of the pan so you can just slide it out of the pan as well.

6. Bake the Brownies

Bake the brownies inside preheated oven for 25 to 30 minutes. Bake this until all the sides start to pull away from the edge of the pain. Check if the center of the brownies is ready using a toothpick. 

How to Make the Frosting

1. Mix all the ingredients to make the frosting

Mix 3 tablespoons of softened canna butter, a dash of honey, a teaspoon of vanilla and 1 cup of confectioners’ sugar.

A spatula or a hand mixer should be used to mix all the ingredients. You need to mix this thoroughly to create a smooth, icing-like consistency.

2. Apply the Frosting on the Brownies

Use a spatula or a knife to apply the frosting on top and on the sides of the brownies.

Lighter Cannabis Brownie Recipe

If you don’t want fudge-like brownies and you want your brownies to have a softer, cake-like consistency, then this recipe for a lighter brownie recipe is for you. And when it comes to a fluffy, light cake, only tempting Devil’s Food cake mix will do. This cake recipe is available from the local supermarket and stores so you won’t have to look far.

What You Will Need

  • 1 pack of Devil’s Food Cake
  • 1 cup of cannabutter
  • ¾ cup evaporated milk
  • ½ cup chopped nuts, marshmallows or chocolate chips

Instructions

1. Prepare Your Oven

Preheat your oven to 350 degrees Fahrenheit.

2. Soften the Cannabutter

You will use cannabutter instead of oil in this recipe. Melt the cannabutter in a small pan under low heat.

3. Mix all the Brownies Ingredients

Combine milk, cake mixture and nuts/chocolate in a mixing bowl and use a spatula to mix everything together until you achieve a smooth consistency.

4. Line Your Baking Pan with Cannabutter

Spread the cannabutter in an ungreased 13″ x 9″ baking pan. Cannabutter will prevent the cake batter from sticking on the side of the pan and will also allow the baked brownies to slide out when it’s done.

5. Bake the Brownies in the Oven

Bake the brownies for about 10-15 minutes, or until the edges of the brownies start to pull away from the sides. The center should be set; you can test this using a toothpick.

6. Cool the Brownies

Place the brownies on the counter and let it cook for 15 to 20 minutes.

7. Cut the Brownies Accordingly when these are Cool

When the brownies are cool cut these according to your desired shape using a sharp knife. Doing so makes it easy to dose on your cannabutter brownies.  

How to Dose on Cannabis Brownies and Other Edibles

Dosing is a part of making cannabis edibles like brownies. You want to make a brownie that has enough kick to use recreationally and medicinally. Dosing prevents dangerous side effects as well.  

This is also important to determine the amount of cannabis material for every serving especially if you want to market your product. To do this, you need to employ a more efficient way to dose your cannabis edible.

Usually, it starts with how potent your cannabutter is which depends on the type of material used to make the butter (whether sativa or indica, the amount of THC or CBD in the strain). Every small detail matters especially if you are making a batch of medicinal brownies.

Consider that you used cannabutter with 100 mg potency and you used an entire block of this butter on the brownie mix. A block of cannabutter will yield twice the yield of the brownie mix in the first recipe.  Therefore it would be safe to say that you will be making a pan of brownies with 100 mg THC. Once the brownies are down, cut these in 10 pieces. You will be able to approximate that each piece will be at least 10 mg each.

What is the ideal dose of cannabis brownie? To get the ideal dose for cannabutter brownies, you can use cannabutter dosing calculators which are available online. Wake + Bake offer a handy online calculator for cannabis dosing. With this online calculator, you can dose your brownies and all kinds of marijuana-infused edibles.

How Long Before Cannabis Edibles Take Effect

An edible like a brownie can take 2-3 hours to take effect. There are a number of factors that can help you make an estimate as to when to expect the edible’s effects. If you have eaten a meal before consuming brownies it could take time to take effect.

When to take your next dose? You can always eat more edibles after you have experienced the effects of the initial dose.

How do you make sure that you are making a potent edible? Make sure that your raw material has the best quality. Therefore, if you want to bake potent brownies, you must learn how to make good quality cannabutter first.

Remember the Following When Making Cannabutter Brownies

Alternative to Cannabutter

Cannabutter is a basic ingredient in baking the best brownies but what happens if you don’t have any butter handy? While cannabutter is the ideal ingredient for baking and other creamy recipes, you may also use canna-oil.

Canna oil is oil that is manufactured from fresh cannabis added to canola, olive, coconut or other types of oil. If a recipe requires vegetable oil and you have cannabutter then you can use this. Just take the amount and use the equivalent amount in softened butter.

Butter is interchangeable with oil even in regular baking and cooking recipes. You simply have to follow instructions well and be prepared for food that has a richer smell, aroma, and taste than regular butter or oil when use cannabutter or canna-oil.

In Making Cannabis Brownies, Can You Sprinkle Dried Herbs in the Mixture?

If you are wondering if you want to take a short cut and make cannabis brownies by sprinkling herbs in the mixture, the answer is a big no. You cannot just sprinkle dried cannabis herbs in the batter in hopes that your brownies will be potent.

This will only lead to a bitter tasting brownie and not the kind of creamy and sweet brownie that you expect to get. The only way to make potent brownies is to use cannabutter or canna oil when you make the batter. Dried herbs will change the texture of the brownies too.

What About the Effects?

If you are new to eating cannabis edibles then you must start with a low dose. This is also true if you are new to taking a strain or you are new to consuming cannabis altogether. When eating cannabis edibles, you must always remember to be patient.

Patient goes a long way considering that the effects of cannabis can take a long time to take effect. Cannabis edibles coming from states that have received legalization have mandated dosage limits. In Colorado, the mandated dosage for commercial edibles is 10 milligrams of THC per serving.

The effects will depend on the type of strain used to make the edible and how the edible was manufactured. If you are eating brownies made of indica-dominant flower then you should expect a relaxing effect.

If you are eating an edible made from sativa then you can expect an energizing effect. It pays to know the different effects so you won’t have to worry about any side effect.  

How to Make Cannabutter

Your cannabutter’s quality and potency will all depend on the type of strain you will use to make it. Use a fine quality, potent strain then you will get cannabutter worthy of being used for baking and creating amazing types of food. Use low quality cannabis then your butter will just be as good as regular butter used for spreads and salads.

Where can you find good quality cannabis to make cannabutter? Purchase dry marijuana from reputable dealers or suppliers. Ask help from your budtender to find out what strain will work best when making cannabutter.

It is possible that your final product won’t taste and smell the same as the regular taste and smell of cannabis. This is because there are a lot of factors that can affect the characteristic of the end product. First of all, the type of butter you used can totally alter the taste of cannabis. There are so many types of butter: buttermilk, salted, organic, etc. and each of these has their own taste and smell.

Another thing that can alter the final taste and aroma of weed used in cannabutter are the ingredients used in baking and cooking. Chocolate, for instance, is available in different types as well. There are sweet, bitter, milk chocolates and chocolates laced with wine. These again can affect the final taste and aroma of the cannabis as well as the batch of brownies you will make.  

About Decarboxylation

To make marijuana-infused butter you need to apply heat to your flowers. Heat will activate the THC. This is known as decarboxylation which simply means to decarb heat in 240 degrees or higher temperatures. The chopped cannabis buds and even plant matter will be exposed to high heat using a regular oven.

The material is scattered on a baking sheet and then baked for 40 minutes. You must turn the dried cannabis a couple of times to ensure that these are cooked evenly. The cannabis plant material will soon become dry and crumbly when held. Remove from the oven and leave it on the counter to cool before use.

Making the Butter

  1. Boil a quart of water in a saucepan. You can vary the amount of water if you wish. As mentioned, water improves the taste and dilutes the cannabutter. Just make sure that marijuana is floating 1 ½ to 2 inches from the bottom of the pot before you start boiling the water.
  2. While the water is boiling, add the butter and let this melt. Mostly, around 4 sticks of butter for every ounce of marijuana are used. This translates to a half ounce of weed for 2 sticks of butter. But of course, you may change this if you want a more potent cannabutter. If you are using a very light strain, you can enhance the effects, flavor, and aroma of the butter by adding more weed.
  3. After the butter has completely melted, add the dried marijuana. Reduce heat before adding the cannabis. This way you are preserving the potency of your cannabutter. The dried marijuana should be stirred well so that these may fold into the melted butter evenly.
  4. Place the mixture in a low simmer and leave this to cook for three hours. This is cooking in very low heat to still preserve the potency of cannabis.
  5. The butter is ready when the top of the mix becomes shiny and thick.

Straining Your Cannabutter

  1. As the butter cooks prepare the bowl which will be used to hold the finished cannabutter product. Use a heatproof bowl or a container with a cover made of plastic to protect the cannabutter,
  2. Place a double layer of cheesecloth on top of the bowl and use an elastic or rubber band to secure the cloth over the bowl.  
  3. Strain the marijuana butter by passing the mixture through the cheesecloth. This material will be able to hold any plant material and impurity that wants to pass through.  
  4. After passing all the mixture through the cheesecloth, remove the elastic and pick up the material. Hold it from all four sides so you can squeeze all the remaining cannabutter from the mixture. Repeat this process as many times as you wish to get purer cannabutter.  
  5. When you are satisfied with the result let it cool for about an hour.
  6. Place the finished product in the fridge until the butter has become solid. This only means that the THC and other cannabinoids have attached to the butter. Leave this in the fridge at least overnight.
  7. Use a knife to pass around the edge of the container to remove the butter from the bowl or container. Lift the butter out and place it upside down on a plate. Remove the underside which is usually made of the cooking water. After doing this, you now have pure cannabutter that you can use for cooking and baking and on bread and other buttery treats.

Common Marijuana Plant Problems that You Should Know

Like any other agricultural product, growing cannabis also involve common problems that every grower should be aware of. Yes, cannabis growers, most especially first-timers, face difficulties growing marijuana because of nutrient issues, overwatering or underwatering, pests, and other issues.

It’s a good thing that marijuana plants are resilient, with innate capability to withstand harsh environments or invaders. When you’re faced with common cannabis plant problems, don’t panic. Assess the signs and make an analysis of what’s happening to your marijuana plants so you can take the appropriate course of actions. Let’s learn the most common marijuana plant problems now!

1. Watering Issues

Overwatering and underwatering are commonly experienced by novice cannabis growers. Watering issues may cause multiple symptoms. They can even cause stunted growth. The contributing factors to successful cannabis grow include adequate lighting, airflow, nutrients, and humidity. However, water is one of the crucial aspects to keep your marijuana plants happy, healthy, and strong.

Let’s check the signs of overwatering and underwatering so you’ll know when to act accordingly.

Overwatering Marijuana Plants

You might be worrying that your marijuana plants need a constant supply of water. However, it’s a pitfall that most novice usually falls into. Marijuana plants use their roots to breath air aside from uptaking water. So if the root system of your cannabis plants is constantly getting swamped, they’ll likely drown.

Signs of Overwatering

  • Drooping leaves
  • Leaves tend to curl and become firm (because they’re full of water)
  • A slow rate of growth or completely stopped (because of lack of oxygen to the root system)

How to Fix Overwatering

  • Water less often.
  • Check soil moisture. Wait for the topmost layer of the soil to look dry. You can also feel the soil or do a chopstick method to ensure that the soil is dry before you water again. Another test to test soil moisture is to put your index finger deep into the soil up to your knuckle. If it’s dry, you need to water your plants. Investing in a reliable moisture meter is also a good idea for accurate reading.
  • Each cannabis plant should have adequate drainage. Make sure that the water doesn’t build up too much in the bottom section of the containers or pots. Excess water should drain out of the pots enough to leave the soil moist for the root system but not waterlogged.

Underwatering Marijuana Plants

As the opposite of overwatering, underwatering occurs when you simply are unable to meet your cannabis plant’s demands. If your plants don’t get adequate water, their root system will start to dry up, leading to stunted growth and reduced yield.

Signs of Underwatering

  • Cannabis plants look lifeless and weak
  • Leaves wilt and look fragile
  • Leaves feel papery and brittle
  • Crispy soil or dry growing medium

How to Fix Underwatering

  • When the soil’s top inch has dried out, water you cannabis plants. Don’t leave it any longer or delay watering because it can lead to major problems, like nutrient deficiencies, leading to death.
  • Make sure that you use the correct sizes of pots at different stages of your cannabis plants’ growth and development. For instance, gro small seedlings in small pots to make sure they uptake enough water.
  • Check soil moisture before watering your cannabis plants.
  • Check water quality by testing the pH. It should be 7, which is the neutral water pH. Too high or too low pH can cause problems because the pH dictates how well your plants can absorb nutrients.
  • Use reverse osmosis filters to remove 95 to 99% of dissolved salts present in the water

2. Nutrient Burn

Novice growers usually encounter nutrient burn in growing cannabis plants. It is often a result of overzealous feeding of marijuana plants. It usually occurs when there’s a too much hydroponic solution that is applied, wherein the roots take more nutrients than what the cannabis plant can use. Nutrient burn also happens when the plants are cultivated in fresh compost manure as well as other plant mediums with too high nutrient levels.  Remember that cannabis plants don’t really need plenty of nutrients in all stages of development. Nutrient burn is caused by feeding cannabis plants with a too strong nutrient mix or fertilizing too frequently.

Signs of Nutrient Burn

  • Leaves appear brown
  • Leaves look crispy
  • Stunted growth
  • Burning starts at the tip of the leaves

How to Fix Nutrient Burn

  • Hold off feeding nutrients to your cannabis plants for a week or two when you begin to see the tell-tale signs of nutrient burn. It will allow flushing out a high quantity of nutrients.
  • Monitor water pH which reflects the capability of the root system to absorb nutrients.

3. Nitrogen Toxicity

Nitrogen toxicity may result in feeding your cannabis plants too much nitrogen. Nitrogen is a macronutrient that marijuana plants use to grow and survive. Most nutrient bottles have three numbers that are listed next to each other, like N-P-K ratios. They symbolize the three main macronutrients including Nitrogen, Phosphorus, and Potassium.

Signs of Nitrogen Toxicity

  • Leaves curl downwards
  • Leaves turn dark green

How to Fix Nitrogen Toxicity

  • Reduce the amount of nitrogen that is mixed into your nutrient feedings.

4. Powdery Mildew

White powdery mildew is usually a result of too high humidity in the grow room, accompanied with low or absence of airflow. It is one of the common fungi infestations you’ll encounter as a marijuana grower. In the long run, the powdery substance continues to spread to the other parts of the plants and produce more mildew like eating up your marijuana plants.

Signs of Powdery Mildew

  • White powdery substance on the leaves and other plant parts

How to Fix Powdery Mildew

  • You can kill the mildew by misting it with a mildew-eliminating spray.
  • Lower the humidity and increase the airflow in the indoor grow room to stop the mildew from coming back.

5. Bud Rot

Bud rot is caused by levels of high humidity accompanied by low airflow. It can also be caused by overwatering, which results in rotting of cannabis buds. The rotting starts from the inside, slowly turning brown and moldy.

Signs of Bud Rot

  • Buds turn brown and look moldy.
  • Eventually, the whole cannabis bud is ruined.

How to Fix Bud Rot

  • Increase the airflow in the grow room by using oscillating fans and ensure proper venting.
  • Lower the humidity in your indoor grow space.
  • Cut off all the infected buds.
  • After the infected buds are removed, pay close attention to other buds to ensure they’re not infected. Practice proper handwashing and good hygiene to avoid spreading the bud rot.

6. Fungus Gnats

Sciarid flies or fungus gnats are small flying insects with a 3 and 5mm size. These are small and dark-colored flies that usually appear and spread on the lower parts of cannabis plants. It also happens in the substrate. Fungus gnats feed on sugars, decomposing organic material, and molasses. High humidity and low light intensity make your cannabis plants susceptible to fungus gnats. Warm temperatures also predispose your plants to this condition.

Fungus gnats are common guests in indoor crops and greenhouses. Hydroponic systems are highly sensitive to sciarid flies. Organic substrates with excessive moisture make an excellent habitat for fungus gnats.

Female sciarid flies lay around 50 to 200 eggs in the substrate and hatch after 48 to 72 hours in favorable conditions. For the next 2 to 3 weeks, there are four different stages of development that larvae pass through. The propagation is fast enough, which highly depends on the environmental conditions.

Signs of Fungus Gnats

  • Stunted growth of cannabis plants
  • Fungal infection

How to Fix Fungus Gnats

  • Maintain moderate humidity in the grow room.
  • Avoid overwatering your cannabis plants.
  • Keep the top layer of the substrate dry to reduce the presence of insects.
  • Cover the substrate with mulch like vermiculite so adult females won’t lay eggs on the substrate top layer.
  • Apply neem flour to combat pests by pouring it on the substrate until it forms a thin layer to act as a seal.
  • Chemical insecticides are considered your least option because of health and environmental concerns.

7. Heat Stress

Heat stress also occurs when a cannabis plant is placed too close or directly to the heat lamp. Heat stress also refers to a form of stress on cannabis plants as a result of too high temperature in your grow room. The ideal temperature in the grow room should be close o 75 degrees Fahrenheit at all time. However, it reaches below 80 degrees Fahrenheit, the cannabis plant starts to slow down.

Signs of Heat Stress

  • As the temperature gets hotter, the fan leaves fingers will start to fold up or taco longways.
  • Yellowing or browning of the edges of the leaves that are closest to the light source.
  • Spots noticeable to the parts nearest to the heat source.

How to Fix Heat Stress

  • Heat stress is the easiest cannabis problem to solve. Lower the room temperature to the appropriate levels.
  • Reduce heat by adding a small fan that blows across the tops of your cannabis plants.
  • Adjust the heat lamp placement to eliminate the problem.
  • Vent out the hot air with the use of an exhaust fan to prevent heat stress and also treat its existence.

8. Fusarium

Fusarium is a genus of filamentous fungi living in the soil and may affect your cannabis plants. Most species are considered saprophytes, feeding on the debris of other soil organisms. Fusarium eventually develops as parasites, producing mycotoxins that can also affect humans causing skin infections. The colonization of fusarium takes place at the level of the soil, through the shallow roots or the stem, which moves all parts of the cannabis plant via the vascular bundles.

Signs of Fusarium

  • Rotting and lignificación of the stem base
  • Nutritional deficiency as manifested yellowing leaves
  • Root rot
  • Brown vascular bundles when the stem is cut
  • The Fusarium fungus blocks the vessels as a result of colonizing the xylematic tissues of cannabis plants. Because of the blockage, the leaves turn yellow and wilt.
  • Eventually, other parts of the plant are also affected, causing necrosis and in worst case cause death of the cannabis plant.

How to Fix Fusarium

  • Get rid of affected plants
  • Strict hygiene to prevent the problem from happening again

9. Aphids

Aphids affect marijuana growers around the world. Aphids are a common garden pest with detrimental effects on cannabis plants. They are small sap-sucking insects which are destructive on cultivated plants. Aphids vary in size from 1 to 10 mm. It can be green, white, red, or black in color with two whip-like antennae and tube-like structures referred to as cornicles.

In early spring, winged female aphids hatch, giving birth to female nymphs. Only within a few weeks, young aphids are born. The number of aphids rises dramatically in a relatively short period of time. Aphids develop as males and females, mating to produce overwintering eggs by the end of summer.

Signs of Aphids

  • You’ll see aphids on the stems and leaves of cannabis plants. The green varieties are harder to spot.
  • Aphids suck sap from cannabis plants and leave a thick and sticky substance referred to as honeydew, that promotes the growth of sooty and black mold.
  • The leaves curl, wilt or turn yellow.
  • Stunted plant growth.

How to Fix Aphids

  • Get rid of aphids by cleaning and pruning any infected areas.
  • Use the water-vinegar solution to kill remaining insects.
  • Introduce predatory insects like ladybugs.
  • Use essential oils.
  • Use organic insecticides.

10. Incorrect pH

Growing cannabis plants with the wrong pH level is a common reason why people experience cannabis plant issues. To prevent health problems, mix nutrients and water at the right pH. Remember that the pH level affects the absorption of nutrients by your cannabis plants. Invest in a reliable pH meter to ensure the water and soil has a neutral pH which is 7.

Conclusion

Growing cannabis is a tricky process, and there are so many things that can go wrong. Too little or too much water, heat, or fertilizer, mildew, mites, viruses, mold, issues with ozone exposure, fluctuations in pH, and nutrient deficiencies can jeopardize your yield and the quality of the final product. Keep these quick fixes in mind and research intensively if ever you encounter any of these common marijuana plant problems.

DIY Stealth Grow Box for Marijuana Guide

Indoor marijuana cultivation is regarded as the more popular choice among many cannabis growers today and yesterday. That is true even though marijuana use has become more popular and accepted in society today. More people in today’s society prefer indoor cannabis growing over outdoor. And there are good reasons why.

First of all, you can control the ideal growing conditions of a cannabis strain when they are grown indoors rather than outdoors, where you are a slave to whatever nature gives you. Second, indoor growing is a lot safer for your plants because they are not exposed to as many harmful elements. And third, cultivating indoors is stealthier.

Even though cannabis is becoming more popularly accepted by society and by laws, people will still prefer stealth growing over cultivating these plants out in the open. In that sense, any stealth indoor grower needs a good tool to use such as a grow box.

What is a Grow Box?

A grow box, as the name itself already implies, houses marijuana plants as they grow. They are made to protect the cannabis plants and to allow them to grow in a safe environment. These grow boxes are usually sold commercially as kits or as a whole but some growers actually construct their own ones right in their own homes.

These boxes are usually light and odor proof and have everything you need to produce healthy cannabis plants. This includes grow lights, ventilation, fans, temperature monitoring, and even hydroponics system.

Grow boxes are preferred over grow tents by a lot of cannabis growers even though they technically function the same way. The reason for such is that grow boxes are solid and rigid. In that sense, they provide more protection than grow tents because of their hard-walled structure and environment.

Depending on the size of your grow box, these containers can house several cannabis plants and are great for anyone looking to save up on indoor space. Imagine yourself purchasing a one-bedroom apartment for five to eight of your marijuana plants.

Why Use a Grow Box?

Now that you already know what a grow box is, there are several reasons for you to choose a grow box over any other types of housing structures such as growth tents. These are the advantage of using a grow box for your indoor cannabis operation:

1. They are Hard and Durable

One of the best reasons why you should choose a grow box over a grow tent or any other housing structure is that they are hard and durable. While the durability depends on the material you used for your DIY grow box or on where you purchased an entire grow box kit, you can be assured that the structure stays solid and rigid.

In comparison, grow tents are made out of fabric that is far from being as hard and as solid as the materials that make a good quality grow box. This means that your grow box will not only stand the test of time but will also be able to survive whatever the elements or a fortuitous even throws at it.

2. No Need to Assemble

The problem with grow tents is that you need to assemble them and figure out how to put everything together. You no longer have to worry about what part goes where and where the wires and the different fixtures need to go to. If assembling things is not your specialty, this can be a difficult task for you to do.

But, if you use a grow box, there is little to no assembly required. Your DIY grow box might have already been constructed out of an old used cabinet. In that sense, you no longer have to assemble the entire structure. You probably only need to put a few things together to complete the entire grow box. That is not the same as grow tents, which need to be constructed from top to bottom.

3. They Last Longer

Because they are not made out of fabric and are constructed out of durable materials, these grow boxes last for quite a long time. If you have a DIY grow box that was made out of good hardwood or was constructed from a cabinet, you can be assured that it will last just as long as your cabinet at home would. It will not be subject to as much wear and tear as the fabric that grow tents are made out of.

What this means for you is that you will be able to save up on expenses in the long run. One grow box will last for a very long time and will ensure that you do not have to purchase a new one every so often if the older ones get run down.

4. Better Fans and Ventilation

When you buy a grow box, they usually come with built-in fans. Most of these fans are made to be a lot quieter compared to the ones you see in grow tents. In that sense, they are generally better. And when it comes to ventilation, since grow boxes are solid, the exhaust windows work better and do not bend out of shape unlike grow tents.

5. They are Stealthier

Grow boxes are not as conspicuous as you might think they are. They look like any normal everyday box that can be found in most homes. Some look like mini refrigerators while others look like your regular filing cabinet. And, if you made your grow box out of a drawer, it will most likely look like an ordinary drawer as well.

On the other hand, a grow tent really does not look like it belongs in an ordinary household. It generally stands out and will attract unwanted attention. So, if your goal is to make your indoor cannabis operation as inconspicuous as possible, your best choice is a good stealthy grow box that you can make out of ordinary materials you can find at home.

Why Go for a DIY Grow Box?

By now, you probably are already convinced that going for a grow box is your best choice when it comes to growing your own cannabis plants at home. And, in that regard, you can either go for a commercially sold grow box or you can actually build your own one by yourself. Here are the reasons why we believe you should opt for a DIY grow box:

1. You Build it According to the Size You Want it to Be

Commercially sold grow boxes come in pre-made sizes that can fit all sorts of different types of cannabis strains. There are some that are made to be small for casual intermediate growers that are just starting out. And there are bigger grow boxes made for those who want to grow more cannabis plants.

While that normally is not a big problem, the issue here is that these sizes do not come in the exact dimensions you want them to be. You may want a grow box that is made exactly to your specifications due to different reasons such as the dimensions of the available space you have set for the grow box or the size of the cannabis plants you are planning to grow. That said, a DIY grow box might be the best for you in this case.

2. You Can Choose Whatever Components Your Grow Box Has

Pre-made grow boxes usually come with components such as exhaust fans, hydroponics system, temperature and moisture level monitoring systems, and grow lights. However, there are boxes that have more components than what you actually need. Or, in any other case, you may have components that are better than the ones in the pre-made commercially sold grow boxes. In such cases, it is better for you to go for a DIY grow box because you can control and choose the components you want to add

3. It is More Affordable for Starters

Commercially sold grow boxes are not the most affordable tools that a beginner grower can afford. It can be pretty heavy on the budget to start out with pre-made grow boxes especially if they come complete with all sorts of expensive components that beginner growers might not want to use yet. That said, building a grow box from scratch can be an affordable endeavor for beginners because you control the parts, materials, and components you want to build the box out of.

4. You Can Recycle or Repurpose Household Items

If you have that old filing cabinet or a drawer that are still in good shape, you may not want to throw them away just yet. Instead, you can repurpose those things and even recycle some other household items to build your own grow box. Since grow boxes are technically made to look like cabinets or drawers, why not use cabinets or drawers to build one instead? That way, you are hitting two birds with one stone because you do not have to start the structure from scratch and you also repurpose an item that is still very much usable.

Building Your Own Grow Box

1. The Most Important Components

  • Grow light – provides the light and the heat necessary in an enclosed grow box
  • Intake and exhaust fans – Fills the grow box with air and filters out the excess heat and also the stench out from your grow box
  • Pots and soil – your plants will grow in the pots and the soil
  • Others – humidity and temperature control systems and hydroponics systems are not essential but they can be really helpful if you are a more advanced type of cannabis grower

2. Size

The size of your grow box depends on how many plants you are planning to grow. For example, a grow box with a width and depth of about 3 x 3 is already enough to house nine cannabis plants. Of course, the bigger the box, the more plants you can grow. The ideal grow box should always be at least 62 inches high because some cannabis strains tend to grow tall enough.

If you have a cabinet that you think is already big enough to fit those dimensions, then you can simply use that instead of building from scratch. But, if you want to pick out the materials and create a grow box that fits specific dimensions, then it might be better for you to build one from the ground up. However, make sure that your grow box looks like an ordinary cabinet on the outside if you want to make sure it is as stealthy as possible.

3. Setting Up

Setting up a good grow box is actually easy as long as you have the components ready. Make sure that the lights are situated above. The distance between the lights and the grow box depends on the type of lights you use or the size of the lights. A standard 600W light might need to be about a foot and a half above the plants to make sure they do not get light burn. You can use a reflector to make sure that the lights go straight to the plants without dispersing all over the grow box.

Of course, the pots should be placed at the bottom of the grow box. You can build a catch basin below the pots so that you can easily collect the excess water from the plants without making a mess.

There should be an intake fan close to the plants so that they get enough air to thrive well inside an enclosed space. An exhaust fan should be placed near the heat source (the light) so that excess heat immediately gets filtered out of the grow box. The intake fan should be bigger than your exhaust fan so that not all of the air gets ventilated out of the grow box. Cut out holes big enough to contain both the intake fan and the exhaust fan.

The ballast for your lighting system should be placed outside the grow box so that you can easily turn them on or off without opening the entire box. Of course, both the lighting system and the fans should be connected to a power source outside the box.

There you have it. That is the basic structure of a standard stealthy grow box. As you move up in experience and as your budget increase, you can add more components to your grow box or you can build an even bigger one.

Growing Cannabis from Seeds Vs from Clones

After choosing your cannabis strains and secure space to where you will be growing your plants, you will have to proceed with the actual work and occupy the allotted space with your chosen marijuana plants. There is countless joy in flourishing your own choice of the cannabis plant.  Sustaining the plants would require diligence and endurance. A common enthusiasm can greatly bloom into a genuine dedication.

There are two available methods to begin the planting of the cannabis – using seeds or using clones. Perhaps you are asking yourself now, “How can I best start the growing of my plant?”

It is good to know that only the female cannabis is able to generate buds. The male cannabis does not generate buds and the existence of the male cannabis during the cycle of flowering can only lead to fertilized female cannabis which gives seeds. Hence, you will not like to put the male cannabis in your garden except if you intend to do the breeding.

Comparing Cannabis Seeds versus from Clones

Now if you have been contemplating in trying to grow cannabis plants for the first time, then you might have taken the initial step to transform a genuine cannabis aficionado. Being a first-time planter and grower, you are expected to make one primary decision before beginning your newfound endeavor. How do you want to do your plant growing – would you go for seeds or are you going to use clones? At this point in time, you might have not been aware that there are actually two methods for growing cannabis plants. Just like any other multiple selections out there, each has their good and bad sides. Thus, selecting for the best choice can relatively correspond between triumph and defeat. Here is some information that aims to discuss each strategy and probably this information will finally guide you on which method to use.

Growing Cannabis using Clones

Clone is done by cutting a portion of a mature cannabis plant so that it can be replanted, and eventually bear buds. You may think that growing a cannabis plant using clone is an easy task to do, but in reality, growing using clone can be more complicated compared to growing with seeds.

All plants are characteristically extremely exposed to various diseases like an infestation of bugs or fungus. When we say clone, it refers to the definite genetic image of a mother plant where the clone is taken from. Thus, if the mother plant had issues on health, there is a great chance for the cutting to suffer the same health issues. Normally, growers who are just starting to explore with this kind of endeavor do not have the knowledge yet on how to handle issues such as these, hence the plant can most likely die.

The state of the clone can present other hindrances. A newly cut clone requires plenty of affection and care, and if it is first replanted, the clone can be greatly receptive. A commencing duration of transplant jolt is to be anticipated. During this period, the clone will really need a very particular quantity of nutrients and light to nourish it throughout this stage. Failure of a transplant is very prevalent. New growers may encounter difficulty in keeping the young clones in good condition.

Another main issue in growing cannabis plant with clones is that they may be difficult to search. You will have to acquire a connection to a mother plant that is mature and then get the license of having it cut. In this particular case, how can you be sure of what kind of cannabis strain you will be using? You will remain clueless about this thing unless you finally put yourself ready for test it. Although there are clones that are available online, this option is a relatively dangerous option of purchasing plants. Shipping the clones can be dreadful for them, thus you are expected to receive the clone but in a weak state. Plants that are sold commercially are occasionally administered with fungicides or pesticides, and clones taken from these kinds of plants will most likely take in the same elements too.

The only concrete advantage of cloning for new growers is the fact that the plant is heretofore beyond ahead in progress that those cannabis seeds. Further, you can also look forward to definite yield earlier. If you do not see time as an issue, then this should not bother you at all. It commonly compresses the complete cycle of growing by around one month. Moreover, a lot of people attest their fun encounter while learning to grow cannabis plant starting its primitive stages.

Advantage of Clones:

  1. Consistent – Clone is the only method to keep a particular strain. This explains the numerous strains which are designated as ‘clone only’.

Disadvantages of Clones:

  1. Endurance – Put in mind that cannabis is known to be an annual plant. By illustrating it, the plant finishes the complete life cycle starting from the fertilization to generating of seeds within a year, and then eventually dies. Therefore, clones are characteristically unnatural. There is an extreme discussion whether the clones would eventually depreciate their endurance over a certain period of time, however, one thing is very certain – the health of the clone is very significant in keeping endurance.
  2. Access – Getting access to clones can be extremely hard if you are residing in a legal state. It will be critical to source the clones from a reputable garden to guarantee you obtain the kind of strain that you want. Moreover, a lot of restricted genetics are firmly held by particular grow circles.
  3. Pathogens – Another explanation why it is significant to acquire the clones from a reputable source is the danger of presenting the clones with occurring diseases and pests. This is enormously happening – as a matter of fact, the sharing of a clone is the top triggering factor of mold and pests among cannabis gardens.

Growing Marijuana in Coco Coir – A Comprehensive Guide

Growing your cannabis in coco coir is a great budding trend and an alternative to growing medium. Coco coir is an excellent growing medium for your marijuana plants. If you’re looking for the great benefits of hydro for faster growth and higher yield with the experience of soil cultivation, coco coir is your best option.  If you’re a novice grower, you’ll find coco coir cultivation easy to learn.

However, the coco coir most cannabis growers use comes in dehydrated bricks without instructions. That’s why you need a comprehensive guide to ensure you use coco coir correctly to obtain the best results. At the end of this guide, you’ll be able to start adding coco coir in your cannabis garden confidently. Are you ready to learn about coco coir cannabis cultivation? Let’s get started!

What is Coco Coir?

Yes, you’re right if you believe that coco coir comes from coconut husks. The fibers from the coconut husk are processed and recycled. Coconuts are mostly grown in Sri Lanka, India, and the Philippines. Coco coir is sold like soil in 50L sacks from grow shops, and readily available in coco bricks which are tightly compressed.

Coco coir is a fantastic growing medium for marijuana plants both outdoors and indoors. In fact, it started replacing peat moss in potting mixes. The pH level of coco coir is comparable to unfertilized soil (6.5 to 7.0). You can use it as a growing medium or mix it with soil to loosen the soil and resolve compaction. Coco coir makes a superb soil mix. You can mix it with 30% of airy amendments, like perlite. The environment is suitable for marijuana roots to survive because the coco coir provides the nutrients they need through the water.

Reasons Why You Should Use Coco Coir

1. Mimics Soil Cultivation

When growing cannabis in coco coir, you can treat it like you’re growing in soil. Because coco coir is considered a soilless growing medium, you’ll feel like actually growing your marijuana plants in soil. You can keep your cannabis plants in regular pots, and you just simply need to water your plants with nutrient water.

2. Nourishes the Root System

One major advantage of using coco coir is its capability to hold moisture and nutrients effectively. The root system of your cannabis plants can benefit from the lighter texture of coco coir because it holds more oxygen.

3. Prevents Underwatering

Say goodbye to underwatering with coco coir! Even if you’re out for a few days, your cannabis plants can survive with a coco coir medium. The coco fibers can hold more water than soil.

4. Environment-friendly

In the past, coco husk was only discarded and even burned in the landfills. Only a few gardeners utilize coco husks for agriculture purposes. Luckily, we are now more open-minded, resourceful, and concerned about our planet. Coco coir is slowly broken down and you can use it more than once. Coco coir is highly sustainable, unlike peat moss. You don’t have to replace coco coir every grow.

5. Doesn’t Attract Pests

Coco coir, unlike other growing medium, doesn’t attract pests that can affect your plants negatively. Growing marijuana in coco coir is less likely attacked by bugs or pests. 

6. Cannabis Plants Grow Fast

Growing directly through hydroponics can be complicated, most especially for a new grower. If you’re not comfortable using a hydroponic medium, you can still obtain the benefits of hydroponics with coco coir. As compared to growing cannabis in the soil, your plants will grow faster with coco coir. The reason is that nutrients are provided readily in the root system, making them more accessible. It only means that the roots do not have to look for nutrients, so it saves their energy and uses it to grow to be healthier and bushier.

Tips When Growing Marijuana in Coco Coir

1. Provide nutrients from the start. As an inert growing medium, coco coir has no inherent nutritional value. That’s why you need to provide nutrients throughout the grow. Monitoring pH is also a must because the pH level dictates the capability of the root system to absorb nutrients.

2. Use a Cal-Mag Supplement. Marijuana plants that are grown in coco coir need more calcium as compared to soil and other growing mediums. That is why a standard “Cal-Mag” supplement is highly recommended to ensure that your cannabis plants will get all the calcium and magnesium they need. Magnesium aids in the proper absorption of calcium.

3. It’s important to re-hydrate coco coir first because it comes in dry bricks. Pre-made mixes are also available with coco coir, which are specifically formulated for cannabis plants.

4. Mixing the coco coir with perlite is a good idea. It provides a sufficient amount of air and water for cannabis roots. It drains well so overwatering is avoided.

5. Iron is a micronutrient that is missing in coco coir, and iron deficiency may reduce your final harvest. Starting with coco specific nutrients is important so you won’t need to troubleshoot later.

6. Use less fertilizer because coco coir holds fertilizer effectively too.

What You’ll Need in This Tutorial

2 650 grams coco coir bricks

8 quarts bag of perlite (found in garden stores)

5-gallon bucket

10-gallon fabric container

Drain

Water

Preparation

You can run your fingernails on a bar of soap. The layer of soap will prevent the coco coir from getting stuck under your fingernails. It will save time and effort to clean your nails once you’re finished.

Step-by-Step Guide to Rehydrate Coco Coir

1. Gather all the materials you need and place them near your sink or tub.

2. The inside of the 5-gallon bucket should be lined with a fabric container, all the way to the top. It’s good to have enough extra so you can easily grab the top and lift it up later.

3. Add the first coco coir brick to the fabric container in the bucket.

4. The bucket is now filled with water until half full.

5. Before soaking the coco coir, adding a Cal-Mag supplement is beneficial to provide nourishment to the roots system. Supplementing the coco coir now will save you time and avoid issues later on.

6. Make sure that the water pH is 6.0 before soaking. You can use a pH meter to ensure an accurate result. It will ensure that your coco coir has the right pH range from the start. Remember that the pH level will reflect the capability of the roots to absorb nutrients and oxygen.

7. Wait until the coco coir is fully hydrated (about 8 to 10 minutes). There shouldn’t be hard parts left. To check, stick your hand on the coco coir. Make sure that the coco coir is soft all the way. You can use your hands to mix the slurry around and break up quickly if you are in a hurry. Some growers prefer to soak their coco coir longer, most especially if they are using pH-ed water. Also, they do it if the coco coir has been supplemented with Cal-Mag. It gives the coco coir more time to absorb the nutrients.

8. Pull the liner up and let the water drain. Allow the excess water to drain first, then place the fabric liner with the slurry on the ground or tub to allow the water to drain slowly.

9. Pour the half bag of perlite (8-quart) on top of the coco coir.

10. Now, it’s time to mix in the perlite with hands. Slowly mix everything. Also, check around the side because you will often find straight coco coir or pockets of perlite in this area. Stick your hands inside and mix everything until it looks even.

11. Fill the containers with cannabis potting mix. A single batch makes approximately 5 gallons of cannabis potting mix. It may appear soaking wet, but it will eventually dry in the fabric containers once you let a fan blow over them in the grow tent.

12. Repeat the steps for the second coco coir brick and the remaining half of the perlite bag.

13. You’re set! You can fill the rest of the fabric containers and solo cups for your marijuana seedlings. Cutting holes into the bottom of the solo cups will allow water to drain after you have watered your cannabis plants. Test it to ensure the water runs through the cup freely.

Step-by-Step Guide to Growing Marijuana in Coco Coir

It is now time to start growing since you already have your potting mix ready. Whenever you are using liquid nutrients, you need to test the pH so the roots of your cannabis plants will easily absorb nutrients. Invest in a reliable pH test kit. Give a full strength Cal-Mag in addition to your nutrients for two weeks at the start of your grow.

1. Germinate the cannabis seeds in Rapid Rooters for the best germination rate. Avoid soaking the coco coir in the solo cups. You can also plant the cannabis seeds directly in your ready coco coir.

2. When your marijuana seedlings grow their first set of serrated or real leaves, you can water them with nutrients (normal seedling strength). You can also add a Cal-Mag. Water the seedlings until you get 20% runoff from the bottom of the container or solo cups.

3. Maintain your cannabis seedlings. You can choose to plant directly your cannabis seedlings in their final container or solo cups. The seedlings should get plenty of light. However, make sure that the light is not too hot for your cannabis seedlings. To test, place your hands directly where your marijuana seedlings are and then wait for 10 seconds. If it feels too hot, it’s the same with your plants.

4. When watering your cannabis plants, continue to give water until 10 to 30% extra water runs out of the bottom. Do not water until the top inch starts to feel dry to touch. Make sure that the water should drain freely. If not, you need to fix it right away. Make a room for new seedlings by digging small holes in the coco containers. Use a butter knife and slide it carefully around the solo cups’ edges.

5. Once the seedlings have 3 sets of leaves, you need to transplant them to bigger containers if you started with solo cups.

6. Maintain your vegetative marijuana plants until they’re half your final desired size. You can start training during this stage. Make sure to wait for a few days after transplantation so the plants won’t get stressed before training. If you’re growing auto-flowering cannabis plants from seed, do not use any training techniques besides low-stress training or LST.

7. Watch out for nitrogen deficiency. It is characterized by yellowing of the lower leaves starting from the bottom upwards. Your cannabis plants need a higher amount of nutrients. The yellow leaves won’t turn green again, so don’t expect it to happen when treating nutrient deficiency.

8. Once your plants reach half your desired size, switch them to the flowering phase. Autoflowering plants will automatically switch to the flowering stage after 3 weeks, which lasts until the plant is about reaches the half your desired final size.

9. When switching to the flowering phase, change the light schedule to 12 hours of light and 12 hours of uninterrupted darkness. You don’t have to do anything with autoflowering plants.

10. Maintain the flowering plants until they’re ready to harvest. Control humidity and temperature. Watch your cannabis plants closely to expose all bud sites to adequate light.

11. Harvest the cannabis buds when they are ready.

Coco coir generally drains better, keeping the roots oxygenated as compared to standard peat-based mediums. From the start, a light nutrient solution should be applied similarly to a hydro crop. The pH should be 6.0 to ensure proper coco coir nutrient absorption for the root system of your cannabis plants. You can add 30% perlite to the mix for the best results. You can use premixed coco coir which is available in online grow stores. One way to ensure a successful coco coir cultivation is to buy a high-quality coco coir brick. Enjoy growing your cannabis in coco coir today!

How Long Does It Take to Grow Weed?

Possibly the most common question that most first-time cannabis growers ask is “How long does it take to grow weed?” This is indeed very common for anyone anticipating his first harvest! Whether you are planning to grow weed for recreation or cultivating medical cannabis for a particular medical condition, you need to know how long you need to grow any strain. Understanding the life span of a strain will help you provide the ideal growing condition that you must provide to your precious cannabis plants.

How Long Will Weed Grow?

Different cannabis strains, different growing times. As there are many different strains of weed, each one of this is unique and has different growing requirements. Some types of weed like regular cannabis may take around 10 to 12 weeks to flower and hence around 12 or more weeks till the buds are ready for harvest. According to Wikipedia under cannabis cultivation, the flowering phase could even take up to 22 weeks in pure indica strains while pure sativas have shorter flowering times.

Autoflowering cannabis plants, on the other hand, will flower in just 7 to 9 weeks or even less. This means that your buds will be ripe and ready for harvest in 8 or more weeks. This quick flowering times and improved harvest times makes auto cannabis plants more popular compared to its regular counterparts.

When it comes to the type of strain, some strains will be ready for harvest in just 9 weeks while there are some strains ready for harvest in about 12 or more weeks. These fast-growing strains are therefore more preferred by people who grow cannabis as a business opportunity.

And of course, the manner in which cannabis grows also makes a difference. Growers agree that when you grow cannabis indoors, you will be able to monitor your plants’ growth better and you will be able to manipulate its growth and development. This could enhance growth and make cannabis growing rate faster. Meanwhile, outdoor growing can take time because you are leaving everything to nature. Consider that there are times when there is no rain and the climate becomes dry; any kind of change in the environment can directly or indirectly affect the rate of growth of your cannabis plants.  

This is why if you want to grow cannabis faster or at least grow healthier plants; you must follow an indoor growing system.

Growing Cannabis Indoors

If you live in a place where growing cannabis is not legal then there is no reason to grow your crops outdoors and risk being reported. You really need to grow cannabis indoors.

Indoor growing is just like being a God. You will provide everything that your plants would need from food to sunlight and doing so, improves your plants’ chances of survival. Indoor growing makes it easier and a lot faster to grow cannabis.

Growing your cannabis indoors will let protect your plants and take good care of these from seedling to harvesting. You will be able to check on their well-being and be able to handle various cannabis plant conditions like under watering and nutrient deficiencies at once.

It’s hard work but even experts agree that it is really worth it.  Those that have grown or cultivated cannabis before say that it is really quite easy to grow weed even when you are at home. This is because the cannabis plant is very resilient and can be grown indoors or outdoors, even in any climate.

What You Need to Grow Cannabis Indoors

  • Cannabis Seeds
  • Grow lights (LED or HPS lamps)
  • 2 small fans (USB fans)
  • Grow tent or a grow cabinet
  • Pots and growing medium (soil, coco coir, etc.)
  • Carbon filters
  • Fertilizer

You can buy these individually or you can purchase a complete set. All of these are available in an online marijuana growing site or you can find these from local cannabis growing supplies store.

Indoor Growing Using Grow Cabinets or Tent

Grow tents and grow cabinets may be commercially made or homemade. If you are a first-time grower it’s smart to rely on ready-made growing cabinets that already has everything you need to start growing indoors.

Grow tents that you can buy online have complete equipment such as lighting, fans, pots, and reflective material so you can immediately grow cannabis at home. Inside a grow tent, you will be able to start growing your plants from the seedling stage to harvest time. This could take anywhere from three weeks to four weeks depending on the strain you are growing.

If the growing environment is right and you have viable seeds, it could take around a week for seeds to sprout and about two to three weeks when our seedlings are ready to be transplanted to the growing medium.

Characteristics of a Good Growing Tent

A good growing tent must keep the light in so with efficient reflective panels on the inside panels of the cabinet. This must have a good door to prevent light from escaping. An efficient grow tent must be able to keep the strong smell in with an exhaust system removing the smell. Finally, growing tents should be easy to set up. This must have a locking mechanism to keep your plants safe especially when harvest time nears.

Equipment You Need to Grow Your Weed Fast Indoors

All About Your Grow Lights

Indoors, your plants will be completely dependent on indoor lighting to grow and make more yields. As a general rule, the better your lights are, the more your plants will grow and give you more yields. And when it comes to the best grow lights for your plants, the most popular currently are HID lamps, CMH lamps and LED grow lamps.

But despite these different types, many growers still prefer LED lamps. This is the most updated type of grow lights because it is energy efficient. You can purchase LED bulbs in different wattages yet the only downside to this is that this is the most expensive type of lighting.

Growers agree that what you spend on bulbs can be earned from the savings you’ll get in the future. It would take time to change the bulbs too so you will again save money from this. There are about two different kinds of LED light bulbs: cheap and expensive ones. Cheap bulbs may have dim and inefficient lighting and can grow only small buds. Having inefficient lighting will only slow down plant growth.

Meanwhile, top quality and expensive bulbs will provide radiant and good continuous lighting to your plants. This can produce the best harvest and even improve growing times.  

Giving Your Plants the Best Ventilation

To grow healthy cannabis plants faster, your plants need fresh air. You need to maintain the ideal humidity inside your grow tent or grow space because poor ventilation may result in the growth of molds, pests, and mildew.

One of the most common types of mold is powdery mildew. This can plague cannabis gardens, slow down plant growth and even completely ruin harvests. It is quite difficult to spot this because these can affect plant leaves from the underside. Most growers discover this when it’s too late making their buds useless. To prevent this you must maintain the ideal humidity levels inside and indoor growing area.  

Getting the Best Growing Mix for Faster Growth

There are different kinds of pot for growing cannabis but the most common nowadays is a fabric pot. These pots are recommended by cannabis growers because this will let excess water drain from the soil mix and the roots of your plants. Fabric pots also allow oxygen to reach the roots better and this can also help plants grow quicker than usual.  

When looking for the right soil mix, select a sandy clayey type of soil because this soil is great in absorbing more water and nutrients to benefit your plants. This kind of soil will also let excess nutrients and water drain from the roots of the plants.

Use Only the Best Viable Marijuana Seeds

After considering and buying your growing lights and fans, you must now consider the marijuana seeds that you will grow. The key to growing good and healthy plants is to buy good quality seeds. Rely on reputable online or local seedbanks.

And although there are bag seeds or seeds with unknown origins, it is not recommended to grow these. Bag seeds are less likely to grow well simply because you don’t really know what you need to do. Different strains have different needs; always keep this in mind.

How to Germinate Your Seeds

The most important question at this stage is how many seeds do you need to grow? The answer depends on the size of your growing area and whether you are using regular cannabis seeds or autoflowering seeds.

If you are growing regular cannabis seeds, you might get 50% females and 50% males. You must sow more seeds to be able to compensate for the possible male plants that may grow. You will remove males later so make sure to grow more plants as possible.

If you are cultivating feminized cannabis seeds then you have more control over the number of plans you will grow. It is recommended that you sow 12 seeds for a growing area that can fit 10 plants. The only thing you may need to keep watch at this time are seeds that are non-viable. So as much as possible, grow as many seeds as you can in case you get more duds or non-viable seeds.

Jiffy Pellets for Faster Germination Rates

One factor that affects the speed of growth of most cannabis plants is the seed’s germination rate. Basically, older seeds take a long time to germinate (may take longer than a week!) while younger or fresher seeds may only take two to five days.

To make germination easier use Jiffy pellets. These are easy to use and are more preferred than other growing mediums. The first step is to soak these pellets overnight in water so that these will absorb more water and double their size.

In the morning remove the pellets in water and then drain these until you get a damp pellet. Get one pellet and place one seed inside. Usually, there is a small hole or slot in the middle of the pellet where you just pop the seed in.

The pellet contains all the nutrients that a seedling needs to grow therefore you don’t need to feed seedlings any fertilizer at this time.  

Time to Place Seedlings in the Grow Cabinet or Tent

Your seeds will sprout at around 5 days inside the grow pellet. Once you are done placing every seed inside a Jiffy pellet, place these inside the grow tent or cabinet. Power on the grow lights and place these over the pellets for 18 hrs.

Power off your lights for about 6 hrs. to give your plants nighttime environment. Cannabis plants naturally need darkness because roots grow in the dark. You can use a timer to automatically power on and off the grow lights.

Roots will soon sprout from the pellets and new leaves will escape from the pellet. These are signs that the plants are now ready to be placed in their new home. A larger and more spacious container.

Transplanting seedlings to a larger container is very stressful to the young plant. This is why there is no need to remove the seeds from inside the pellet. Just pop the entire plant/pellet in the soil. Dig a small hole in the middle of the soil, about two to three inches deep. This is where you will place the pellet.

Place more soil to cover the seedling and compress this lighting using your hands. Place this underneath strong grow lights. Water your newly transplanted seedlings at least once to two times a week. As much as possible, water only when the soil is dry; never when the soil is wet or damp to avoid mold and mildew growth. There should be water draining from the holes under the pot. This means that excess water has been removed from the soil.  

Determining the Time it Takes for Weed to Grow in Different Stages

The Cannabis Vegetative Stage “5th day to 4th week”

There are two stages of a cannabis plant’s life: the vegetative or growing phase and the flowering phase. During the vegetative stage, the plants veg out or grow taller and wider and this according to the type of strain you are growing.

During the vegetative stage, you must maintain a specific growing schedule. Follow 18 hours light and 6 hours darkness for 3.5 weeks. A 24 hour light schedule is also recommended but this can be very costly. So instead of a 24 hour light schedule, start with an 18/6 schedule to ease energy costs.

The Cannabis Flowering Stage “3.5 to 4th week”

The flowering stage is exactly what it is. It is the time when cannabis plants (male and female plants) show off their flowers. It will take around 3.5 weeks for your plants to finish growing and after this, it will cease growing and concentrate all its energy to make buds.

So at this time, you can switch from an 18/6 light/dark schedule to a 12/ 12 schedule. At this time, flowers will start to show. The first buds will appear about 4 weeks when your plants are under 12/12 light/dark schedule.

Both males and female plants will create buds but these are quite different from each other especially in appearance. Females will grow buds with whitish hairs sticking out from them. Male plants, on the other hand, will grow balls and sacs that have pollen inside.

At this point, it is very dangerous to leave male plants in your growing area because males will pollinate the female plants. When you remove male plants your females will now be able to grow unfertilized marijuana buds that we all know and love.  

Fertilizer for Cannabis for Faster Plant Growth

There are fertilizer mixes especially made for cannabis plants. These are ready-made products which can be used either for the vegetative phase or flowering phase. You must use the right fertilizer on your plants to avoid any nutritional problems.

Should you use commercially-prepared mixes or a homemade plant food mix? If you are new to feeding your plants, a commercially-prepared product will reduce costly feeding mistakes. You can buy these in most online or local garden supplies stores.

Get Faster Harvests and Better Yields with Autoflowering Feminized Marijuana

Expert growers say that if you want to simplify the growing process for weed, you need to invest in top quality autoflowering seeds. These seeds are simply seeds that were created to flower without changing the plant’s light cycles.  With this kind of seed, you can grow cannabis without worrying about male plants.

Getting to Know Autoflowering Cannabis Seeds

Autoflowering cannabis seeds are seeds that can speed up the growth of your plants. Autos will flower in just 7 to 9 weeks. At this rate, you can have your plants ready for harvest earlier.

Auto seeds will also flower no matter what light schedule you put your plants in. Most growers and breeders say that autoflowering cannabis is the best for novice growers because these are very easy to grow. And whether you are growing recreational or medicinal reasons, it is definitely easier to grow autoflowering cannabis seeds than regular seeds.

The Origin of Autoflowering Cannabis

Autoflowering seeds were initially spotted in the near-frozen parts of northern Eurasia. This is a harsh place to grow cannabis however cannabis plants are very robust. Cannabis stains are mixed with a strain called Cannabis ruderalis.

This plant does not wait for warm weather which sativa and indica strains need to grow flowers. These plants will flower according to its own internal growth schedule and this is not the amount of light that it gets every day.  

Why Use Autoflowering Feminized Cannabis Seeds?

Autoflowering seeds have a very short life span and therefore grow faster than other strains. You can even grow two outdoor crops in a year as long as you provide the best growing environment for your plants.

If you are growing autoflowering cannabis indoors, plants will fully mature as quick as 9 to 10 weeks. And depending on the strain, you may even get auto plants that are resilient to many types of diseases, mold, and mildew.

Anyone new to growing cannabis can start cultivating their first crops with autoflowering seeds. Not only will you be able to harvest early but you will be free from common worries of growing marijuana plants.

Giving Your Autoflowering Cannabis Plants the Right Amount of Light

Autoflowering plants have higher cannabinoid content without the need to expose your plants to intense lighting. Regular marijuana strains will require strict monitoring of the light intensity and light periods as well as dark periods. Cannabis seeds use light to create flowers because these seeds are based on the amount of light that the plants receive.  

With autoflowering seeds, it’s a different story. These plants will complete their life cycle without the need to place these under alternating 12 hours of light and 12 hours of darkness. Autoflowering plants will even be able to handle light pollution and therefore is a good option for growers who live in places with short summers.

The Ideal Light for Faster Better yields for Auto Plants

Is there a kind of growing light for cultivating autoflowering seeds? It is recommended that you use a strong lighting option like HPS or LED lamps. These produce intense and even lighting that will be able to improve growth and yields.

HPS is high-intensity lighting that is very bright and very hot. This is very effective in supporting faster and healthier plant growth but can leave a hole in your pocket. On the other hand, LED lighting will provide intense light without high electricity bills. LED bulbs also last longer or will burn longer compared to other lamps, therefore, it will take a long time before you need to replace this.    

Cultivating Fast-growing auto Cannabis Plants

Autoflowering seeds are perfect for novice users. The common factors that affect regular growth of sativa and indica plants are avoided when you grow autoflowering feminized seeds. With autos, there is no need to provide good lighting so that your plants will flower plus there is no need to grow more plants and remove male plants.

When it comes to the ideal growing environment, autoflowering cannabis seeds require an environment between 75 and 86 degrees. Marijuana plants can grow in warmer or colder temperatures, however, as the climate becomes warmer, it is more likely the plant will grow faster and reach its full growth size.  Why do cannabis plants grow well in warmer climates? Because warm air contains more water vapor which is perfect for your plants. Reducing humidity will help you control mold growth as well. If you grow cannabis plants in a growing room or cabinet you can check on your plants regularly and monitor these constantly as well. You must also consider reducing the temperature ten degrees at “night” or when your plants are at the dark period. Never reduce more than ten degrees because this can harm your plant and result in smaller plants and very little yields.

Simple and Easy Growing

Aside from these factors, autoflowering cannabis seeds are really simple to grow. You just have to ensure that your plants get a lot of light, water and maintain the ideal growing temperature. As your plants reach the end of the growth cycle, you need to prepare it the same way that you prepare regular plants.

Feeding your autoflowering plants fertilizer mixes is sometimes not recommended. These plants are already in such stress to flower at a particular time and any mistake in feeding could be drastic to your plants.

As much as possible test your soil first or test pH of the soil that you intend to use to grow your plants. Feed your plants the correct nutrients according to the stage of development of your plants. During the growing stage, your plants require more nitrogen to develop healthier and more leaves, stems and thicker roots. But during the flowering stage, fertilizer should have higher potassium and phosphorous to boost yields and have lower nitrogen content. Your plants will now grow flowers so these won’t need nitrogen anymore.

Just like regular plants, it is recommended that you use commercially-prepared nutrients or fertilizer to prevent very costly mistakes. You may also want to use nutrients ideal for autoflowering plants only so be sure to specify this when shopping for the right nutrient mix.

How to Purchase Autoflowering Cannabis Seeds

You need to make sure that the autoflowering seeds that you buy from a local or online seed bank are really what they are. So to be sure and to avoid any worries, buy only from reputable seed banks. This way, you will be confident that you are buying healthy viable seeds that will grow into healthy, high-yielding autoflowering plants.

How to Care for Marijuana Seedlings

Marijuana seedlings are greatly fragile and therefore should be guarded by all means. But how can you strengthen the young seedlings in order for them to grow into healthy high-producing plants? If you like to enjoy an optimum harvest once the growing phase ends, then it is important that you place proper care on your marijuana seedlings on every stage of its life. Some growers have the tendency of only putting their care and focus to their plants one the harvest season is already near approaching. Conceivably, the most significant phase in the life of marijuana, the phase of a seedling is the moment when the plants are ultimately defenseless. A hearty phase of plant seedling can signify a powerful groundwork for the vegetation phase as well as the blooming growth in the latter part. How can make sure that your plants can grow successfully with endurance?

Understanding the Basic Concepts of Seedlings

Seedlings take place when some procedures occur at the start of the marijuana’s life. The moment the seed is planted flourishingly, it breaks up into two as its bud develops right from the husk. The tail vegetates earthward, plunging deep-seated into the ground until it created sufficient edge to develop higher ground too. The husk which possesses the two halves of the marijuana seeds will crop up from the soil and penetrate solar energy in order to release chlorophyll. What is left in the growth of your plant carries on from there? This is how the stage of the seedling is being illustrated.

The growth of the leaf of an immature seedling starts through sucker leaves. Sucker leaves are known to be the initial two leaves which appear during the period by which the seed has broken up into two. Next to the coming out of the sucker leaves appear two three-lobed leaves, that develop, that shoot out on the center of the sucker leaves. After which, you will find five-lobed leaves. Lastly, you will see the common seven-lobed leaves which are well recognized and conveniently pointed out as the leaf of the marijuana. The entire new leaves from there on will be characterized with seven lobes.

Safekeeping the Seedlings

Given the fact that the marijuana plants are in their most defenseless stage during the phase of seedling, it is the ultimate significance that you go far and wide to ensure and keep their safety. You may consider it as a form of an investment – it will be your investment for the forthcoming stage of vegetation, and also for your final harvest. The protection of the seedlings is minimally referring to the danger of them being found, but it is more of them encountering and handling other kinds of dangers.

Rodents, insects, and other types of pests have a special attraction for the seedlings. They would be very happy to eat them! Hence it will be best if you can use some kind of home to throw these pests away. You can make use of some dome or see-through bubble to carry out the plot. A lot of growers find the comfort of constructing these homes by themselves through the use of transparent plastic bottles which they cut in two and utilize the lower portion to be put over every seedling. Never miss the idea of cutting holes to obtain appropriate ventilation. The dome that you would like to create can potentially guard the young marijuana plants against the pests. It will also guard the plant against the danger of sudden frost, acting as an efficient insulator.

As the seedlings demand guarding and protection against some things, they also require plenty of other factors, such as water and sunlight. The soil surrounding the seedlings must be moistened all the time. Further, plenty of sunlight is also needed. The dilemma or comfort of acquiring these requirements may rely on your exact location. Climates situated further north have a shorter period of spring days, thus sunlight is expected to be lesser. If the seedlings fail to get sufficient sunlight, they shall start extending crossways until they grow too tall that they can no longer stay erect. Hence, you must do everything to prevent this thing from happening.

With this justification, a lot of growers choose to grow their marijuana seeds in an indoor environment. You can refer to artificial lights in order to supply the seedlings with the kind of nutrition which is required to keep them healthy, durable start. This, certainly, also brings the difficulty of having to transplant your plant latter. It is really important that you contemplate first your options before you finally make up your mind and decide which one to choose.

Watering the Seedlings

Well, the most occurring problem with watering the seedlings is overwatering. This often happens especially if you are just new to this endeavor. In this situation, the volume of water is actually not the real problem. Instead, the issue is the insufficient oxygen caused by a huge volume of water. This usually happens among plants which are being grown in containers. The easiest way of recognizing the manifestation of overwatering is the dropping of leaves. If you see this kind of manifestation, then you are expected to act on it immediately.

How Can You Resolve the Problem of Overwatering?

A lot of growers are amazed to find out that overwatering happens most normally if they are vegetating small plants in huge containers. This is what likely can happen – with a huge container and small plant, growers are allured to supply the container with the highest volume of water that the container is capable of holding. This leads to overwatering.

To stop this thing from happening, you have to see to it that the seedlings are grown in containers that are suited to their size. There is a perfect time of moving them to a larger container – wait some time until it grows enough. However, if you have already grown your plants and then realized that you have wrongly planted them in larger containers, then simply concentrate your plant watering on a little radius surrounding the stem of the plant. Pause until you notice the top inch portion of the soil gets dry again, and then you can water again.

Skilled growers will have arrays of pot sizes available for the different life stages of their marijuana plants. This frequently covers to growers who like to have their plants grown in containers during the entire season, instead of moving them out to an outdoor site.

But what happens if your container is too small for your seedling? In this situation, the seedlings are most probably turn “root bound”. This means that the roots will create an underground obstruction right in the circumference of the outside portion of the cup. This will stop the water from running out outside just as it is expected to do. The “root bound” plant shall encounter all kinds of issues, thus you must prevent this thing from happening.

Another issue that can occur to lead to overwatering is the improper container drainage of your seedling. You have to make sure that holes were created in the bottom portion of the container. It is also important that the holes are large enough to provide access to water for escape through. If drainage is not installed, the issue of overwatering can go to the extent of threatening the life of the plant. To prevent this, it will be best if you use the kind of soil that is able to drain properly. Do not use soil that is so much clay-based. If you notice issues on drainage, use perlite in order to boost the oxygen that is present in the soil, and lower watering until the plant returns to its normal condition.

How Can You Resolve the Problem of Underwatering?

The issue of underwatering, though not a common problem, can also lead to calamitous effects on the seedling. The problem of underwatering can be determined with the manifestation of drooping which underwatered plants illustrate. Underwatering happens when growers recompense and trigger the contradicting problem.

To sum up the requirements of water for the marijuana seedling, the roots demand constant water access. Just as when any roots of the plants penetrate water, the said water shall be delivered to the plant and is adrift through the process of transpiration of the leaves. Because the transpiration process is unceasing, if the seedlings will not acquire passage to sufficient water to help it, there is a tendency for serious issues to occur.

One method of determining the issue of underwatering is to check the soil whether it really keeps apart from the container. Soil will really separate from the container if underwatered because it is too dry. You must be particularly involved when watering the plants if the soil that you are using is fortified with nutrients, since the result of underwatering when placed with nutrients can be ultimate.

Good thing underwatering can be simply transposed if caught in time. All you have to do is to provide the plants with more volume of water. If you can do it so, the plants are expected to throw in again in just a short period of time.

Nutrients Needed for Seedlings

Feeding the seedlings with nutrients is also something you need to do with care. The expansion of nutrient toxicity is a critical and implicitly ruinous issue for immature marijuana plants. If the seedlings are being grown in soil that is filled with nutrients, then it will be helpful if you indemnify for it through adding more amount of water. Generally, it is not a brilliant idea to provide young seedlings excessive in the form of nutrients. You can also use a potting mix in top quality to do this scheme, even in the absence of additional nutrients, until the seedlings reach a few weeks of age.

On the spectrum’s opposing party, there is also a possibility of giving the seedlings lesser than they require. This is known as a nutrient deficiency. You will know if the plant is being affected with nutrient deficiency once the leaves start folding and become yellow. Eventually, these leaves will fall off. Hence, it is significant to make sure that the marijuana plants possess just the right amount of nutrients all through their life stages, particularly if they consume their soil. Plants that are grown without the use of soil also need nutrients.

Additional accomplish of nutrient problems in the seedling can be the unbalanced pH level. Unbalanced pH level can actually hinder the plants from penetrating the proper volume of nutrients, regardless if those nutrients are enriched within the ground.

The Temperature for the Seedlings

Generally, the most ideal temperature in growing hearty seedlings is at seventy-three degrees Fahrenheit. Temperatures that go beyond that will lead to the snug of the leaves. And if the leaves really snug, you can still rescue the situation by simply reducing the heat, or perhaps transferring the lamp more distant from the marijuana plants. When mixed with underwatering, this can have an extreme injury to the young plants.

Recommended Lights for the Seedlings

For seeds that are germinated indoor, you can place the seedlings below the lighting of a fluorescent. Fluorescent lights are energy efficient and they also do not make too much in the form of excessive heat. For safe placement, situate the light within two to four inches distance from the plants. Execute seedling lights with a gap of eighteen hours of light, and six hours of dark.

For outdoor-germinated seeds, you will be relying on the sunlight. Overall, you will not exceed the limit of sunlight for your plants except if you disregard the other factors for their maintenance. If the seedlings are starting to grow slender and taller, this signifies that they are elongating to catch more amount of light – which means that they do not possess sufficient as it is. You must understand that if you notice your plants elongating, then a problem is existing. The plants must have strong and durable stems to help the vegetation and flowering stages during the latter period. If the seedlings start to elongate, you can try curving back the stem to push them to reconstruct the parts which have curved and torn, thus heading to a generally stronger stem. If it will be doable for you, give the plants more amount of light to prevent this issue collectively.

How to Clone a Weed Plant

There are two ways to grow a cannabis plant. One, you can grow almost all strains of cannabis from seeds. Second, you can grow some cannabis plants using clones or cuttings. Growing from seeds is the most traditional but some strains are not available in seed form anymore. This is why some cannabis growers resort to using cuttings to grow plants. But not all plants may be cloned so consider this information when choosing the strain you want to clone.

Why use clones

Clones take the short cut to grow healthy cannabis. You no longer have to deal with germinating your seeds and going through the tough yet very crucial seedling phase. Many experienced growers agree that this is the most important part of every cannabis grows. If you fail during the germination and the seedling phase, your yields will greatly reduce and your plants won’t be as healthy as they are.

Remember the strain you love to consume over and over again? With cloning, you will be able to preserve the flavor, taste, and aroma that you love about this strain. With cloning, you can get the same plant, its appearance, the recreational effects and the medicinal effects that you crave for.

But a word of warning, cloning can only go as far as a number of generations. The genetics of a parent plant will eventually change due to an overproduction of hormones. This is why you need to make sure that the parent plant is in good health and is ready to provide you with good clones.

Things you will need for cloning

You need the following to clone cannabis plants

  • A healthy parent plant

You need a healthy parent to grow healthy clones. Healthy plants are essentially plants that don’t have any growth issues. These plants grow new leaves and stem almost daily during the growing phase. These plants are also free from pests and molds.

Parent plants are also still in their growing phase or vegetative phase. These should be actively growing so these could be at around three or four weeks into the growing phase.

  • A sharp or preferably new razor blade

You need a sharp blade or preferably a new blade so this will cut well. Avoid using scissors to cut your clone plants because these can crush the stem and cause more damage. Remember that cutting clones is stressful for any plant and you should give your plants as little stress as possible.

  • Growing medium, we prefer you use peat cubes at this stage

Although you can use a variety of growing mediums for your plant, it would be a good idea to start peat cubes. Why peat cubes?

Peat cubes are easy to use and you can easily transfer your peat cube-grown plants to a long-term, permanent growing medium after it has matured. Peat cubes are very cheap and are so easy to use. This will be discussed more in the cloning instructions below.

Another popular growing medium is Rockwool. This is similar to peat cubes but the cubes start out as very hard cubes. These should be immersed in water overnight to increase in size before use.  

  • Cloning powder or gel (optional)

You may or may not use cloning gels or powders. This is actually made of hormones that will stimulate the growth of the clones. This is available from online gardening stores or you can purchase this from a local garden shop.

  • A clean and sterile area for cutting

You need a clean and tidy working area. As much as possible, the area should be sterilized because you will be cutting your plants and exposing it to bacteria that cause plant diseases. Use soap and water to clean the area and dry with a soft, clean cloth afterwards. Use 70% isopropyl alcohol to disinfect the area. This will be enough to clean and sanitize your working area for cloning.

  • A humidity dome

This is available from gardening shops and online cannabis growing shops. This is basically a large dome where you will place your cannabis clones. Inside, the temperature and humidity inside the humidity dome are strictly controlled with an electronic system.

State of the art humidity domes are now available, with the ability to hold more clones and will be able to fine-tune temperature and humidity. You can also use this to grow all kinds of plants even herbs, vegetables, and fruits.

  • Intense grow lights

When it comes to grow lights, there are a few types that you can use. The most common are LED and CFL lamps. There are different advantages and disadvantages of each type of lamp.

LEDs are known to be the most efficient. These are brighter, will last longer and are cost-effective since it costs less to use LED lamps than other forms of lighting. The downside of using LED lamps is that it is very expensive. But the cost can be easily augmented since it will take a long time before you replace your bulbs.

CFL lamps are also very popular because these are available in different wattages and tints. These are inexpensive but are not as bright as LEDs.

  • Protective gear

As you create a clean and sterile environment where you will cut clones, you also need to protect your plants from microorganisms that you may give to your plants. Wash your hands thoroughly and use isopropyl alcohol to sterilize your plants. You may also use gloves when handling your plants.

  • Water

You need clean and safe water for your plants. As much as possible use distilled water or bottled water at this time. This will avoid any problems with pH as well as any nutrient imbalance.

The Steps to Clone Cannabis Plants

There are a number of ways you can clone your cannabis plants. You can do this in water, soil and in Rockwool. These are time-tested methods that you can actually do yourself. These can be done at home using the materials indicated above.  

No matter what method you choose, work in a sterile environment because dirt and dust will ruin the quality of your work. Treat our cannabis clones with TLC. These need the best care to grow into healthy, well-adjusted and high-yielding cannabis plants that will grow lovely resinous flowers.

Cloning Cannabis in Rockwool

Cloning in Rockwool is a very popular one of the most popular methods. It’s quick and easy and gives very favorable results.

  1. Soak Rockwool cubes in water for about two hours

This will make the Rockwool fatter and will expand many times its size. Use water that is pH balance at 5.5.

A word of warning for Rockwool users: Rockwool cubes are very popular but this material starts out as very dry and can irritate your respiratory system and your eyes if the tiny bits reach your eyes and nose. Be sure to wear a face mask and gloves when working with Rockwool.

  1. Prepare your clones

After soaking the Rockwool in water for two hours, remove these and let these drain. Take a cutting and remove almost all its leaves except for the ones that are found at the top. This is done to stimulate the plant to start growing roots.  

  1. Dip the tips of t the clones in cloning gel or cloning powder

Take one clone cutting and hold it gently along its body and then dip the bottom tip in cloning gel or powder. Some growers even double dip: they dip the tip in cloning gel and then dip this again in cloning powder.

  1. Place the clone in a Rockwool cube

Take a Rockwool cube and locate the small hole or section for the clone. Place the clone inside, carefully place the tip (the section that was dipped in cloning gel) inside the cube.

  1. Place your cubes under bright grow lights

When your cubes are ready, place these under intense growing lamps. Your clones should receive at least 18 hours of light in a day. A CFL bulb is recommended for cloning using Rockwool pellets. Clones should be kept at a temperature between 72-75 degrees. When you maintain this growing condition, your clones will finally grow roots in just 7 to12 days.

  1. Use a humidity dome

To ensure success, you might want to consider placing your plants inside a humidity dome that provides the best growing environment that is conducive to root development. Your clones will stay in this dome till the time it grows roots.

  1. Transfer in a growing medium

After growing more roots or complex root systems and you can see more new leaves, it’s time to transfer your plants in a growing medium. You may use soil, coco coir or grow your plants in hydroponics.

Cloning Weed in Soil

Cloning in soil is the most common way of growing cannabis clones. With this method, there is no time wasted because you will already cultivate your plants in its final growing container. But if you still want to grow in a smaller container like a party cup, you may still can; although you may risk stressing your plant when you transfer to a larger growing container.

Small young plants especially clones can be prone to stress, therefore, you must handle these carefully. There are many reasons why your plants can become stressed and one of these is transplanting from one growing container to another.  This is why most growers that cultivate in soil start growing their young plants in soil in their final containers.

  1. Take the cutting from the mother plant.

Cut the clone from the mother plant. Use a sharp blade and cut the clone at a 45-degree angle.

  1. Remove any mature leaves from the stalk of your clone.

Removing mature leaves should be done to stimulate the cutting to grow roots. Leave only the leaves at the tips of the cutting.

  1. Dip the end of the cutting in water and then in cloning gel or powder.

You must move quickly after removing mature leaves. Dip the tip in water and then in cloning gel. You may triple dip to ensure early growth of the clone roots; dip once in water then in cloning gel and finally in cloning powder.

  1. Place growing soil in growing containers.

Use the best soil for growing cannabis plants: sandy-clayey soil. This type of soil is porous but will absorb water and nutrients better. It will remove excess water and nutrients too. Make sure that your container has adequate drainage from the bottom. Water the soil until you see water runoff from the hole at the bottom of the container. Wait till the soil is moist before placing the clone.

  1. Stick the clone in the soil.

As soon as the soil is moist you may now stick the clone into the soil. For soils that come with nutrients flush this with pHed water to prevent any nutrient imbalance. Clones don’t need to be fed at this early stage so just water your plants twice or three times a week. When all the growing conditions are met, your clones will grow roots at around 7 days.

Cloning cannabis in water

Aside from Rockwool and soil, you can cultivate clones in water until these grow roots. This is very easy to do and most growers that use this technique agree that it is very effective and will support root growth in clones faster than most methods. You will use clean, pHed water for this method. This will ensure that your plants grow without suffering from nutrient imbalances.

  1. Take cuttings from the parent plant.

Cut the clones in a 45-degree angle using a sharp blade. Doing so improves the surface area of the stem to efficiently take in water and nutrients.

Remove the mature leaves at the lower part of the cutting. Just leave the leaves that are located at the tip.

  1. Place water in a tall container.

Use clean pHed water for your clones. Use a tall and large container that will fit all the clones or cuttings you have taken from the parent plant.

  1. Replace water that has evaporated from the container.

It may take up to 7 days for your plants to develop roots and during this time, water from the plants will have evaporated. Replace this and never let the container be without water. Roots will soon appear on the 7th day onwards. When this happens, it’s time to transfer your plants to a better growing medium, soil, coco coir or grow this in hydro.

Growing and maintaining your mother plant

Thanks to a healthy and well-developed mother plant, you have clones that will grow into young cannabis plants soon. It is therefore very important to ensure the health of your parent plant so you can harvest more clones in the future.

A mother plant is simply a cannabis plant that has been cultivated to remain in the vegetative phase. How is this so? This is done by constant trimming of the large fan leaves and pretty much most of the plant’s parts. This way, the plant still thinks that it is in the vegetative phase and it still needs to grow more leaves and stems.

To maintain the health of the mother plant you must have at least three or more plants. This way, a plant can rest and recuperate while you still have other plants to harvest from.

Having a collection of healthy mother plants is essential because you cannot clone the same plant over and over again. Doing so can hurt the genetics of your mother plant leading to the growth of weak plants with many different health issues. Your plants can also develop mutations as a result of tireless cloning.

The mother plant deserves a good area in your growing space where it can relax and recuperate after harvest of clones. Keep it under 18 or more hours of light every day to initiate the growing cycle. You may use a separate tent or growing cabinet for your plants if possible.

Stop feeding nutrients to the mother plant for at least a few days before harvesting clones. This reduces nutrient overload in clones as they are transferred to a new growing environment like peat cubes, Rockwool cubes, and soil.

Is it Better to Grow Plants from Seeds or from Clones?

The taproot in plants grown in seeds is a huge advantage. Growers will be able to cultivate strong, resilient and healthier plants when they grow these from seeds rather than from clones. The taproot makes a lot of difference to keep a plant healthy and able to take in nutrients for growth and development.

The taproot also helps plants adjust to weather extremes which are mostly true for plants grown outdoors. Cloning is faster and cost-efficient when it comes to leapfrogging the seedling phase of the plant. Growers don’t need to spend much on growing supplies to grow more plants and there is no need to bother with germination as well.

How to Germinate Weed Seeds: The Definitive Guide

Germinating weed seeds refer to the process of making your seeds sprout, that is when white, little tendrils pop out of the seeds.

Your marijuana cultivation project usually starts with this process. It could be challenging if you are not familiar with the method just yet.

To help you out, read through this guide and learn more about the water soaking + paper towel germination method as the best way to germinate cannabis seeds.

Cannabis Seed Germination – Cup of Water + Paper Towel Germination Method

Image result for how to germinate weed seeds Cup of Water + Paper Towel Germination Method

Image Source

The cup of water + paper towel germination method is a tested way to germinate cannabis seeds. In this guide, we will discuss this process in detail.

Reminders

Before starting the germination process, it is best to prepare everything that you need, including your workspace. Make sure that all the tools are cleaned accordingly. This is to make sure that cross contamination is avoided. Also, it is important to ensure that all necessary materials are available.

Preparing a checklist would also help. Make sure that you have the following:

  • A glass/cup
  • A plate
  • Tweezers
  • Bottled Spring Water/Distilled Water
  • Absorbent Kitchen Paper Towels

For the water, make sure that you only use bottled spring water or distilled water. Boiling water does not help either. It only kills the germs but does not necessarily remove impurities.

For the absorbent kitchen paper towels, use the really absorbent ones, not Kleneex tissue.

Optional Step

To further encourage the seeds to start germinating, you may do light scuffing of the seeds. This can be done using fine sandpaper, or even an emery board. You may also opt to shake the seeds inside a pill bottle. This process will enable the outer shell to loosen it. At the same time, the water will be able to penetrate easier, thus starting the germination process accordingly, and earlier.

Fill a glass with water, leaving it to stagnate inside a room with a temperature higher than room temperature, specifically between 20 to 25 degrees Celsius.

Place the seeds into the glass and observe them as they float. Allow the seeds to soak for about 12 to 18 hours. Take note that the process of soaking the seeds is the most important step.

After soaking the seeds, check each of them, tapping gently with your finger. You may even see the seeds sinking to the bottom.

You may observe the seed shell cracking, with a small, white root starting to appear. This is the signal that the germination process now is starting. You may wonder how long to leave seeds in water. Leaving them for 14 to 18 hours is fine. Still, it is just fine if the shell has not yet cracked towards the end of this time period.

Take note that it is not advisable to soak your seeds in the cup for more than 18 hours. Also, the tap roots should be allowed to grow to a length reaching 3 cm to 1 inch.

Preparations

Image Source

After seeing the seeds crack open, with white root forming, you can start using two or more paper towels in order to make a thick, folded layer on top of the plate. Using distilled rainwater, make sure to moisten the paper towels enough for them to be damp, but not soaking wet. If there is any excess water, make sure to drain them.

After 14 to 18 hours of soaking the paper towel, place the cannabis seeds between the two folded paper towels. Give enough space for the seeds in order to prevent the tangling of the new taproots.

The germination plate should be stored in a closed, dark space, but make sure to keep the layers moist. This can be done by dripping water at least every 5 to 12 hours. They just need to be kept wet, but not soaked.

Another thing that needs to be taken seriously is to make sure that the paper towels do not dry out. They need to stay moist. This may have to be given more depending on the humidity levels of the environment. This means the need to regularly check the dampness of the towels throughout the process.

Also, the plate with the completed germination should be placed away from direct sunlight. Rather, it should be placed on a heat source, a warm appliance perhaps, in order to help the seeds to absorb more water. The room temperature should stay at 21 to 29.4 degrees Celsius. With enough darkness, moisture, and warmth, better results are encouraged.

Important Notes

Image Source

It is very important to check the paper towels and the cannabis seeds at least twice or thrice a day for every 24 hours. During this period, make sure that you do not touch the seeds. Ensure that there is a proper moisture level in the towels, and wait for the taproots to surface.

If there is a need to touch the cannabis seeds, using tweezers is recommended. Take extra care in moving the seeds because they are so fragile at this stage that they can be damaged quite easily when transplanted or transported. The taproots should be especially untouched.

When the taproots reach about ¼ inch or ½ inch in length, the process of germination is now complete. The cannabis seeds are now ready for transplanting into the soil, with the taproot facing down.

Most of the seeds will begin germination within just 24 to 48 hours. However, there are some seeds that may take as long as a period of 7 days, mostly depending on the strain. So long as the directions mentioned above are followed, then you can expect up to 80% success in germination. This method has been designed to replicate the actual process that the seeds usually go through when grown in a natural environment.

Germinating Cannabis Seeds – Summary

Image Source

Before you start with germinating seeds, there are certain things that you need to take into consideration as something very important. For example, it is recommended by expert growers to use only bottled spring water.

With this said, you can now proceed with the process in germinating marijuana seeds.

Step 1: Prepare Your Seeds. First, place your seeds in a cup. Make sure that the water is at room temperature. This should be done for 14 to 18 hours. Since the seeds normally float, you can sink the seeds to the bottom of the cup using your fingers.

If you notice that some of the seeds do not sink, do not worry. This is just fine. It also does not matter at this point whether the seeds start cracking or remain uncracked. It is also advised not to PH your water, use water coming from a well, or use reverse osmosis.

Image result for paper towel germination cannabis prepare your seeds

Image Source

Step 2: Get two pieces of thick paper towels and place them on top of a dinner plate.

Step 3: Pour the seeds together with the water on the paper towel. Afterwards, fold the towel over the cannabis seeds to cover. Drain any excess water. This is a vital step to ensure that the seeds could feel air, moisture, and heat simultaneously.

Avoid putting the seeds in a drawer, cupboard, as well as other small, closed spaces. Doing this will only pose more difficulties for the seeds to crack and open.

Step 4: The seeds will start to crack open at this time. You will see a taproot beginning to develop. With this, you can allow the taproot to grow half a centimeter to three-quarters of an inch before you transplant the seeds.

C:\Users\Eva Mansueto\AppData\Local\Microsoft\Windows\INetCache\Content.MSO\D84BEA3C.tmp

Image Source

Note that the number of days in which the seeds will germinate may depend on the type of strain of the seeds that you are trying to grow. Still, it may take between 2 to 7 days to crack open.

At this point, it is recommended to use only plain soil for plotting. Avoid using nutrients on the soil, especially during the first three weeks of growing.

It is important to avoid covering the plate using another plate, a ziplock bag or plastic wrap. Doing so will only stop the free flow of oxygen as the weed seeds also require airflow, warmth, and moisture.

Possible Reasons for Germination Failure

C:\Users\Eva Mansueto\AppData\Local\Microsoft\Windows\INetCache\Content.MSO\93A74C72.tmp

Image Source

Since there is still a percentage of failure during the germination process, it is best to know what the possible reasons are.

  • The seeds should be allowed to sit on the paper towels for about 14 to 18 hours. If you fail to do so, perhaps removing them earlier, then the seeds will fail to germinate as the seeds were not soaked in the cup of water long enough.
  • Another reason for failure is if the paper towels end up either being too wet or too dry. The seeds could drown, or dehydrated.
  • The seeds can also die if the temperature in the place where you are placing them is too hot. This could also be the same if the temperature is too cold.
  • Avoid suffocating the seeds in plastic. Seeds also need air to breathe.
  • There is a possibility of failed germination if you are using tap water. Tap water often has too many impurities.

Emergency Germination

In such a case that your seeds end up failing to germinate, the reason is most likely due to lack of water. To save the process, make sure to drop the seeds in a cup of distilled water, leaving them right there until you start seeing a tap root surfacing. When it does, you can then start with the paper towel method until you notice that the tap root reaches ½ inch long.

Planting Your Germinated Weed Seeds

C:\Users\Eva Mansueto\AppData\Local\Microsoft\Windows\INetCache\Content.MSO\8FF3D550.tmp

Image Source

After seeing that the cannabis seeds have finally sprouted, it is very important to plant them right away. At this point, it is very important to make sure that you do not touch the taproots using your finger. If you do, the seed may still survive, but damage to the root may slow down or even stunt the growth of the seedling right from the start.

Plant with the Root Down

When you plant the seeds, do so in a way that the white root faces downward. The root should be about a knuckle deep into the growing medium. The top, on the other hand, should be just beneath the surface of the medium. Keep in mind that while the success rate of the paper towel germination method is high, there will be instances wherein you will lose a seed. Keep in mind that most of the time it has nothing to do with how you did it.

Within the first few weeks of germination, you may notice that some seeds start germinating right away, while others may take longer. There are a number of reasons behind this, ranging from the age of the seed to the temperature, and several others. Usually, the amount of time does not have to do with the health of the plants in the long run.

Once the seeds are planted safely, you can now start turning on your grow light. The heat that comes from the light source will also improve the germination rate, and it can also help the seedlings to open their leaves.

If there is a need to transplant the seeds from one pot to another, avoid doing so until you notice that they are already established well, and have at least a couple sets of nodes, or leaves. As suggested by some growers, planting the seedlings in a peat pot or solo cup is a good option so that they can just cut the cup away for easier transplanting.

Keep in mind, however, that moving the seedlings a lot may stress the plant, even stunting their growth. Too much of this stress can even cause your plant to die. Therefore, it is best to plan right from the start so that you can easily plant your seeds after germination without having to move them around a lot.