605+ Cannabis Strains over 20 Breeders worldwide.

Toll Free: +1 (800) 805-7835

Cannabis Expert Guide to Cloning Autoflowers

You may have heard that autoflowers can’t be cloned. It may be a shame as it is an efficient and economical way of cultivating Cannabis. 

Some people said that it might cause stress to the mother plant, and it can slow down development. It may happen as cutting on the stem is made. So these are the concerns of some people when it comes to cloning autoflowers.

Can you guess if it’s just a myth or not at all? Well, this article will show the real deal about this matter.

Cloning Cannabis Plants

The process of cloning Cannabis plants is quite interesting. It would start by getting a ‘cutting’ from the chosen mother plant to produce a new plant. The newborn plant would retain the genetics of the mother plant. 

Therefore, cloning is the process that would let growers preserve the genetics of the strains with characteristics that they admire. Some of them attract you to its flavor, and some would let you depend on them due to their effects.

Cloning also economically attracts growers as they don’t need to keep on buying Cannabis seeds. As long as they maintain the robust health of the mother plant, they can just get some cuttings to create a homogeneous version of the strain that you desire. 

While there are benefits from this process, there may be a possible downside to this. Some view some limitations when it is applied to cloning autoflowers. 

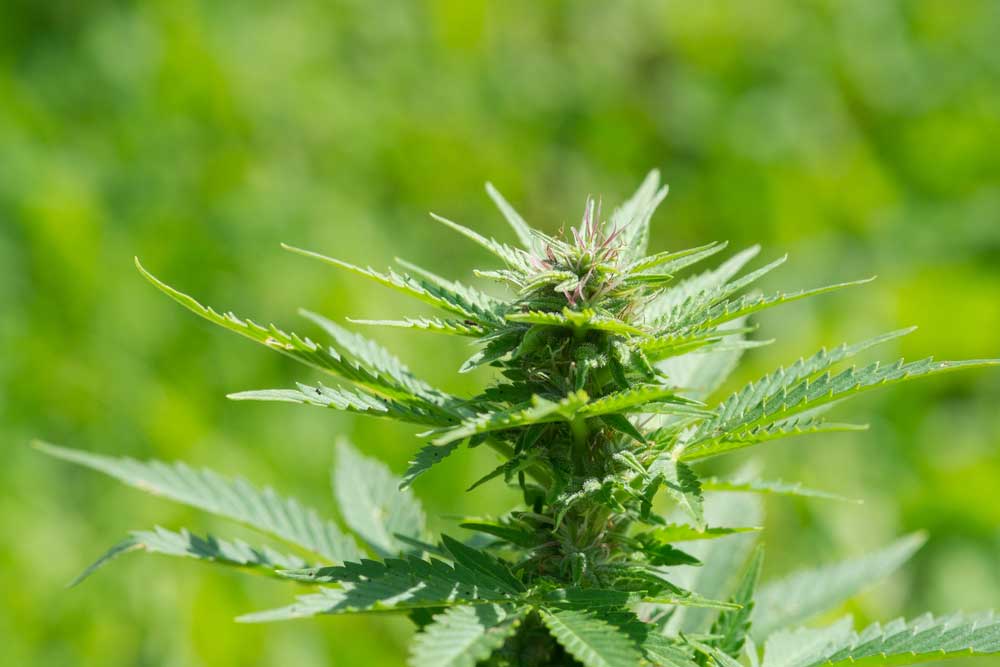
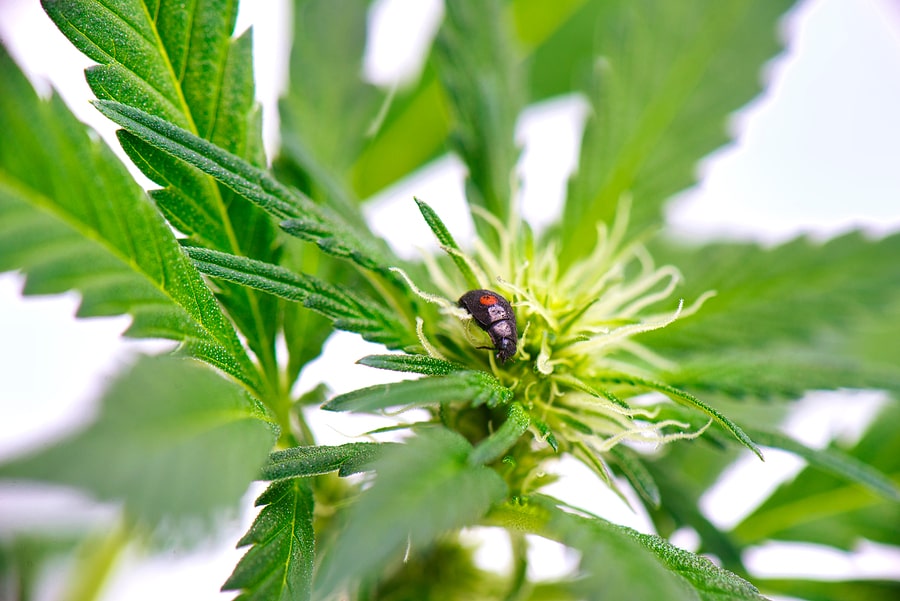
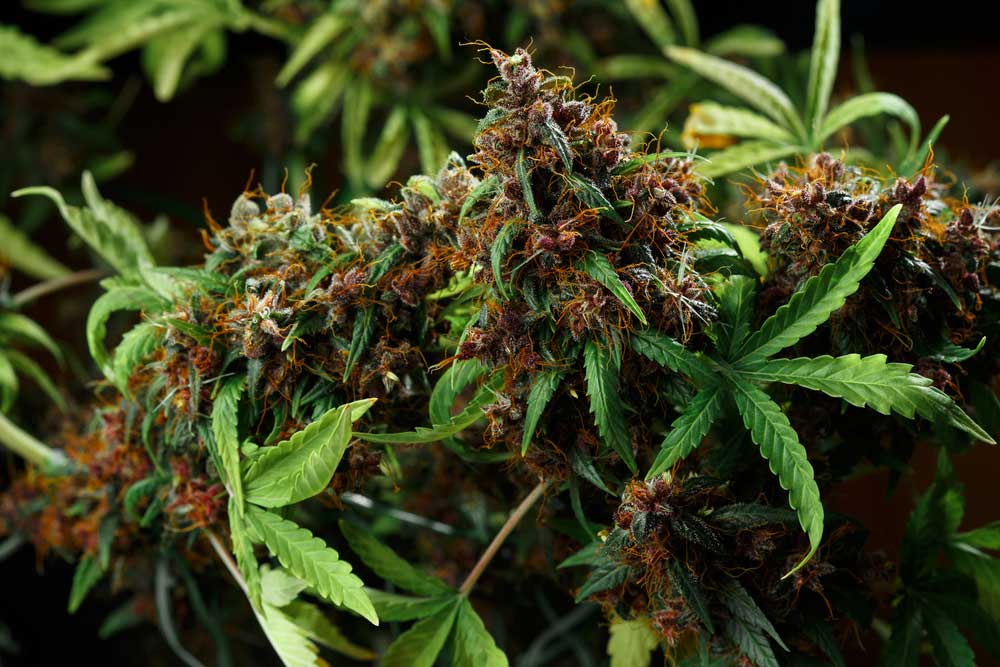
Auto-flowering strains have a lot of advantages when it comes to Cannabis cultivation. They’re compact-sized weeds that finish quicker than others. So some growers think that it’s a good idea to clone them. 

What Happens in Cloning Cannabis Plants?

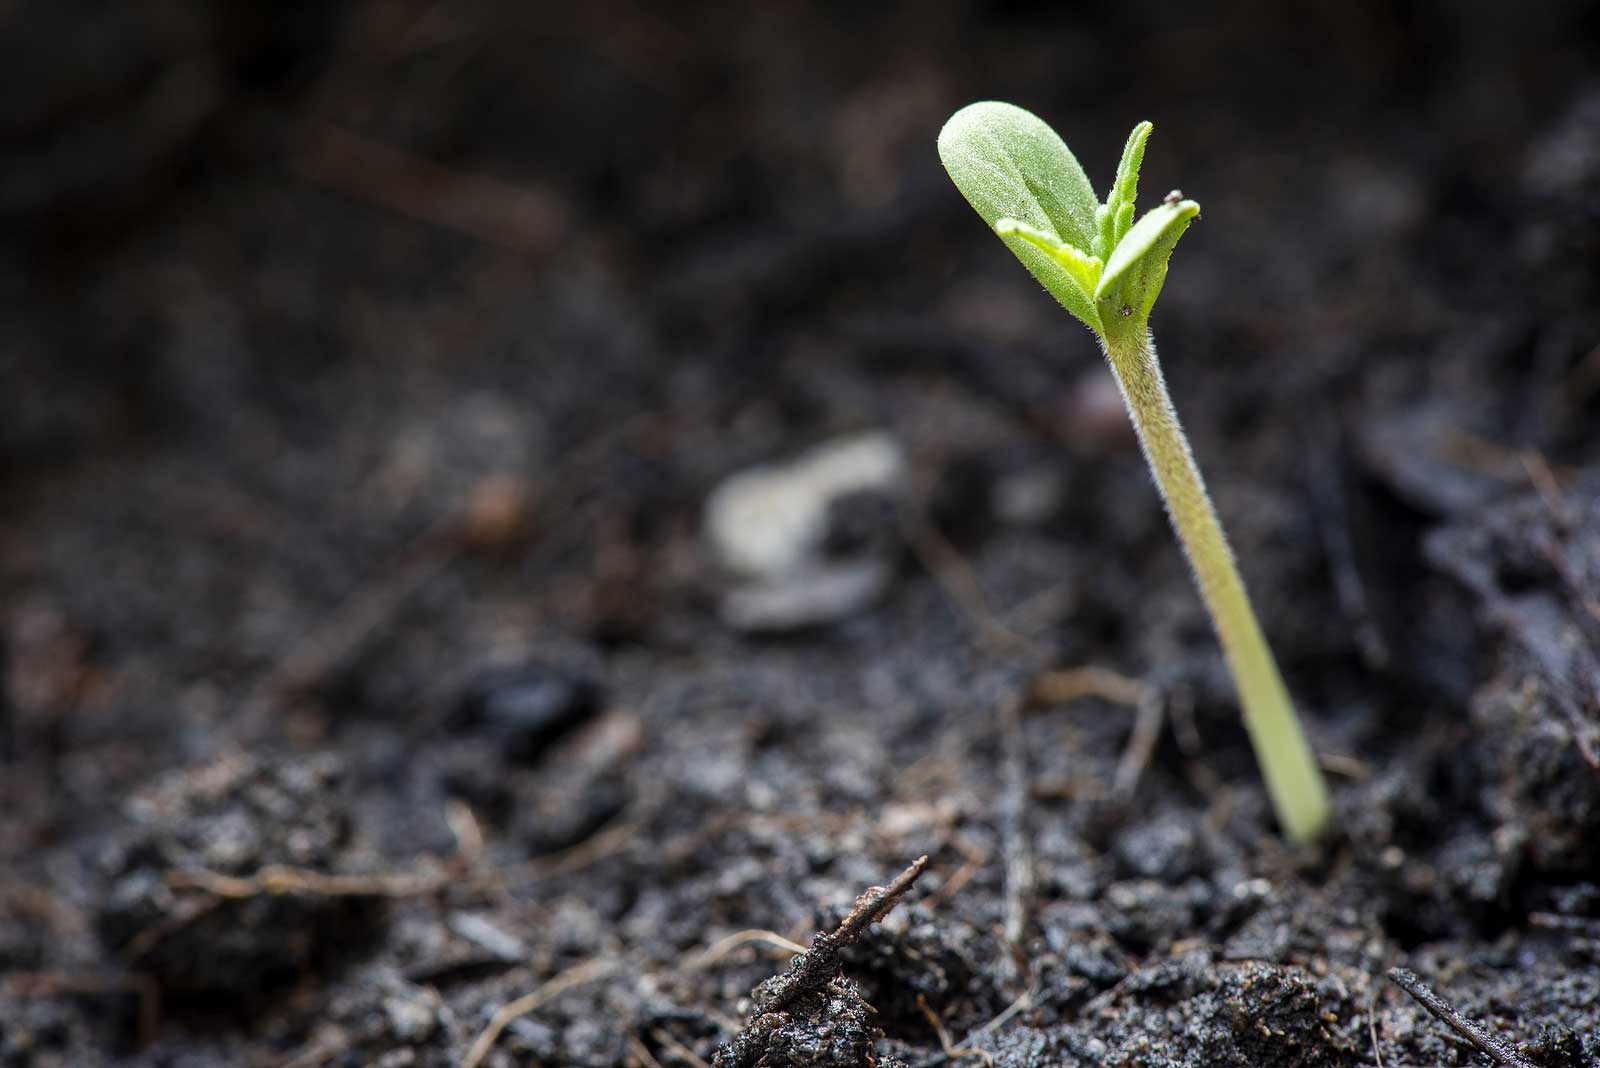
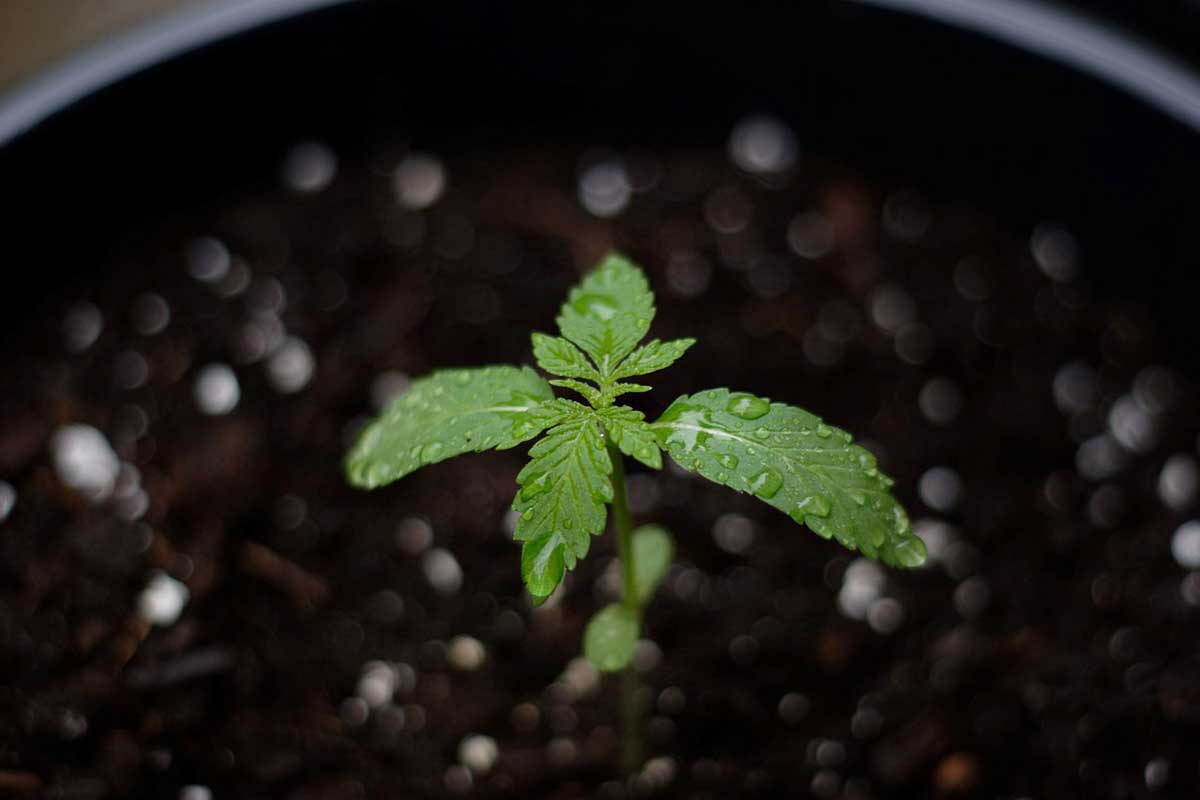
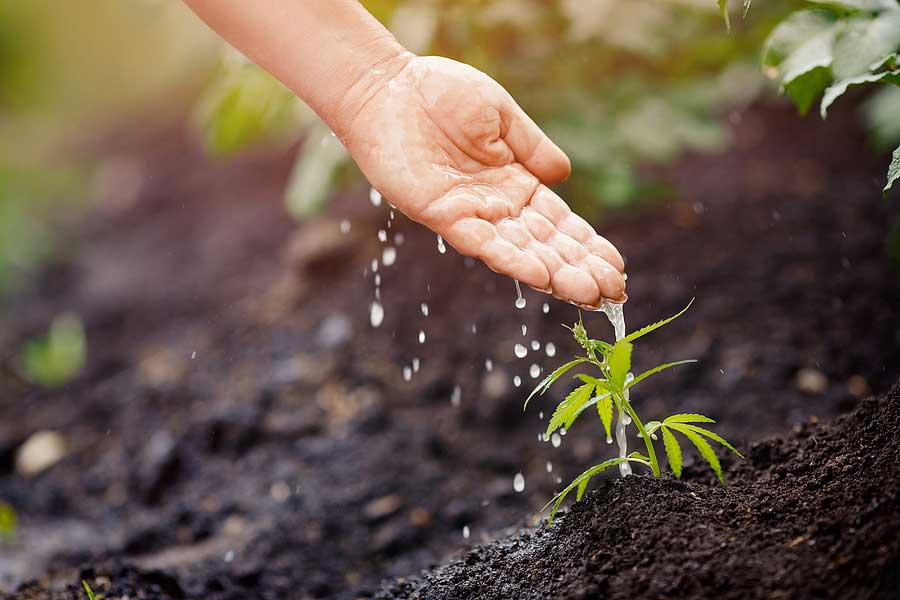
The cutting for cloning is done during the vegetative phase. Then you can place it in a growing medium of your choice and let it grow roots. Some growers would use hormone powder or gel, but it’s not that necessary. 

The cuttings can develop the root system in a matter of 10 days. They will transform into plants that are identical to its source. 

It’s easier to start with cloning if you want to reproduce the same Cannabis plant. It will let you skip the sensitive seedling period. If you get it from a feminized plant, you will be able to retain the status.

Cloning Cannabis Plant: Comparison Between Autoflowers and Photoperiod 

To analyze why some growers don’t want cloning autoflowers, you have to know some of the traits that set them apart from others. As its name suggests, it flourishes automatically by time rather than environmental elements that photoperiod strains are sensitive about.

Photoperiodic strains require a switch of the amount of light when it’s time to shift from the vegetative stage to the flowering stage. This matter is based on evolutionary differences. 

Autoflowers are known to have evolved in the northern hemisphere, an area where there’s only a little sunlight in the entire year. It is the setting that made them automatically flower after a particular period.

So it won’t burden Cannabis cultivators to change light for starting the flowering stage, so a decent yield is attained. 

Whereas, photoperiodic strains came from areas near the equator. When they are cultivated indoors, they need a light cycle for them to embark on the flowering period as well as seeding. They need to do it to avoid harsh weather so they can continue with survival.

The Connection With Cloning

So, how does genetic difference affect the cloning process of Cannabis? You must remember that cloning will result in a plant, which is the exact duplicate of the mother plant. The clone will copy every bit of the mother, including the age when the cutting was made.

The cutting proceeds with the genetic timeline of its mother. It keeps on with the flowering stage despite its size and status of development. 

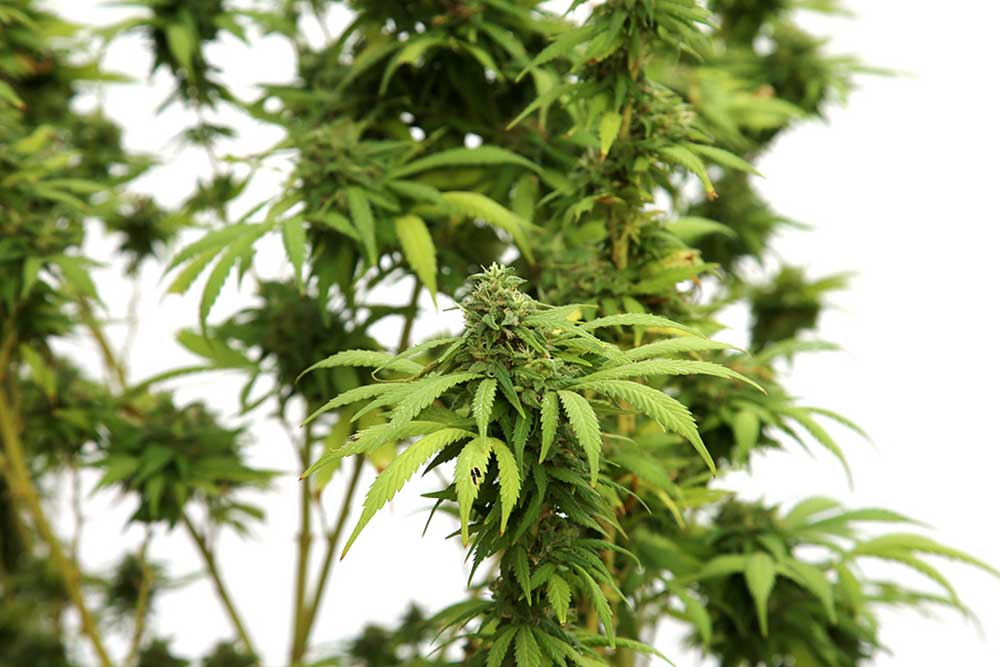
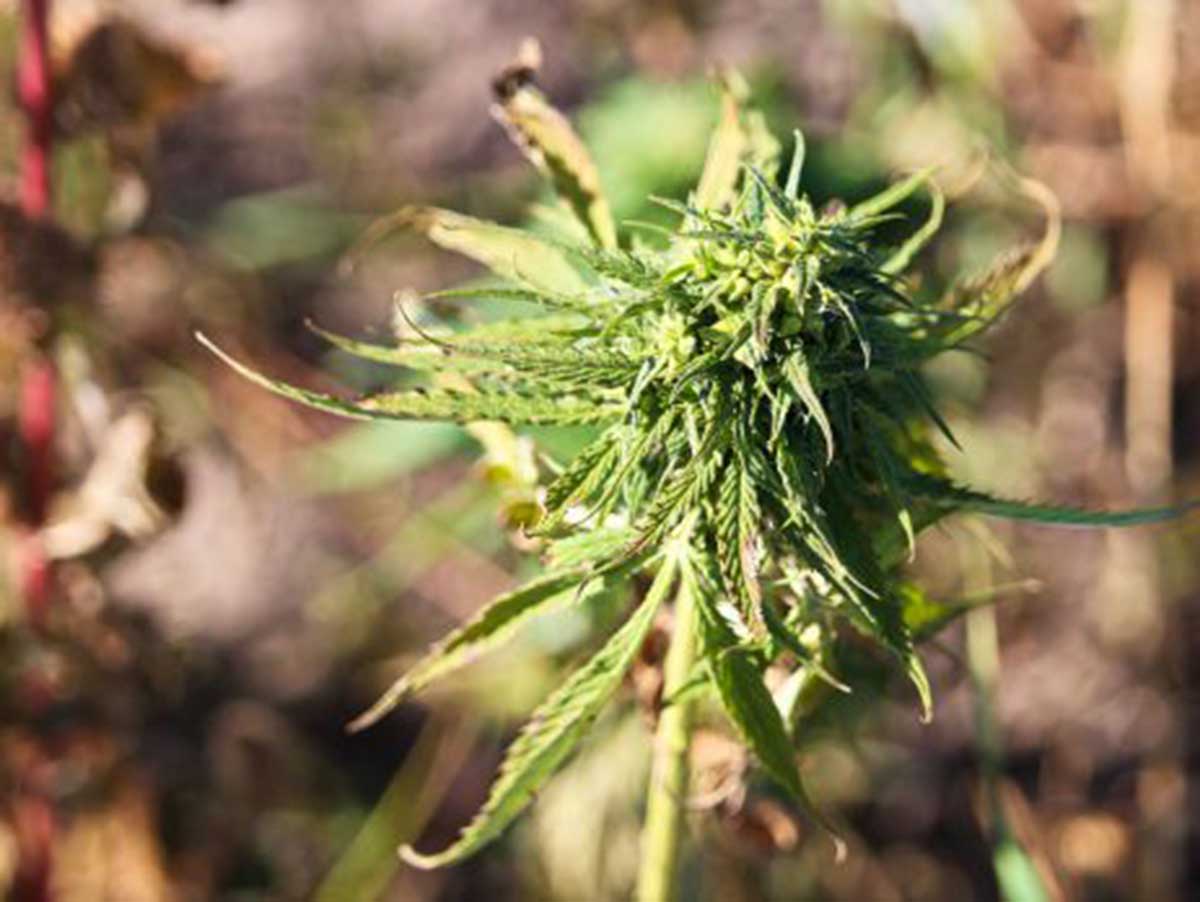
When it comes to auto-flowering strains, clone ones will come out as small and underdeveloped with only minimal yield. Cloning is suitable for photoperiodic strains. The cutting taken during the vegetative stage can still grow and flourish within the same period as long as there’s no change in the light cycle.

When the plant arrives at its optimal size, the grower can make changes on the light cycle so the flowering stage can begin. 

This explanation shows how cloning is suitable for photoperiod. But it doesn’t say that cloning autoflowers can’t be done. 

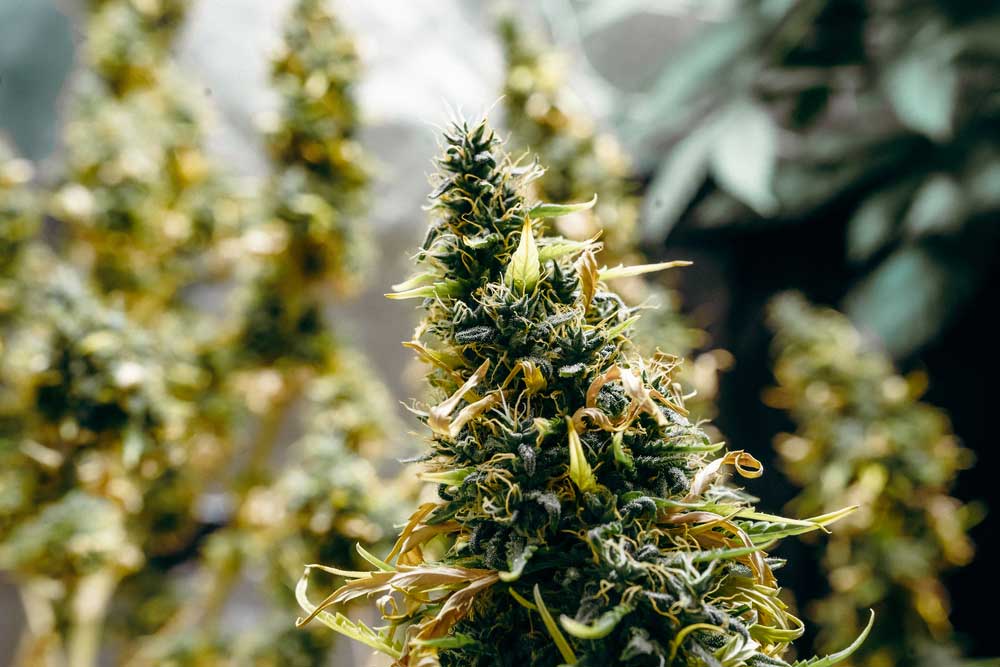
There are Cannabis growers who have successfully applied cloning with autoflowers. But the yield is only suboptimal. If you want to stick to the main goal of cloning, which is preserving your favorite strain, it will be fine but don’t expect too much during harvest time.

Guide on Cloning Autoflowers

When attempting clone autoflowers, you should get the cutting at the bottom part of the mother plant. The lower branches are believed to be more mature and have more stable hormones than the ones on the top. 

Apical meristem is the main terminal stem that receives the signal when it’s time to flower. But it goes downwards, so the signal is brought to the knowledge of the lower branches. Then they prepare for flowering time.

A short window of time happens like just a few hours for sexual features along with the permeation of flowering hormones which spread all over the plant’s tissues. It’s essential to observe your mother plant if it starts to flower as it would tell you that you can get some cuttings.

When you have secured the cuttings from your autoflowers, put them under low-intensity lights. They also need to be in a moist condition to induce rooting. 

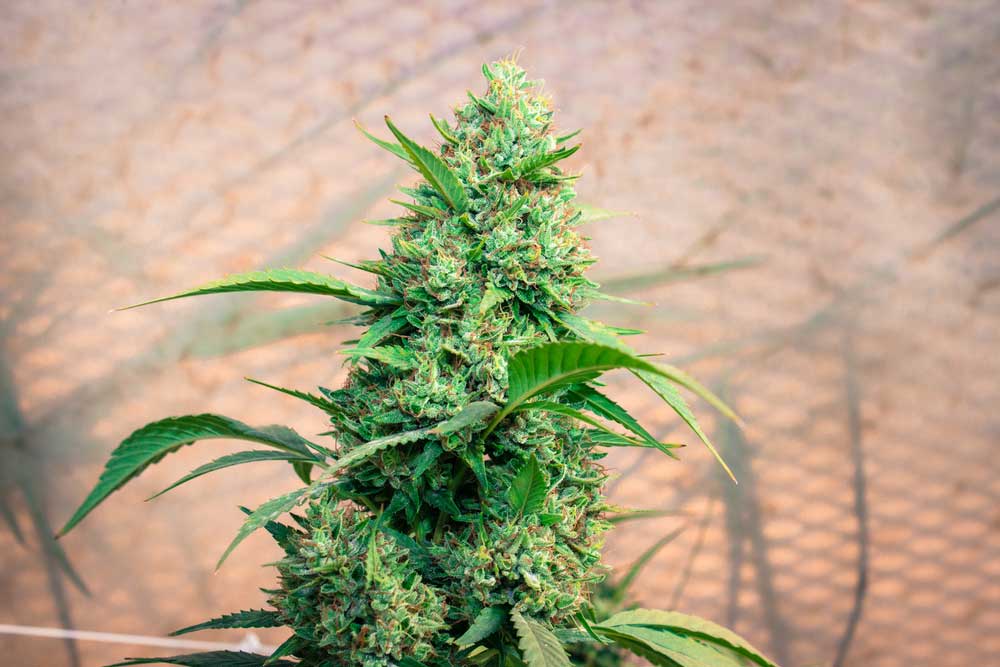
When the cutting has roots, they can proceed to the vegetative stage. They will reach approximately 80% of the size of their mother. You will then see the harvest. It can also come to the point that the harvest is comparable to the mother plant.

Final Thoughts

You can try cloning your auto-flowering strains, and no one is stopping you. It can be done simply and, of course, successfully. So you can produce a future generation of your favorite strains without the need to buy some autoflower seeds

Cloning autoflowers still coheres with the main goal of this process. It will produce the same copy of its mother plant. 

However, the yield will be minimal amount. But it would be enough to pay off all your efforts and skills you applied in its growth.

Much-Needed Autoflower Nutrients that Cannabis Growers Should Know

Autoflowering cannabis is the third type of cannabis that evolved over the last few decades. It was first discovered in the early 1920s by a Russian botanist and is said to be most-likely from Central or Eastern Europe. As the name suggests, these plants automatically begin flowering at a specific age. Unlike traditional cannabis plants that flower depending on their light cycles or the amount of light they receive, these plants have highly accelerated growth rates and do not have a photoperiod sensitivity.

That being said, because autoflowering plants have a significantly different life cycle, they also have different autoflower nutrients requirements for fertilization and higher performance and yield.

Macronutrients needed for autoflowering cannabis plants

Like any other growing plant, cannabis autoflower seeds need a number of different minerals in order to fully develop to happy, healthy plants. They use photosynthesis to produce their food from water and carbon dioxide. Autoflowering cannabis plants use large quantities of three primary macronutrients: Nitrogen (N), Phosphorus (P), and Potassium (K).

Primary Macronutrient: Nitrogen

This nutrient is considered the most important component of any plant growth. In fact, Nitrogen has been used in plant cultivation since prehistoric times. Nitrate (the form of Nitrogen that plants use) forms part of the growth and development of vital plant cells like the cell membranes and the chlorophyll molecules. Nitrogen is a core nutrient that forms the DNA needed in plant survival. Cannabis plants, unlike normal plants, are very efficient in taking up nitrogen. Nitrogen deficiency is a rarity in the world of marijuana cultivation.

Primary Macronutrient: Phosphorus

As the mineral responsible for protein synthesis, energy storage, and nutrient uptake, Phosphorus plays an essential role in the plant’s entire growth process from seedling development to the timely formation of roots and flowers. It is a vital nutrient used to maintain the cannabis strain’s genetic integrity as it gets passed down from one generation to the next. Without adequate levels of this nutrient, your plants will suffer reduced health and stunted growth, both of which can greatly impair your crop quality and yield.

Primary Macronutrient: Potassium

Another nutrient that is crucial to sustaining plant growth and production, Potassium is the final primary macronutrient for plants, including autoflowering cannabis plants. It fulfills key physiological functions, such as the regulation of carbon dioxide, strengthening of the plants, and even retention of water in the plants. During a drought period, this macronutrient helps improve the plant’s strength. This includes the resistance of the cannabis plant’s root system and tissues.

Autoflowering marijuana plants also need other macronutrients to balance the N-P-K inputs and for maximum growth stimulation. Aside from the N-P-K ratio, these plants also require Calcium (Ca), Magnesium (Mg), and Sulfur (S) in relatively abundant amounts but significantly lower doses than N-P-K. 

These three nutrients are called secondary micronutrients. It is important not to be confused with the term “secondary” as the deficiency of any of these nutrients is just as detrimental to the growth of the autoflowering cannabis plants as the lack of the N-P-K macronutrients.

Secondary Macronutrient: Calcium

Calcium is one of the structural autoflower nutrients components that contributes to the integrity of the cannabis plant’s roots, cell walls, and membranes. This nutrient is key because well-developed cell wall structures help strengthen stems and leaves, combat pests and illnesses, and respond to environmental challenges. Deficiency of Calcium among cannabis plants are common and will show as distorted growth in new root tips and yellowing in leaf tips.

Secondary Macronutrient: Magnesium

When it comes to the green coloring of the cannabis plants, Magnesium is the powerhouse behind the process. It is another essential macronutrient that has to be abundantly present in all the phases of the life of the autoflowering cannabis plant because of its role in the chlorophyll molecule. Without this macronutrient, cannabis plants would not be able to capture and utilize energy from the sun.

Secondary Macronutrient: Sulfur

Chances of Sulfur deficiency is very slim when growing cannabis plants in soil. This is because pretty much all soils contain considerable amounts of this macronutrient. When growing your autoflowers in compost or with hydroponic systems, ensure that the needed macronutrient levels are supplied through feedings. Sulfur is another important structural mineral component for autoflowering cannabis plants that assist in the production of important amino acids, proteins, enzymes, and membrane channels. It also helps plants fight off diseases and grow and form healthy seeds.

Micronutrients needed for autoflowering cannabis plants

Important micronutrients that all cannabis autoflowering plants need include Boron, Chlorine, Copper, Iron, Manganese, Molybdenum, and Zinc. The plants will need these nutrients in smaller quantities as compared to macronutrients. But just the same, their roles should not be underestimated as any deficiency in these elements will prove damaging to the overall health of the cannabis plants.

Micronutrient: Boron

Alongside Calcium, Boron is a structural nutrient necessary for the development of cell walls and membranes. This micronutrient is vital during reproduction; otherwise, deficiencies will translate into abnormal growths of the young shoots.

Micronutrient: Chlorine

Chlorine works alongside Potassium with many plant functions, including the absorption of nutrients, helping with photosynthesis, preventing plant diseases, and sustaining plant development. Autoflowering cannabis plants require only very small yet optimal quantities of this micronutrient to remain healthy.

Micronutrient: Copper

This micronutrient is responsible for activating enzymes in plants that are involved in lignin synthesis. It is also crucial in several other chemical reactions, including the process of photosynthesis, plant respiration, and plant metabolism. A cannabis Copper deficiency appears as dark green leaves taking on a blue or purple undertone with white-yellow edges. The leaves may also feel stiff. 

Micronutrient: Iron

Cannabis plants need only small amounts of this micronutrient to produce chlorophyll. A deficiency in this nutrient is usually caused by problems with pH. Without adequate levels of this nutrient, plants will turn to a sickly yellow color instead of a luscious green, while veins remain green.

Micronutrient: Manganese

Manganese is responsible for carrying electrons during the process of photosynthesis. It is also intimately involved in several other functions, including plant respiration, hydrolysis, nitrogen assimilation, root cell development, and energy transference. Any deficiency in this micronutrient is detected on young leaves showing signs of zero growth and slow blooms.

Micronutrient: Molybdenum

Molybdenum deficiency is extremely rare in autoflowering cannabis plants, but if it does hit your crop, it needs to be worked on urgently. Plants take up this micronutrient in the form of molybdate, and it plays a crucial part in the regulation of various plant functions. It is an essential component in the conversion of nitrate for the synthesis of amino acids.

Micronutrient: Zinc

This is the last of the required micronutrients and is usually needed in the smallest quantities. They are used to build enzymes and proteins and directly interact in the creation of the chlorophyll compound. A zinc deficiency is detected as small dots appearing on the edges of the youngest leaves of the autoflowering plant.

Autoflowering cannabis plants require a number of autoflower nutrients – macronutrients and micronutrients – in different amounts. While they may be named under different classifications, all these nutrients are equally necessary to ensure quality cannabis growth, plant development, and amazing harvests. Any signs of deficiencies should be urgently supplied using additional nutrients. Otherwise, your autoflowering cannabis yields will suffer.

Autoflowering Feminized Seeds Grow Guide

Cannabis cultivation goes very far back to at least 3000 years ago in Taiwan. And ever since its discovery, people have been benefiting from these plants in many ways. Several genetic variations and crossbreeds have emerged as cannabis can be grown anywhere, with different strains fitting different climates and resulting in diverse effects and advantages. 

Introduction to Autoflowering Feminized Seeds

One of the greatest phenomena that have come out of the extensive evolution of cannabis over recent years is the creation of autoflowing feminized seeds. These seeds are different from traditional photoperiod ones as the latter does not rely on specific light cycles or schedules from the sun to begin their flowering process. Strains of this nature include the Cannabis Ruderalis genetics, a species of cannabis that is known for growing and flowering based on their age, without any intervention, and reaching full maturity within just a few months. 

Before we go into the details of the autoflowering feminized seeds grow guide, let’s review the different advantages of this cannabis variety.

Benefits of Auflowering Feminized Seeds

Autoflowering feminized seeds have only gained recognition in the last few years. Today, they are taking the market by storm with their many benefits, including ease of cultivation, higher quality, and greater yields.

Growing these seeds are pretty straightforward, as growers can just leave these hardy and forgiving plants under a fixed light schedule from seed to harvest time. These seeds not only grow faster (around 8 to 10 weeks as opposed to sixteen weeks for photoperiods), but they also tend to produce smaller plants that won’t get taller than 50 to 70 cm. Smaller buds are known to produce more intense flavors, as evidence on many award-winning strains. And shorter plants make indoor and discreet growing easier and simpler.

Autoflowering Feminized Seeds Grow Guide

With all the benefits that come from choosing autoflowering feminized seeds, it comes as no surprise that these seeds are becoming immensely popular among cannabis breeders, both novice and experienced, nowadays.

However, it is important to realize that because of their shorter lifespan, these seeds will grow and flower whether or not you are ready for them. So like everything else, successfully cultivating autoflowering feminized seeds require some preparation. Here is a week-by-week grow guide that covers all the parameters and variables of cultivating these seeds.

Week 1

Proper germination and is pivotal to the development of healthy, vigorous, and productive marijuana plants. Germination takes one to three days, generally. It is during this time that your seeds will activate, grow roots, and a shoot above the surface.

During this stage of early seedling, you have a number of routes to choose from, including the traditional one of using soil. The paper towel method, however, is probably the easiest and most popular way to germinate your autoflowering feminized seeds.

To begin the germination process, moisten a paper towel on a plate. Place your seeds on the paper and cover them with a plate. This is to ensure that moisture is locked in. Certain environmental factors play a key role in germination, and in ideal situations, the seeds should sprout in a day or up to a week.

Next, prepare a suitable soil mix that is light and airy. Poke a small 10 to 15 mm hole in the soil up to an inch deep. Sow your seed directly into its one and final pot that is large enough to provide plenty of space for the roots to grow. It is important to remember that autoflowering feminized seeds are less forgiving when it comes to major stressors and mistakes, including repotting. As such, it is best to plant these seeds in their final pot right from the get-go.

Week 2

By the second week, your seedling would have now emerged. As mentioned earlier, growing autoflowering feminized seeds is pretty straightforward. You do not need light schedules. Instead, you just need to leave your lights on an 18/6 schedule for the entire grow. Experts recommend growing these seeds indoors with a 250W LED light, which will provide enough power to meet your 18hr-on 6hr-off light schedule. Set the temperature at the ideal 68 to 77 degrees Fahrenheit with at least 50% to 70% humidity levels.

In addition, it is during this week that the feeding of your plants starts. Apply nutritional formulas specifically designed for the seedling. As light feeding is ideal, there is no need for additional nutrients during this period unless your plant shows signs of deficiency like yellow leaves.

Week 3

By week three, your plant will be well into its vegetative phase. As you notice new fan leaves developing, you can begin adding more nutrients, increase the feeding rate, and start training your plant. The only training method you should use on these plants is the LST (Low-Stress Training). Performing this training to your plants will help boost yield during the flowering stage. Do not top, prune, or pinch your autoflowering plants.

Week 4

Your plant will be nearing the flowering or bloom stage by week four. Aim for the following environmental conditions for maximum growth: 45% RH, 0.5L of water for every 24 hours, and 20 degrees Celsius air temperature. Finish off any training by this period to avoid stressing your plant when you get on the flowering stage.

Week 5

As the flowering phase starts, dial in the optimal environmental conditions of 45% RH, 1l of water for every 24 hours, and 23 degrees Celsius air temperature. Also, switch the LED light settings from blue to red to encourage the budding process.

Your plants will also be requiring higher demands for their nutrition, and this includes amendments to their phosphorus, magnesium, potassium, and calcium feedings.

Week 6 and 7

For the next two weeks, focus your time and energy in keeping an eye out for those yellow, banana-like structures. These “bananas” produce pollens and do not even need to open up before making seeds. Thus, it is important to remove these from the growing space immediately to prevent them from pollinating your female plants nearby. While hermaphrodites in autoflowering feminized seeds are rare, they are still worth looking out for.

In addition, conduct routine checks to search for pests and signs of nutrient deficiencies. If your plants have dried leaves, which are common during this stage of flowering, remove them to promote better airflow around your buds.

Week 8 and 9

By this time, harvest season is near, and it is time to flush and defoliate your plants. Flushing is when you stop feeding your plants and only administer as much water into the soil and wait for it to dry out. Repeat the process over the next two weeks before harvesting. The goal here is to remove whatever chemicals that have been fed into the plants and create better-tasting buds. As you notice your foliage starts to discolor and turn yellow, that means you’ve successfully flushed your plants.

Week 10

Autoflowering plants are generally ready to harvest by week ten. Check on your trichomes, and the majority has turned milky in color, they are ready for harvest. It is important to understand that there is no need to harvest the entire plant all at once. Some of the buds may be ripe, while the others are not. So instead of collecting them all in one go, try a progressive harvest.

As illustrated by the week-by-week autoflower seeds grow guide above, cultivating and harvesting these seeds is quick and easy. There may be many variables to cover, but if done correctly, you will be sure to reap and enjoy healthy and delicious buds in as short as ten weeks.

Autoflower Grow Cycle: Understanding the Growth of Your Cannabis

Cannabis horticulture is a great endeavor to pursue, especially nowadays, with improved technologies and techniques. Horticulturists have discovered the perfect strategies to maximize the yield that you can get from these plants. For beginners, it is important to make an effort to master the basic processes and be educated about the autoflower grow cycle.

The Basics Of A Cannabis Autoflower Grow Cycle

Just like cultivating any type of plant, growing cannabis plants is both an art and science. There is a distinct system that you should follow in order to properly go through the process of cannabis growth. It can also be seen as an art because growers express their creativity, resourcefulness, and patience in order to complete a life cycle.

Beginners might encounter challenges and trials in this type of adventure – but, giving up after one mistake will lead them to miss the beautiful opportunity of harvesting the fruits of their labors. Similar to other endeavors that people pursue in life, it takes practice, correction, and repetition until you can manage to perfect the harvest of potent and dank buds that will reward all of your hardwork.

Stage 1: Germinating Autoflower Seeds

The life cycle of an autoflowering plant begins once you germinate its seeds. You can start by getting your hands on the seeds of your preferred autoflowering cannabis strain. There are different ways that you can try germinating the seeds. You can check them all out and decide to go for the one that works best for you.

Most cannabis growing experts recommend soaking the seeds in a glass of water within a minimum of 24 hours. Then, you should place the autoflower seeds into a damp paper towel and store them into a ziplock plastic bag. Others place the wet seeds in a plate over a damp paper towel and cover it with another plate. With these methods, you will be able to notice the seed-producing roots, signaling that the seedlings can be transferred to their permanent growing medium.

On the other hand, some growers just prepare the seeds and stick them inside the soil and just wait for them to grow. This can be done as well, and it adds excitement to the growing process.

Stage 2: Beginning Growth As A Seedling

Once the seeds are successfully transferred into their growing medium, usually soil, they will start their upward and downward development. Eventually, after about one day or two, the seed that you planted will emerge upwards. While waiting, make sure that you will be patient, and you will not bother the plant that you have planted. Being tempted to try assisting the seedling will just hinder and halt its growth much further. 

This point of the plant’s growth can be considered the most important – because this will tell you if the seed will develop successfully or not. If you injure the plant or hurt it at this point, there is a great chance that the plant will be unable to recover. During this time, if you are growing indoors, make sure that the plant receives enough light. It would be best to place the plant about 17 to 20 inches above the growing seedling.

Stage 3: Counting The Next Three Weeks

This stage occurs once your autoflowering seed begins developing its first two ‘real’ leaves. In the very first week, your plant will not ask for too much, just watering daily. If you want to sustain them through the use of nutrients, you should not go further than 1/8 of the mature plant recommended value.

It is also important to note that though the plant thrives in being watered, going overboard can drown your plant and kill them. Again, it is important to be patient and stick with the recommendations for watering your plant. Watering should not leave the plant too dry or dripping wet. The preferred situation is just enough to keep the soil moist.

Eventually, you will notice new sets of leaves appearing and the plant starting to develop a stronger stance. This is the point when you can start providing the recommended nutrients – just stick with mild ones so that the plant will not be overwhelmed.

By the third week of the autoflower grow cycle, your plant will also show their sex. If you are planting regular autos, you must distinguish the females from the males. The female plants have pistils, and the males will have sacs containing pollen. If you have a mix of males and females and you only plan to produce buds and not seeds, separate the males from the females so that pollination will not occur. On the other hand, if you are planting feminized seeds, you will not encounter any problem with this.

Stage 4: Growth and Development Stage

At this point, your plant will continue to grow until it reaches its matured size. To control too much height, you can apply different plant training techniques like pruning and FIMing. Make sure that at this stage, the plant receives all the levels of nutrients that it needs. Also, it would do you good to regulate the pH levels, and you can do so by using the proper nutrient mixes.

By the fifth or sixth week of growth, you will start seeing your plant developing beautiful flowers. This would be the perfect time to provide blooming nutrient mixes.

Stage 5: The End of the Autoflower Grow Cycle

By using blooming nutrients, growers will notice the plant developing strong aromas and expressing its beautiful colors. Maintain providing them with these until about the 9th week of growth. Then, you should stop feeding them and start flushing.

Flushing is a process that makes use of water to remove extra nutrients and avoid the unnecessary buildup of chemicals. This will improve the taste and effects of your weed – losing the chemical taste of your buds.

At this point, you are free to begin harvesting your beautiful buds. Remember to use gloves and sterilized scissors to avoid contaminating your precious flowers.

Final Thoughts

The autoflower grow cycle might seem intimidating on the first encounter, but mastering this will be worth it once you have your harvest in your hands. Just remember to dry and cure them properly so you can store them for a long time and make the most of their potency and quality.

Pros and Cons of Autoflowering Seeds

Are you thinking about going for autoflowering cannabis for your next cultivation experience? Autoflowers are one of the formulations that are perfect for beginner growers and for experienced growers that would want to consider genetics that will give higher yields in a faster way. To help interested growers in making a smarter decision, here are the pros and cons of autoflowering seeds.

What Are Autoflowering Seeds?

Autoflowering seeds produce cannabis plants that bloom or flowers automatically. They are not dependent on lighting schedules in order for them to produce beautiful buds. They just depend on how time passes. This specific trait was brought into existence through genetic evolutions and the plant having to adapt to colder temperatures and other harsh situations.

Our List of Pros and Cons of Autoflowering Seeds

Pros

Pro #1: Autoflowering seeds do not require 12 hours of light for it to bloom.

Regular cannabis plants follow a photoperiod process. This means that they depend on a certain length of exposure to both the light and darkness. The length of time that they are exposed to darkness will trigger the cannabis plant for it to produce flowers. For photoperiods, they have to be exposed to 12 hours of light so that the plant will be pushed to form its pistils.

This is something that can be hard to maintain because even the littlest of light leaks during this time of darkness has the ability to induce problems in the plant’s growth. Depending on the age of the photoperiod plant, the light leaking into the time where it should be dark can make your plants hermaphroditic. This is also prohibiting you from growing buds, halt the development of buds making them too small, and delaying the formation of flowers. 

This is why it would be easier to go autoflowering plants if you are not a fan of monitoring light schedules closely. As soon as the seed germinates, you will be sure that you will begin seeing the plant producing its buds. You can decide on the lighting schedule that you prefer to go with, depending on the strain. There are strains that will still produce flowers even with 24 hours exposure to light. However, most strains usually thrive in 18 hours of lighting and 6 hours of darkness for it to succeed. Even when the plants get exposed to light leaks, there are no significant reported effects to autoflowers. 

Pro #2: Autoflowering seeds bloom more quickly compared to other types of strains.

One main reason why autoflowering seeds get noticed by novice growers and other enthusiasts is that they produce buds very quickly. This is apparent especially when you compare them to photoperiod flowers. As they bloom in a specific permanent schedule, their flowers will be ready for harvest within six to seven weeks after you germinated them. Technically, autoflowers can deliver quality cured buds from seed in a very fast eight weeks.

If you are one grower who lives in a cold place where summers are quite short, autoflowers might be the best option for you. If you choose photoperiod strains, they will bloom too late, and they might end up frozen before harvest time arrives. Autoflower seeds can remove this risk entirely – which is amazing, in simple terms, if you think about it.

Pro #3: Autoflowering plants grow into a small height that is perfect for stealth growing.

One common characteristic among growers of autoflowering cannabis plants is that these plants are usually short and stout. Compared to most photoperiod strains, these plants are ideal if you are after stealth growing. Their height just ranges to 30 cm to 120 cm, so they really not call attention, which is important for growers who value privacy.

If you are also a grower who has limited space in their home, autoflowering seeds allow you to make cultivation that you can place in small grow tents, balconies, and closets. If you are an outdoor grower, most autoflowering plants also blend well in the midst of grassy fields, brush piles, and within bushes.

Pro #4: Autoflowering plants are strong, hardy, and resilient.

Another great benefit that you can get from autoflowering plants is that they offer growers with an amazing experience. Because of the amazing Cannabis ruderalis genetics, these autoflowers are excellent in adaptation, and they are more resistant to temperatures, pests, diseases, and other adverse situations. Aside from that, autoflowering strains are also strong against underfeeding, overfeeding, and resistance against mold.

Cons

Con #1: Autoflowers produce a smaller amount of yield compared to photoperiods.

Autoflowering plants owe their genetics to the Cannabis ruderalis. This means that they have a quicker lifespan, with the main focus only on reproducing as fast as possible, no matter what the conditions may be. Because of this, the plant has not existed so much longer than the yield is usually in a lower amount every time.

However, autoflowering strains have evolved over the years that this con is almost becoming a myth. Nowadays, breeders have successfully bred autoflowers that produce considerably high yields – at similar levels as photoperiod strains. Growers can also do something to increase the yield of autoflowers. Learning about plant training techniques will go a long way, as a Sea of Green strategy can improve growth and the amounts of harvest.

Con #2: Autoflowering strains have a weaker potency compared to photoperiods.

In a similar way to how many buds it can produce, autoflowers also have lesser THC contents, which is the psychoactive component of cannabis. But again, the first autoflowers might suffer from this – but nowadays, growers take these claims as a myth. Because of selective breeding and different breeding technology, the new autoflowering strains are more potent. They also taste so much better, smell better, possess beautiful colors, and are overall competitive when you compare them with other types of cannabis strains. Those are some pros and cons of autoflowering seeds.  

Final Thoughts

There are many pros and cons of autoflowering seeds. The users and growers themselves should weight them and check on which are deal breakers for them and which advantage is most important for them. Also, remember that the best growing experience lies in the hands of the grower. Make sure to stock up on your knowledge and grow as you go.

Have the best growing experience with premium quality autoflowering seeds found on this link!

Autoflower vs Photoperiod: What is Their Difference?

One of the greatest things about the cannabis industry is that it is constantly evolving. No one has ever imagined how wide, diverse, and developed the entire cannabis community has become. Aside from the usual weed, there are even various ways that you can consume cannabis, depending on how you feel.

But, here is one thing that you should think of if you are planning to explore cannabis growing on your own. In the battle of autoflower vs photoperiod, which one should you go for? You are not the first one to think about it. Enthusiasts, breeders, and growers have been debating on autoflower vs photoperiod for many decades ago.

In this article, you will learn more about these two big groups of cannabis strains.

What Are Photoperiod Cannabis Plants?

One of the first terms you will encounter while studying cannabis is the word ‘photoperiod.’ This word is used to describe the lighting schedules of the plants and how much light they actually need in order to thrive and survive. For example, when 24:0 is used to describe light – this means that the cannabis plant must be exposed to light for 24 hours in one day and 0 hours of dark. A huge chunk of photoperiod cannabis strains grows well with at least 12 hours of light and 12 hours of darkness, just like how it is supposed to happen naturally.

But, there are different types of lighting schedules that growers use. In the vegetative stage, you can expect many experts to suggest going with 18:6, which means 18 hours of light and 6 hours of darkness. This can help that plant develop quickly, but this will not do anything. The flowering stage will be triggered once the grower uses a 12:12 light cycle as the plant will seem to think that the seasons are changing, and it is the right time to bloom.

What Are Autoflowering Cannabis Plants?

Unlike how the changing of light schedules trigger the blooming of photoperiods, the opposite is true for the autoflowers. These types of cannabis strains do not depend on any seasonal change for it to flower; once the plant starts to develop its branches, it will flower on its own – thus the name autoflower.

This means that growers do not have to change, alter, or monitor lighting schedules when they are using autoflower seeds. Whether it starts with a 12:12 lighting cycle from the beginning up until the moment to flower, the autoflowers will ‘automatically’ flower even without any sort of trigger.

But, it can also be noted by growers that autoflowering strains produce higher yields when they are exposed to 18:6 lighting schedules. They will grow fine no matter the light cycle, but longer exposure to light will assure that they will be more generous in their yields.

Autoflower vs Photoperiod: Their Differences

1. Autoflowers are quicker to grow compared to photoperiods.

One main reason why home and commercial growers love autoflowers is that their entire life cycle is short. This makes harvest time to arrive so much quicker. Usually, it will just take about 2 to 3 months to grow an autoflower vs photoperiod strains taking four months to complete a grow cycle. This is a reason why cannabis experts suggest that beginners go with autoflowers. This allows them to have a quick grasp of learning cultivation in a quicker and somewhat easier process.

If you will be given a chance to complete a growing process from seed to cure buds, would you for three months with autoflowers or five months with photoperiods? The choice is yours.

2. Photoperiods are generally larger in height compared to autoflowers.

When photoperiod plants are planted, they take more time to fully develop, which naturally, would mean that they would grow quite larger. Based on common planting experiences, photoperiods that are planted indoors grow up to 5 to 6 feet. When you grow them outdoors, you will be surprised – they can even reach up to 10 feet. But, of course, growers can still control this growth if they practice plant training techniques.

On the other hand, autoflowers are smaller in height. Crediting their faster growth period before it is time to harvest, these autoflowering strains usually grow to a more controllable size of 2 to 3 feet for indoors and up to 5 feet when planted outdoors. If you are a person who would prefer to grow their cannabis supply stealthily, they might lean towards choosing the autoflowering strains.

3. Autoflowering plants are easier to maintain compared to photoperiods.

Photoperiod plants require lots of your time and attention from the moment they require changes in their light cycles. They also require plant training so that their growth can be controlled, and it is very important that you protect them well against light leaks when it lights off.

On the other hand, autoflowers are resilient and hardy plants. Though they come with their growing requirements, they do not need to be checked on as often as photoperiod plants would require. You also don’t have to alter the light schedule – once you set it, that’s it.

4. Photoperiods and autoflowers can be as potent as each other.

Years ago, the main drawback of autoflowers was that they lack potency. The gap between autoflower vs photoperiod used to be wide, but things have changed so much now! In recent years, new autoflowering strains introduced to the market have THC levels that reach as high as 24 percent. With these numbers, you can see that they are all as good as each other.

5. Photoperiod plants produce greater yields compared to autoflowering strains.

Because photoperiods are bigger, they can produce more. If you compare their average yields, photoperiods can produce yields as high as 600 to 700 grams per square meter. It is significantly higher if you compare to the usual 450 to 550 grams per square meter that auto-flowering plants produce. However, there is still a way to get around this. If you consider the length of time you have to wait for photoperiods to complete a grow cycle, it can be said that you have completed two grow cycles of autoflowers by then.

Final Thoughts

Both autoflowering strains and photoperiod strains have their own well-deserved place in the cannabis community. No one can really say, in a general blanket term, that one is better than the other. In the battle of autoflower vs photoperiod, the result lies in what the grower prefers for themselves and what is more appropriate for their needs, experience, and abilities.

Autoflowering Feeding Schedule

Just like other plants, autoflowering cannabis also requires its own growing requirements. In order for them to thrive and produce high yields, growers must be able to supply them with the nutrients that they need. In this article, you will be able to learn about different types of nutrients and the autoflower feeding schedule that you should provide for it.

The Basics Of Plant Nutrients

Before you begin to plan your autoflower feeding schedule, you should learn to familiarize yourself with the different plant nutrients needed by your plants. This is normally categorized into two: macronutrients and micronutrients.

Macronutrients are given this name because they are commonly applied through using large quantities. This group is comprised of NPK or Nitrogen, Phosphorous, and Potassium. On the other hand, micronutrients are comprised of Manganese, Iron, Zinc, Copper, Sulfur, Calcium, and Magnesium. They are given to the plants in smaller amounts.

Both sets of nutrients are supplied to the plant in different ways, which can be via a slow-release powder, nutrients mixed with water, and through mixing with pre-amended soil. One of the most important things to remember is that there is a tendency to feed too little and too much to your plant, and that is the main reason why you should study the autoflower feeding schedule carefully.

Organic vs. Inorganic Nutrients

The organic method of feeding cannabis plants comes with the theory that enriching the growing medium will also enrich the plant in a natural way. This would mean that you will not directly feed your plant. You will focus on taking care of your medium so that microorganisms will grow on the medium, break them down to smaller pieces so that the plant will be able to absorb them well.

This technique is used so that the plant will decide on its own how much it will absorb the nutrients that it needs. This will avoid having problems with going overboard with the nutrients because the plant decides on what it actually needs.

On the other hand, inorganic nutrients work through providing the nutrients by getting the exact amount of nutrients that it needs. Because everything will be addressed by your plant, the grower must be aware of the breakdown of the nutrients needed by the plants. As the exact numbers change from one to strain to another, you should first check and verify the needs of the strain that you choose to grow.

For autoflowering strains, it is essential that you know how to identify what are the nutrients that the plant requires because going overboard with organic nutrients will just waste all of them, and too much use of inorganic products will help you avoid burning all your plants. If you are unsure, you can always check on the manufacturers because they can provide that to you, and they must know everything about the plants that they sell.

Autoflower Feeding Schedule For Seedlings

At this moment, the seedlings only have a few leaves. They have two little ones that are called cotyledons, and they provide the plants the nutrition that they require at this young age until they mature and develop more leaves. Though the plant is still quite small, this first two weeks of the plant’s life is very crucial because the development is very fragile and mistakes at this point can harm the success of the yields at the end of the life cycle.

The nutrients that you should go with should only amount to 1/8 of the suggested amount. You should take caution in giving too much to your autoflower. There are many experts that even state that water alone will be enough to sustain the plant in its first two weeks. Overfeeding, in the worst case, will kill your plant.

Remember to read and research the exact nutrients that you should give as it depends on the strain and the growing medium that you will use.

Autoflower Feeding Schedule at the Vegetative Stage

Because you are growing an autoflowering cannabis plant, it will just breeze through the vegetative stage as it will quickly transition to flowering. You can observe this when the autoflowering plant is growing quite faster. At this point, you will be safe to give ½ of the recommended value of the nutrients. The emphasis on this part must be macronutrients, or Nitrogen, Phosphorous, and Potassium. In terms of weight, the Nitrogen must be larger compared to the other two. You may also decide to give them micronutrients – but only in smaller amounts.

Autoflower Feeding Schedule at the Flowering Stage

When the flowering stage of your cannabis plant is reached, you should begin realigning the distribution of the nutrients for your plant. The amount of Nitrogen should be lessened, and more Potassium and Phosphorous should be introduced. Phosphorous will help your plant to produce more buds and fully bloom, so you should provide this to your plant to trigger the flowering stage.

Flushing

Before the harvest season comes, you can get some slow-release nutrients through pellets that you can place in the growing medium. This will release the nutrients while you water your plant – or in simple terms, you will be able to flush them out.

Summary of the Autoflower Nutrient Schedule

Week of Growth Stage of Growth Amount of Nutrients to Provide
1 Seedling Water
2 Vegetative stage 1/8 vegetative nutrient mix
3 Vegetative stage ¼ vegetative nutrient mix
4 Pre-flowering stage ½ vegetative nutrient mix
5 Little flowers growing 1/8 vegetative nutrient mix &¼ blooming nutrient mix
6 Flowering stage ½ blooming nutrient mix
7 Flowering stage ½ blooming nutrient mix
8 Ripening stage Flushing
9 Harvesting stage Flushing

Final Thoughts

If you are planning to grow autoflower seeds, you should study about their specific requirements and understand each part that is different from each other. You can use this autoflower feeding schedule guide, but it is still essential to keep on reading related articles and ask from experts until you are comfortable with the things that you know.

A Comprehensive Marijuana Autoflower Growing Guide

Planning to grow cannabis seeds for your home garden is such an amazing adventure, and it is an exciting endeavor to pursue. Browsing for the cannabis seeds that you can try planting might have led you to see autoflowering cannabis strains. What does autoflowering mean, and how can you grow this type of seeds? Keep on reading this autoflower growing guide to finding out more.

What Are Autoflowering Cannabis Strains?

In simple terms, autoflowering cannabis can be described as a type of plant that will independently grow without the influence of lighting schedules. They will automatically flower, thus their namesake. Unlike other plants that depend strictly on a specific time for them to be exposed to sunlight or artificial light, autoflowers will start on the flowering stage 2 to 4 weeks after the seeds started their vegetation.

This kind of characteristic began when cannabis breeders began playing around the genetics of the Cannabis ruderalis. It is a type of cannabis that possesses the ability to be independent of lighting schedules and grow in short height. But, it does not have effects as strong as Sativa and Indica plants – which led to breeders cross-breeding them to achieve the best of both worlds.

How Long Will It Take To Grow Autoflowering Plants

Another reason why many growers prefer using strains with autoflowering genetics is how quickly they can be ready for harvest. Usually, cultivators just have to allow 8 to 10 weeks, and they will be ready to harvest autoflowering strains.

Step by Step Autoflower Growing Guide

1. Begin seed germination and care for the plant until it becomes a seedling.

The first thing to do is to allow your autoflower seeds to germinate – which can usually be completed within 1 to 3 days. What happens in this part is a small root will grow from your seed, and it will start growing the root lower to the soil and growing shoots that will reach the surface. 

To start this, you must prepare light and airy soil mixture. One great mixture will comprise of 3 parts of compost, 1 part of vermiculture, two parts of perlite, nutrients, and three parts of moss. This will make the soil more conducive for cannabis growth when the mixture is transplanted to the soil. 

When the seed receives ample nutrients, it will utilize the minerals and other appropriate elements so that it will flourish when it grows. It will take a few days, and you will be able to see a seedling rising up within a few days. For the best results, you should maintain the air temperature at about 22 to 25 degrees Celsius and humidity ranging from 70 to 90 percent.

2. The seedling will begin the process of photosynthesis.

In this part, make sure that you have provided a light source for your plant. If you grow indoors, a LED light with 250 Watts in power will be enough. You can apply training methods like low stress training techniques so that you will be able to produce four plants within 1 square meter. Remember that the lighting must follow your preferred light schedule – the suggestion is 16:8.

3. The seedling begins the vegetative stage.

As the autoflower starts its vegetative stage, you might notice that it begins to develop new leaves and growing height at about 15 cm. Make sure that you maintain training your plant and monitor its growing conditions to meet the following requirements: 2 times nutrient feeding, the temperature at 20 degrees Celsius and humidity at 50%. Also, remember to water the plant regularly – about ½ liter of water in a day.

4. The plant prepares for the flowering stage.

After another week, the plant will almost be ready for flowering. During this time, the grower will be tweaking the environment a little – changing the humidity to 45% and maintaining everything else. At this point, the autoflowering plant is now producing pre-flowers. Again, for the best results, remember to apply low stress training to maximize the canopy.

5. The flowering stage commences.

At this point, the cannabis plant will begin producing round sacs – these will become buds much later. The grower must watch the lighting again and change it from blue to red. As the plant reaches 30 cm in height, double the amount of water to 1 liter every 24 hours and increasing the room temperature to 23 degrees Celsius. The plant will need additional nutrients like phosphorous, magnesium, calcium, and some nitrogen, as well.

6. Flowering continues, and you will notice the fragrance of growing cannabis.

You will notice that the buds will be produced by now, and the efforts that you have exerted are showing a stunning canopy of beautiful buds. At this point, continue with your slight adjustments on the growing conditions. Increase the watering to 1 ½ liter every 24 hours, the temperature to 24 degrees Celsius, and altering the humidity levels to 40%.

7. Do routine checks and watch out for pests.

At this point, you are almost done, and you just patiently wait. Just ensure to monitor the growing conditions and maintain them at the ideal levels for the best results. Also, look clearly and carefully at your plants and check for some mites, mildew, mold, and other pests.

8. Start flushing.

Depending on your plant, you might be ready for flushing after 8 to 12 weeks of your plant’s life. This can be done by refraining from feeding your plant, flooding the soil with lots of water, and do it a few more times for about two weeks. This will remove all of the extra nutrients to make your buds taste much more appealing.

9. Harvest time! 

Congratulations, you have reached the end of your journey. If you have followed the autoflower growing guide, you are ready to reap the fruits of your labor. You can start snipping the buds away, dry, and cure the buds; then, you are good to enjoy these tasty buds.

Final Thoughts

Autoflowering strains are a great way for novice growers to have a grasp of how to care for cannabis plants.  They offer a unique experience while retaining the best qualities you love from your weed, making them a great addition to the life of any marijuana enthusiast. There are hundreds of autoflowering strains to choose from, so check them out and make the most of your cultivation journey with this autoflower growing guide!

Feminized Cannabis Growing Problems and Troubleshooting Guide

Even if you are new in the world of cannabis cultivation, you should probably know that growing female cannabis can give lots of benefits for your growth. If you know how to do things properly, you have the opportunity to grow beautiful marijuana plants that can produce amazing yields.

In this article, the focus will be on feminized cannabis seeds. Growing them is generally much easier – because growers will be assured that the plant will grow up as females every time. If you want to know more, keep on reading.

What Are Feminized Cannabis Seeds?

Feminized cannabis seeds are genetically modified by expert horticulturists in order to ensure that growers will be able to get female cannabis plants every time. Basically, this means that getting feminized seeds from a trusted and reputable seed bank will give you a guarantee of 80 to 99 percent, depending on the company that will grow old as female plants.

But, guaranteeing they are feminized does not mean that the growing process will be easy breezy. Growers can still encounter some problems while cultivating their plants.

Common Growing Problems When Using Feminized Seeds

1. Plant Stress

In the technological methods used to produce feminized seeds, some of the processes can make the seeds weak. Most of the time, this is because of the hormones or the chemicals applied by breeders and horticulturists.

The usual process involves forcing the female cannabis plants into producing the pollen sacs of the male plants so that they can generate pollen for reproduction. This means that the false male pollen from the female plant meets the pistils of another female plant with the outcome of fully feminized seeds.

Unfortunately, though the plant will be able to grow only females, the resulting seeds have the genetic weakness to become more vulnerable against stress.

What does this mean? It means that when the plant feels stressed, the female plant will produce seeds instead of buds, produce fewer trichomes which means becoming less potent, attract pests that will harm the plant, and become easily infected by plant diseases.

2. Hermaphroditic Plants

One of the things that you would never want to encounter with feminized seeds is having them end up being a hermaphrodite plant. These plants appear to be a female plant, but a closer look would show that it also possesses male reproductive organs and end up producing pollen.

According to several cannabis growers, feminized cannabis can produce hermaphrodites, and their theories have been effectively proven. In this situation, a mother plant had to be manipulated at some point for it to produce some pollen to get a female seed. So, this pollen is applied to different female cannabis plants, and fertilization occurs. Then, the breed produced will only be females because they are all coming from female origins. However, this means that every time you possess a female seed, this seed has a parent that produced male organs when you check on its hereditary information.

So, how are hermaphroditic plants produced?

First is through chemical incitement. This happens when a female cannabis plant is exposed to chemicals like colloidal silver and gibberellic acid at the beginning of its flowering phase. Because of these chemicals, the plant feels pressured to produce pollen despite being female in its sexual orientation. This method is very effective and is usually done by seed banks.

The second method is rodelization. This strategy means making the flowers mature in extended periods. When the flowers develop past their maturity time without experiencing fertilization, the female plant naturally produces some male pollen within its flowers in order to attempt doing self-fertilization and begins seed production.

The third way is through exposure to high stress. When the plant is exposed to too high temperatures, light leaks, and inconsistent lighting schedules, the exposure to extreme levels of stress can lead to even a perfectly healthy cannabis plant to produce some hermaphroditic strains.

The fourth way is through bad genes. If a plant is borne through messed up genetics that has a history of producing hermaphrodites, it also has the chance to do so despite the grower growing it under optimal conditions.

3. Seedy Buds

Another effect of hermaphroditic plants is producing seedy buds. What does this mean? In ideal conditions, cannabis cultivators are attempting to produce buds that do not have seeds. But, having a few seeds within the buds will not spoil the entire grow. However, having some seeds within the buds will hurt the amount of your harvest because the cannabis plant will use all of its energy into producing some seeds instead of producing more buds. Most of the time, buds that have seeds inside are also less efficient and less potent as well.

4. Problems with Breeding

If you are interested in breeding new strains, feminized seeds are not an option for you. Feminized can only produce feminized plants and are not viable for generating new types or variants of cannabis. If breeding new strains of cannabis, what you should invest in are regular cannabis seeds and not feminized cannabis.

5. Chances of Not Germinating

When you purchase feminized cannabis seeds, there are chances that they will not germinate at all. If your seeds do not germinate, this means that the seeds are duds, and you will not even gain access from buds. The chances of this to happen, increase when you transact with breeders, dealers, or online seed banks that are not experienced in the techniques that are used in order to create feminized cannabis seeds.

This is why it is very important that you only transact the purchase of your feminized cannabis seeds through a trusted breeder or a famous seed bank so that you will be assured that the seeds that you get will grow up to be a feminized cannabis plant that produces beautiful and potent buds.

Final Thoughts

Like other endeavors and adventures, growing feminized seeds always come with a risk. There is always a chance that you might not get results even you apply all of the techniques properly, and you provide the plant with all of its needs. It does not necessarily mean that you are a week breeder, it might mean that you need to source your raw materials, feminized cannabis seeds, much better.

Do Feminized Weed Seeds Make Hermies?

If you have been studying ways to grow cannabis seeds, especially feminized ones, you might have probably encountered the word “hermie.” You might be shocked and intrigued about why people get frustrated about hermies and the problems that they can cause to cannabis cultivation. But what is a hermie? Hermie is a nickname for a hermaphrodite cannabis plant.

In this article, you will be able to know all about hermies and all the things that growers should be aware of in order to be safe against plants like this.

How Can You Define A Hermaphroditic Cannabis Plant?

Just like animals, plants also have their own genders – it is just not as obvious as to how it works with animals. Reproduction in plants happens when female cannabis plants encounter the pollen that is produced by male cannabis plants. Once this situation is complete, the female cannabis plants will create seeds and produce the next generation of plants. This is why if you are a breeder of a new strain of cannabis, you would definitely enjoy the pollen coming from male plants. But, if you are after dank buds, whether for medical or recreational uses, only female plants will be beneficial for you.

Now, our focus will be on the hermaphroditic cannabis plant. Hermaphrodites are cannabis plants that possess male characteristics and female characteristics at the same time. The hard part about this type of plant is that growers will have to very vigilant and meticulous in order for them to remove the male pollen sacs that they can produce. If you fail to do so, there is a very high probability that the pollen sacs will burst and pollinate the female part of the plant to produce seeds.

Why Does Hermaphroditism Happen To Feminized Marijuana Plants?

Hermaphrodite cannabis plants only come to be because of two reasons.

The first is genetics. To look at it very simply, hermie parent plants are highly likely to produce children with hermie characteristics as well. This is why if you plan on cultivating cannabis seeds on your own, make sure that you only purchase from a reputable supplier – especially if you purchase online. Another important thing to check on your research is that there are cannabis strains that are highly susceptible to having hermaphrodite characteristics. One of the most famous strains of this problem is the Thai Sativa. 

The second possible reason that cannabis hermaphroditism happens is stress. If you look at it biologically, a plant turning into a hermie is actually a smart move for survival. Considering the plant’s evolutionary characteristics, this means that the plant does not want to become dependent on another plant or its environment for it to attract pollen. Instead, the plant exhibits an independent behavior and proceeds to pollinate itself. Though this can be seen as a good thing, it also has its cons. Because of this, the plant does not receive new and fresh genetic components. Just like humans and other animals, plants are living things that also resort to drastic measures to survive and avoid dying.

How Can You Help Your Plant Avoid Turning Into A Hermaphrodite

The first thing that you can do to avoid hermaphroditism is to source your raw materials well. The strongest way to avoid this is just to ensure that the feminized cannabis seeds that you buy come from a reputable and highly recommend seed bank.

Another great thing that you can do as a cannabis cultivator is to take care of your plant in the best possible way to avoid having a stressful life. For instance, it is very important to learn and understand how lighting cycles work before you even attempt to grow your own cannabis. Lighting is a trigger for plant development, so one mistake will hurt the growth of your plant. Once the cannabis is in the period where it should be in a dark place, make sure that you never interrupt your plant’s beauty sleep.

Additionally, cannabis plants are also very sensitive to changes in temperatures. If the temperatures are too high, the chances of getting a hermaphroditic plant also increase. More than that, you should also watch the temperature of the water that you give to your plant. Unlike humans, who enjoy drinking cold water, a cannabis plant dreads that.

The rule of thumb in situations like this is to look back on how cannabis plants usually live while they are in the wild. The air temperature should be warm, but not too hot, and the same goes for the water temperature – lukewarm is more than enough. That’s what your plant expects you to provide – so that is what you should give them. Remember, stress triggered by lighting and heat are the most common reasons for a cannabis plant to turn into a hermaphrodite. 

Aside from these things, take note that when you feed your plant, you should not leave them gasping or drowning from all the water. You should start to research on the different tips and tricks on how you will know that the water is enough. Study it carefully, which one would work best for you and do that. This rule also applies to nutrients. Plants have their own types of appetite, so you should study the best feeding schedule for your feminized cannabis plants.

There are also organisms that can mess up your plant’s growth, especially if your grow area is located outdoors. You should watch out the surroundings of your plants and observe for the presence of mites, diseases, insects, and other similar things.

In terms of handling your plant, ensure that you will be very gentle. If you plan on applying plant training techniques like pruning or topping, make sure to keep a light hand and not go overboard as this can also give stress to the plant.

Final Thoughts

Every cannabis grower wants to stay away from producing hermies, but that is a possibility that you cannot deny when growing feminized seeds. But, you can avoid all of that by sourcing your cannabis from a reputable seed bank or breeder to lower the odds of growing hermies drastically.